In the first article, I explained my experience with custom keyboards and my requirements regarding a layout for my next DIY keyboard. I have also promised there will be another article featuring a custom keyboard with such a layout.
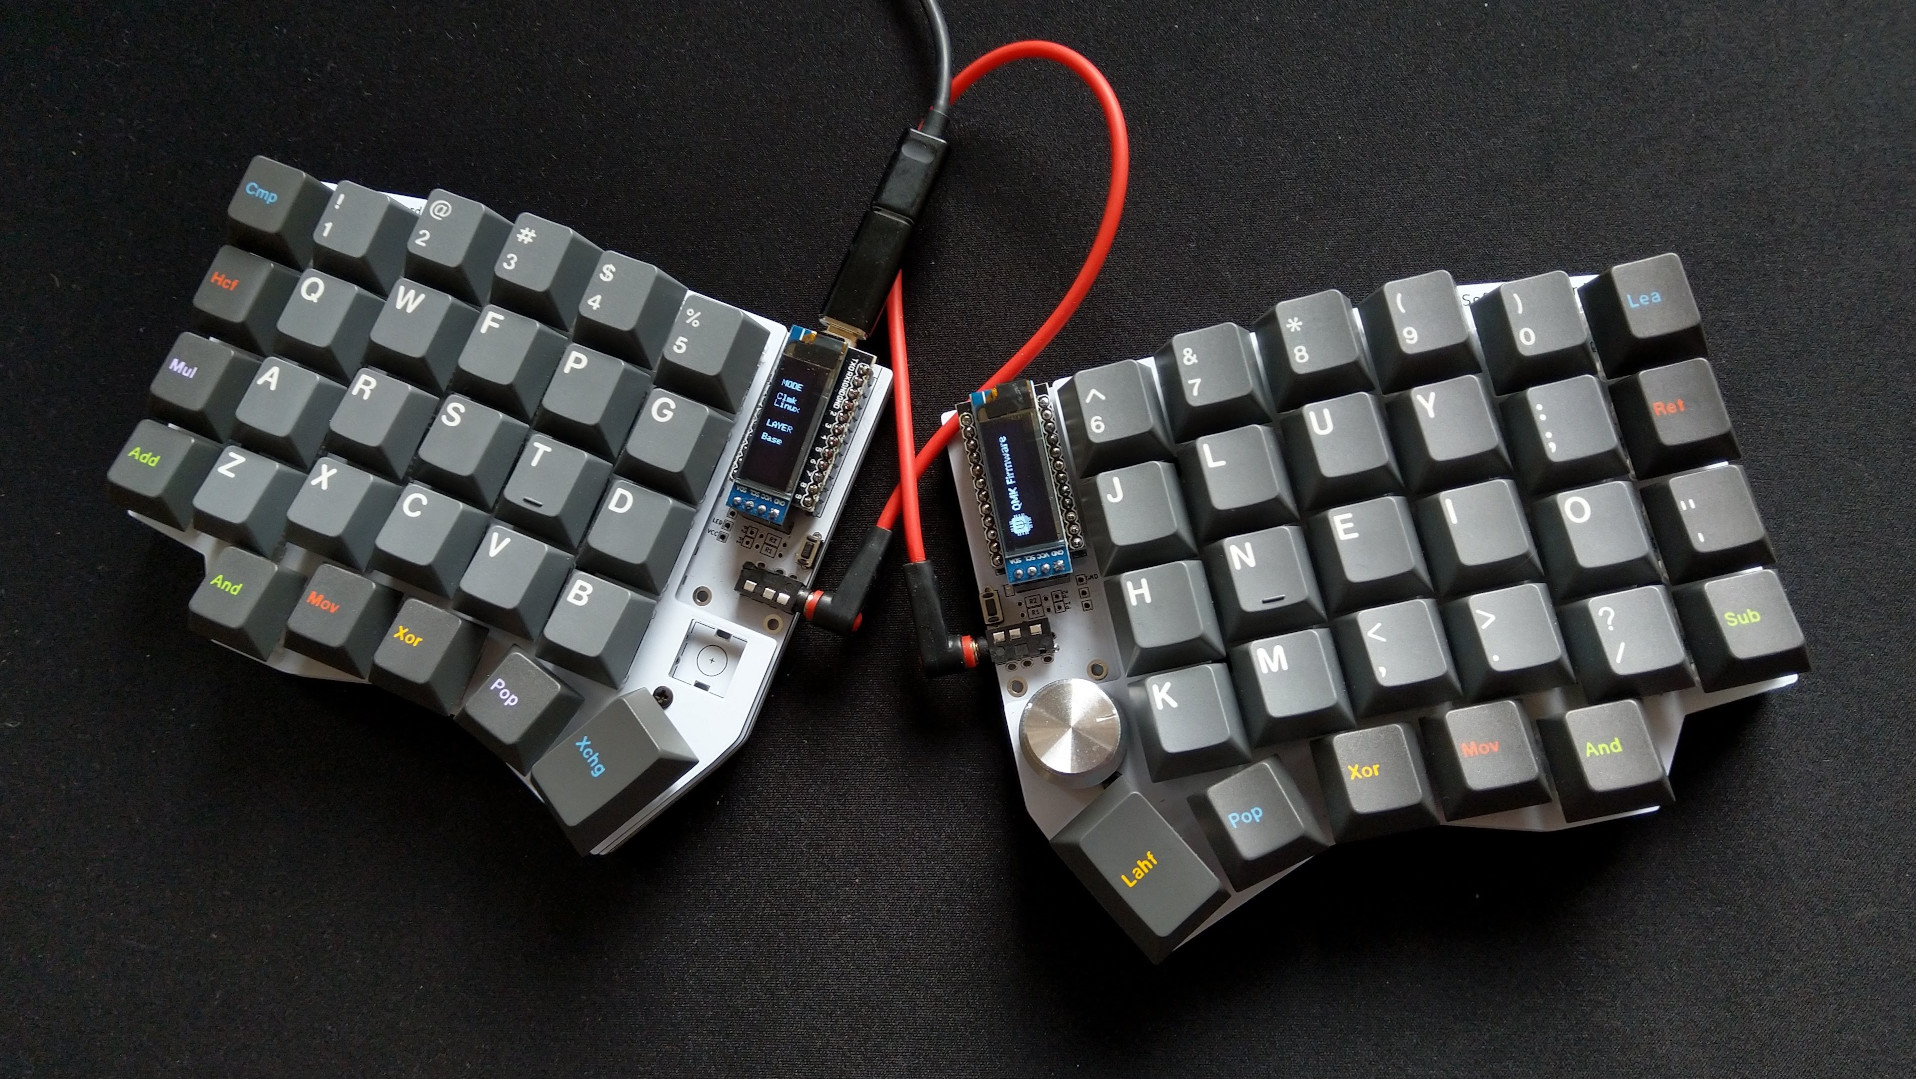
Behold, this is SofleKeyboard - a 6×4+5 keys column-staggered split keyboard with encoder support. Based on Lily58, Corne, and Helix keyboards.
This article is Part 2 in a 7-Part Series.
- Part 1 -In search of the best custom keyboard layout
- Part 2 -Let me introduce you SofleKeyboard - a split keyboard based on Lily58 and Crkbd
- Part 3 -SofleKeyboard build log/guide
- Part 4 -Sofle Keyboard evolution: slow and not really steady
- Part 5 -Another year of Sofle keyboard
- Part 6 -Stáňa AKA Sofle Unsplit - a monoblock split keyboard
- Part 7 -Stáňa - a monoblock split keyboard, part 2
Standing on the shoulders of giants
How hard is it to design your own keyboard, you may ask? It depends, is the answer. In my case, it was quite easy because I was not starting from scratch. As I explained in the previous article, Lily58 was almost exactly what I wanted. The keyboard is designed in KiCad and the design files are available under MIT license. Thankfully I learned how to use KiCad and design simple PCBs recently.
Neither Lily58 was built from scratch. It is obvious (and written in its licence file) it’s derived from Helix, Ergo42 and Corne AKA crkbd (which was also called Helidox and is based on Helix).
All those keyboards have a lot in common:
- They are split keyboards.
- They use QMK firmware. If you check their firmware you can see they are copying the custom firmware parts from each other. More about this later.
- They don’t have a microcontroller on the PCB directly but they rather use a board with ATmega32U4 microcontroller originally made by SparkFun and called Pro Micro. Cheap clones are available from AliExpress (and similar). This makes PCBs and assembly simpler and also allows to use pin sockets for microcontroller so it’s not permanently soldered to the PCB giving an option to remove Pro Micros and use them in another iteration of the design.
- Each keyboard uses 2 Pro Micros. They communicate with each other through a TRRS cable (a cable with audio jack connectors). They can either communicate via serial1 or via I2C2. One of them is called “master”, it’s connected to USB and all the decisions are made there3. The other one is called “slave” and only scans the matrix and informs the master about what is pressed.
- The same PCB can be used for both sides. Just flip one of them and solder components to the other side. If you manufacture 10 PCBs of the same design you could make 5 keyboards. Or two and a half for 5 PCBs (which is common minimal quantity). This approach reduces cost.
- They have support for OLED displays connected via I2C. Usually, they can display a keyboard’s logo and some debugging info. The displays are always optional.
- There are design files for a sandwich case available, usually from laser-cut acrylic. The sandwich case consists of a bottom plate and a top plate. Some stand-offs and screws are used to sandwich plates around the PCB. This is a very nice option if you have access to a laser cutter. It’s also possible to find a laser-cutting service online.
- Usually, there’s another option for a sandwich case where the plates are made using standard PCB manufacturing process which may be cheaper than laser-cut acrylic. For me, it worked for both Corne and SofleKeyboard very well. But there can be problems.
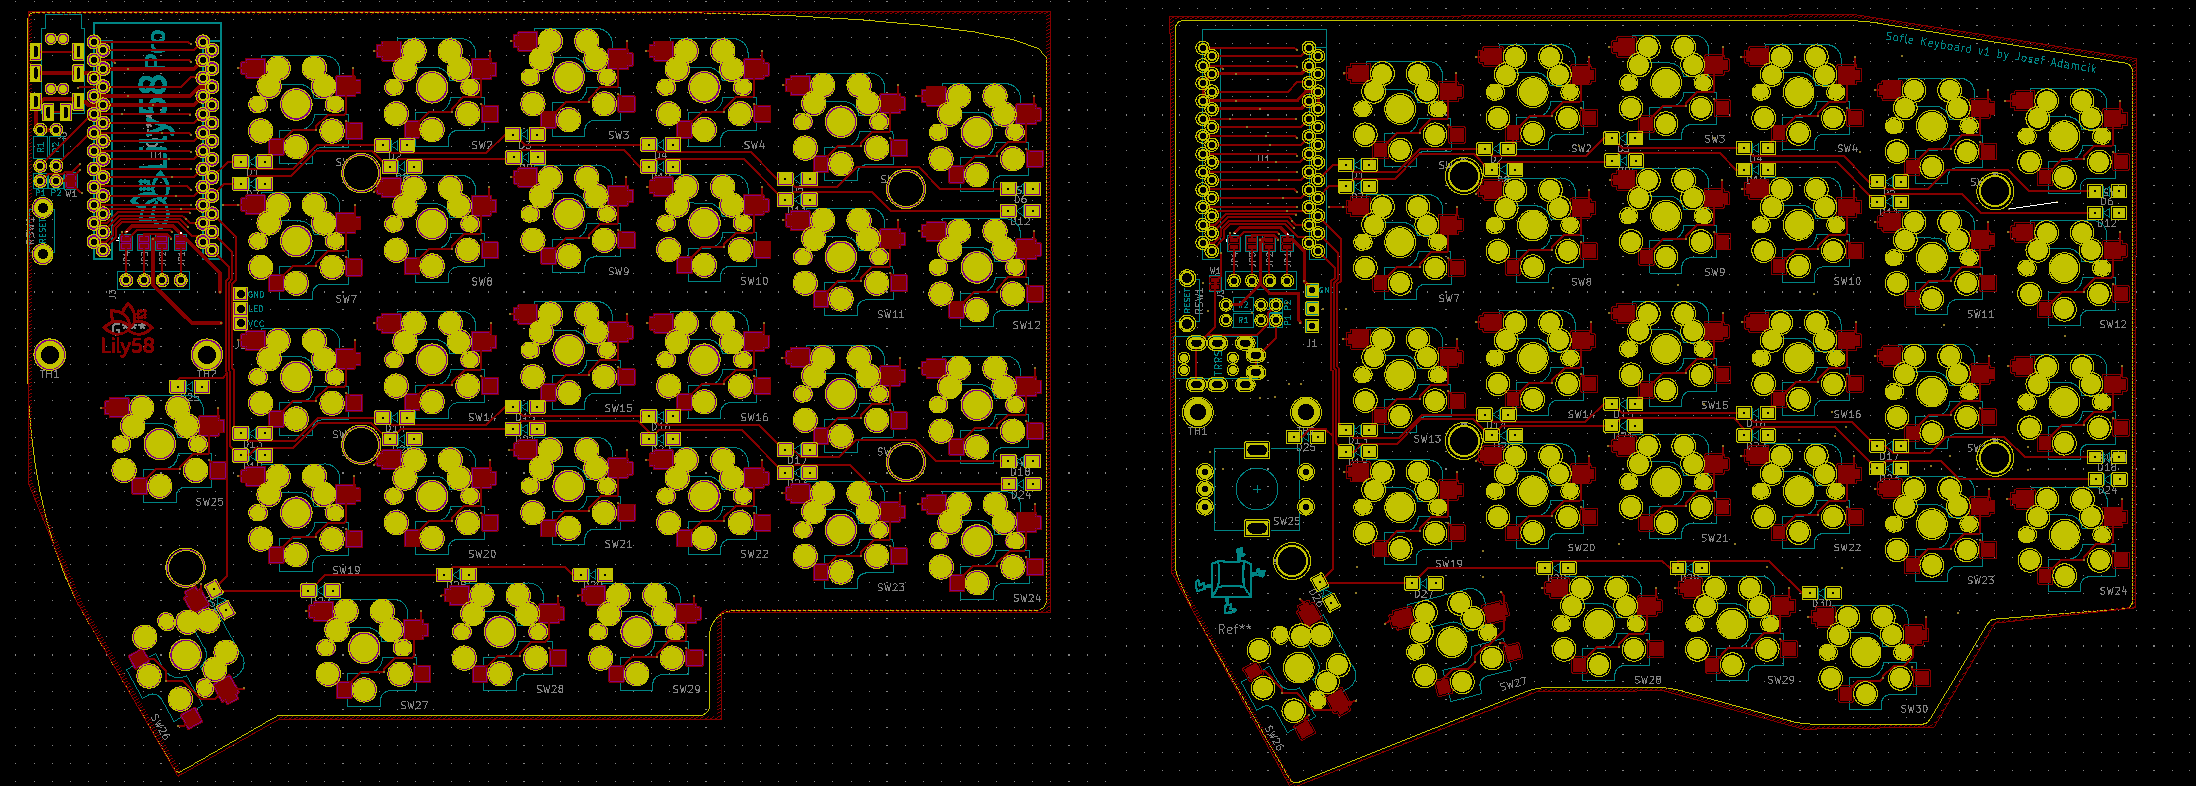
Changing the design
It was not difficult4 to get the files from Github and start playing with the design in KiCad. I chose Lily58 Pro variant because the switches are not soldered directly to the PCB but sockets are used instead. I don’t know how many iterations I am going to go through and good switches5 are quite expensive to be wasted just to try a layout.
Adding one more switch to the bottom row was pretty straightforward. I added it to the matrix in the schematic, updated the PCB and placed new footprint and traces.
There’s was also one key, just below the microcontroller, next to index finger which I didn’t need. I decided to replace it with a rotary encoder. Why? QEM firmware supports rotary encoders even for split keyboards and you can map anything you wish to rotation in both directions and press. People use them for volume control, page up, page down, mouse scroll and similar. I just had nothing else to put in the empty space so I figured I might as well give it a try.
I also felt the inner side of the keyboard which contains the Pro Micro and TRRS jack could be smaller. So I moved things around and arranged them more in the way how Corne does it: TRRS jack and reset button below the microcontroller.
The last thing was to change the overall shape of the board. I used Inkscape and the tricks I learned when making PCB badges.
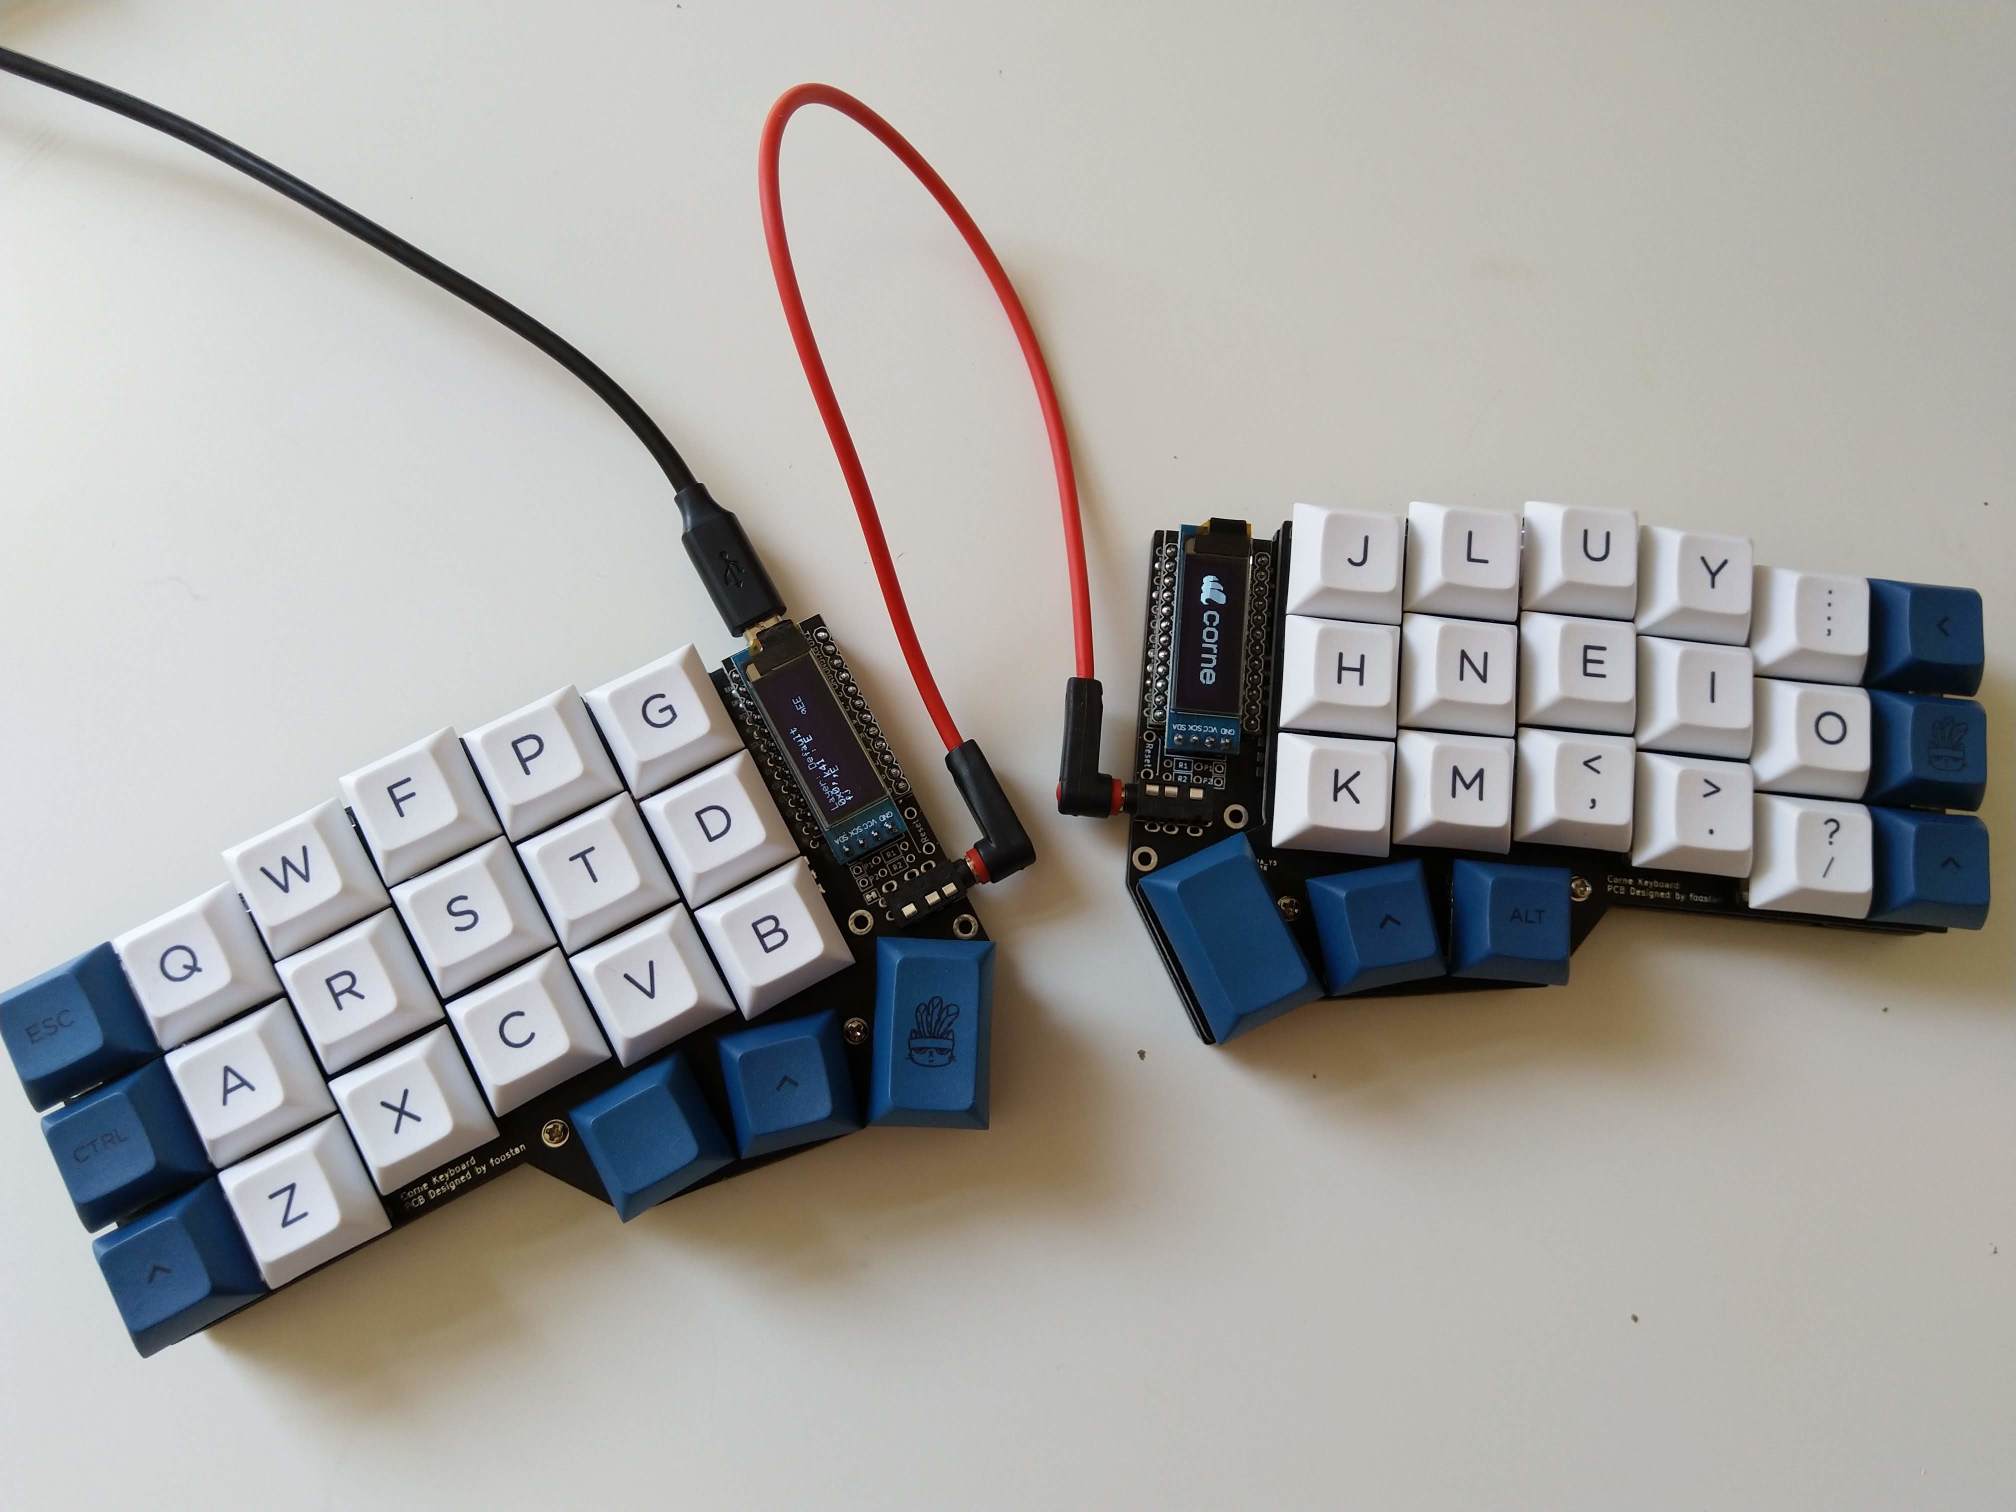
You can see on the picture above how close are both keyboards to each other.
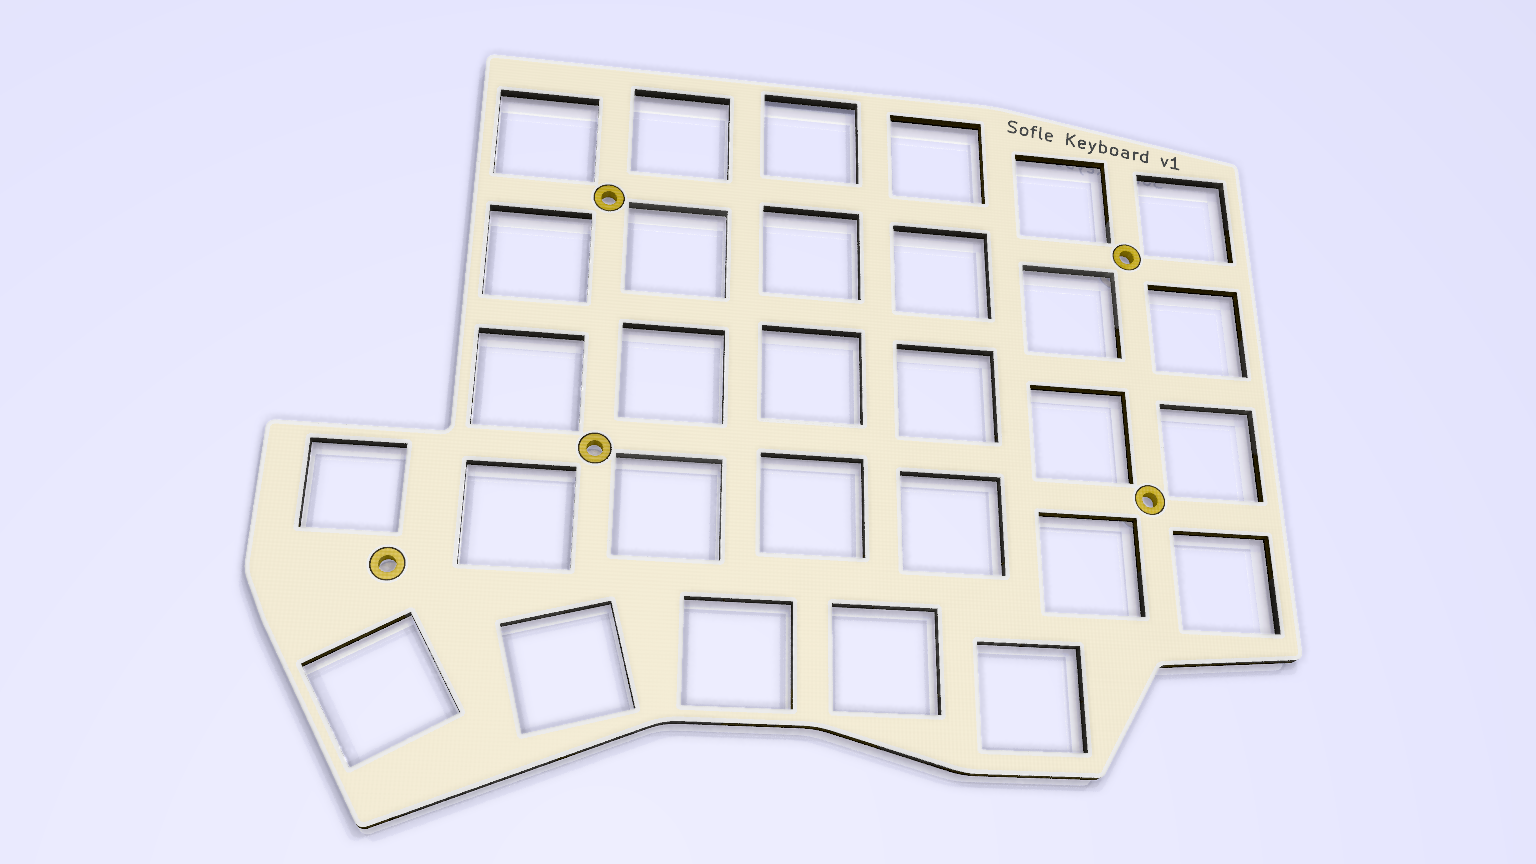
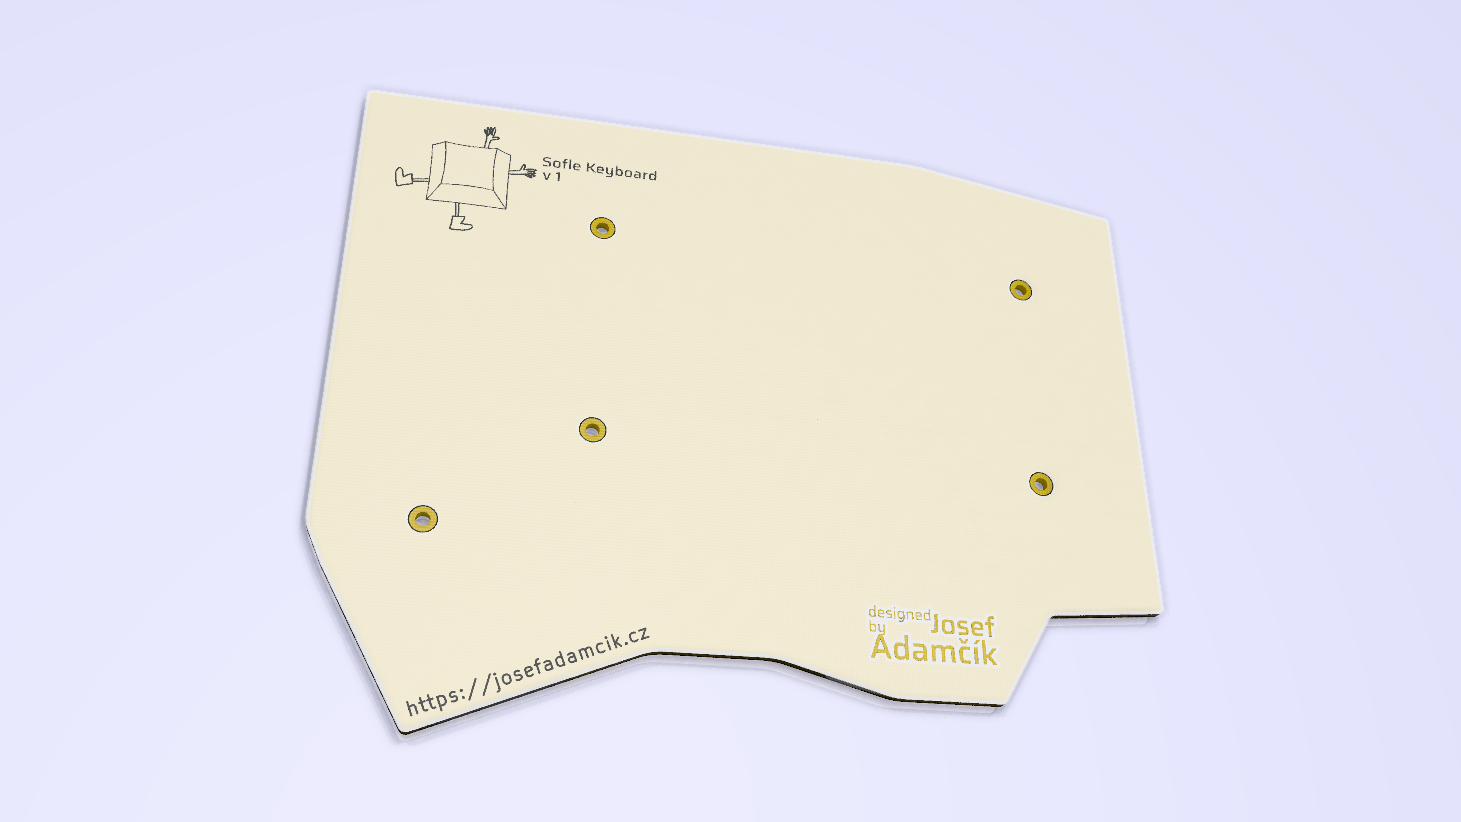
Next step was to create the top and the bottom plate. It took me some time to figure out how to align properly the cutouts for switches in the top plate and the holes for screws. To be honest I don’t recall the exact process. I exported layers from KiCad and did most of the work in Inkscape. The holes for switches are included in the Eco2.User layer. It’s also possible to plot a drill file to SVG which allowed me to align drill holes (The svg2shenzen Inkscape plugin helped me there since it allows to define a drill hole by placing a circle of the desired diameter on a particular SVG layer).
I was worried I might have made some mistakes so I made a cardboard prototype.

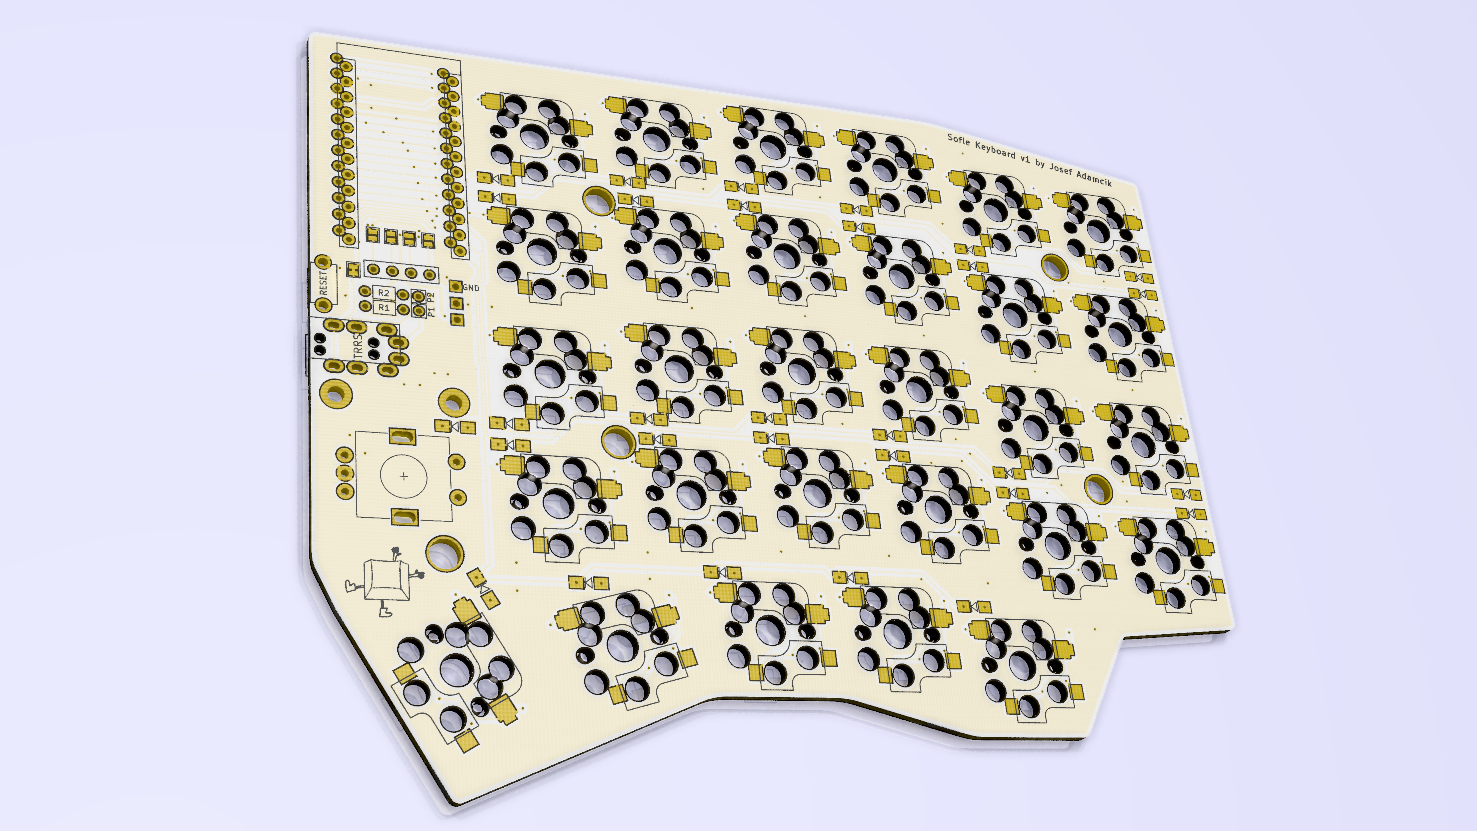
And everything looked good. My girlfriend was so kind and drew a logo for the keyboard. Also, the name was chosen at the time (my GF likes to call herself Sofie. Therefore Sofle is a little play with the name and the keyboard is named after her). This is how 3D renders in KiCad looked.
Manufacturing the boards
I had the boards manufactured at JLCPCB as I did for Corne. 5 pieces of each (top, bottom, PCB) with white silkscreen, 1.6mm thickness and HASL finish. The price was 27$ for boards and 11$ for shipping (cheap and slow one as usual) which is 38$ for 2.5 keyboards.
I ordered them 15.10. they were shipped 21.20. and delivered 4.11.2019. This makes 3 weeks total. And here they are.
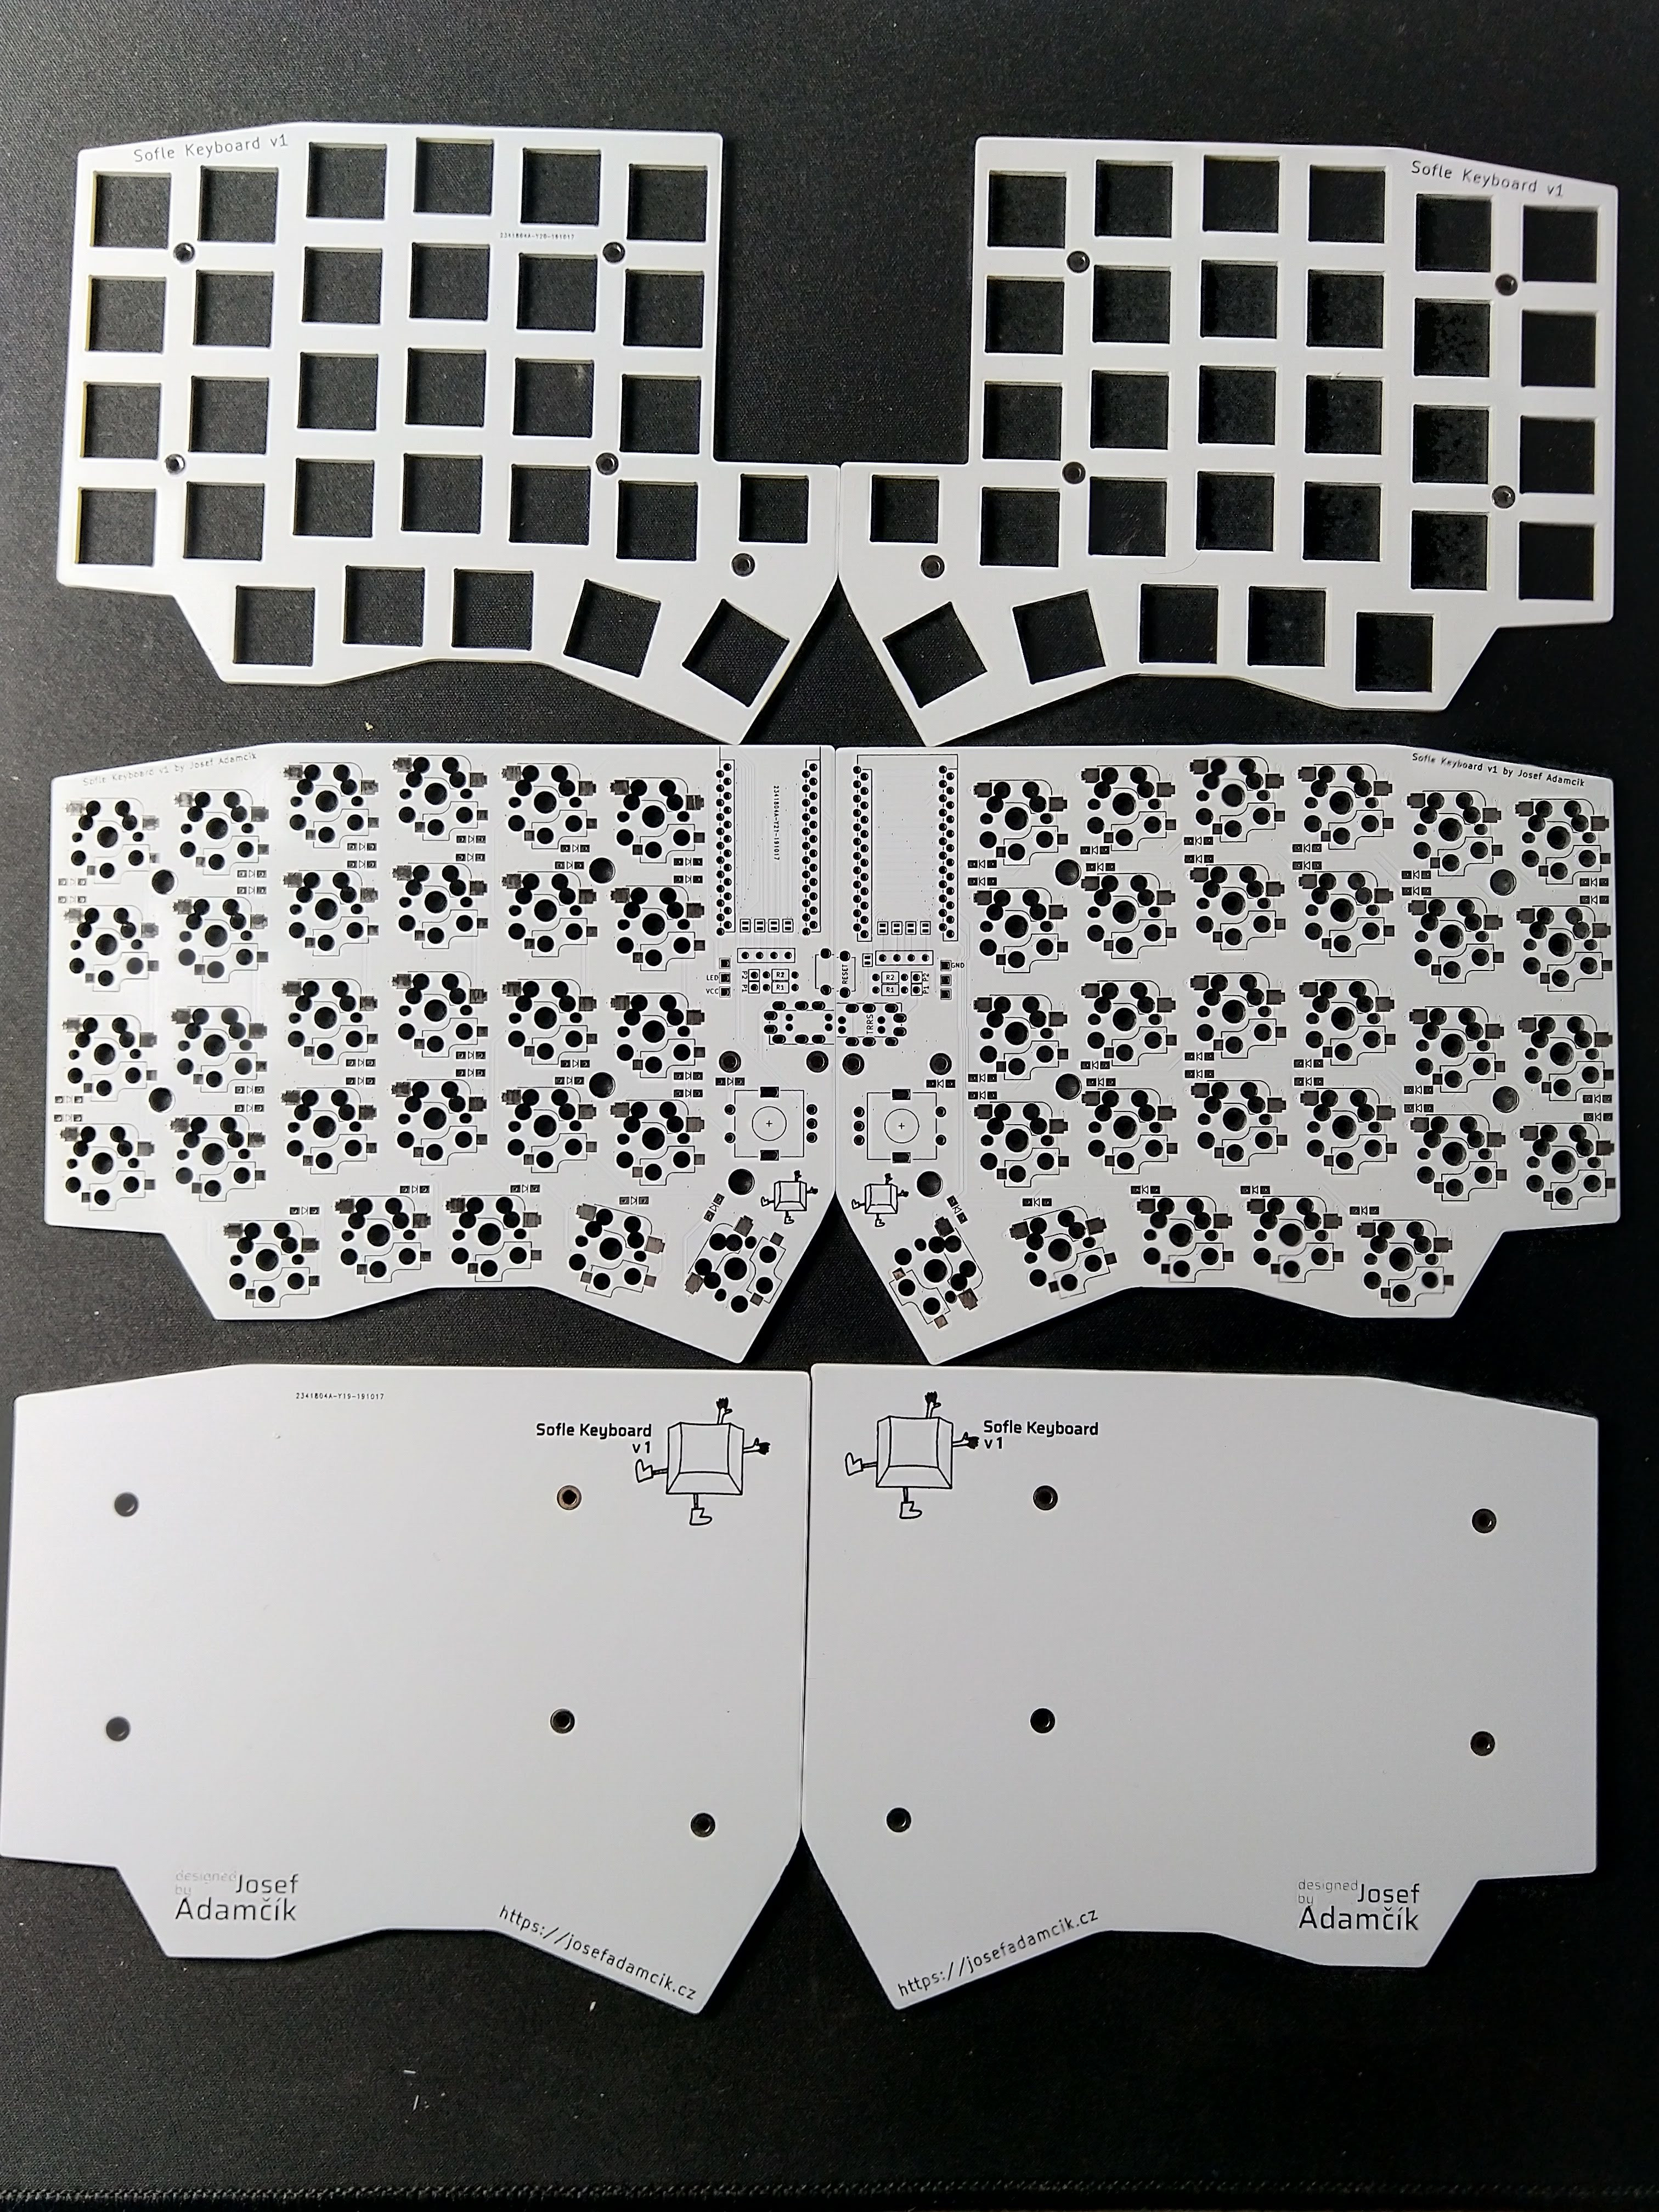
The result was perfect. No manufacturing problems, no mistakes on my side, everything was aligned properly.
Building the first SofleKeyboard
Originally I wanted to have a detailed build log in this section. But it ended up being quite long. I also wanted the build log to act as a build guide (since there’s no build guide for SofleKeyboard on Github yet). Therefore, I have published it as a separate article: SofleKeyboard build log/guide. Update: please, for an up-to-date and improved build guide go to the SofleKeyboard’s website.
Cleaning the firmware
I started by copying the keyboards/lily58 directory in the QMK firmware and modified the necessary parts to have it compiled by running make:sofle. Then I had to add support for rotary encoders and new keys in the layout. It wasn’t difficult but while doing that I noticed there’s a lot of code in the directory. Files like: matrix.c, serial.c, ssd1306.c etc. I was curious why the files are there since they seemed to be reimplementing things which should be already part of the QMK firmware. But the the most important task at the moment was to make the keyboard work.
I managed to make almost everything work easily apart from the rotary encoder. It was working on the master half but not on the slave half. When digging around I verified it should be supported on split keyboards without problems (I have found a closed bug report and the code that was supposed to handle it). So what’s the problem? Well, the problem was that Lily58 was not using the built-in support for split keyboards in QMK but rather overriding most of the default behaviour by its own implementation as I suspected. This Lily58’s implementation appeared to be an older version of the code in QMK core and didn’t handle rotary encoders properly.
I believe (but it’s mostly a guess) reasons for this are historical. The code for Lily58 was apparently copied from Corne. And Corne seems to be copied from Helix. I think the code from Helix was copied from Let’s Split which was one of the first (if not the first) split keyboards using QMK firmware. Back in that time someone copied the source and used it. The support for split keyboards was later added to the QMK firmware and it’s no longer necessary to drag this pile of code around in order to support a split keyboard. But people either don’t know it or maybe are afraid they may break something or just don’t understand the code enough to realize something is odd. So the outdated copy-pasted code is still being used by those many popular boards.
For me it was easy: I have to fix a problem with the board so the mess must be cleaned. And it also felt very good to throw away all then unnecessary code and make the custom part of the firmware for SofleKeyboard much cleaner and easier to understand.
Future plans
I have been already using the first prototype for three months, only at home, though. I still use my Katana60 as a daily driver at work. Currently, I am waiting for switches for the second build and as soon as I make it I am going to bring it to he office and use it at work too. So far I am very happy with the keyboard and there are no obvious problems I need to fix. But I do have plenty of ideas for the future.
Short term
- A proper build guide in the repository.
- Improve default layout to be more friendly - the default should be QWERTY and maybe support for Dvorak could be added.
- Consider adding support for QMK configurator
- Push the firmware/layout to QMK upstream.
- Design a laser-cut acrylic case and OLED covers. Build one version using those.
- Build another version with Choc switches.
- There could be a version of the PCB which would allow switches to be soldered directly on the board.
Long term
- Another version with an improved layout. I could move the bottom row a tiny bit more into the centre. That would allow me to lower the two outer columns a have more aggressive stagger. I feel it might be better for my pinkie.
- Some future version could have microcontroller directly on the PCB (I see Pro Micros as a temporary solution).
- I might even use some other microcontroller. Maybe STM32F303xC which is used by QMK Proton-C and supported by QMK firmware (even though split support is not in there yet).
Feedback welcome
I would be thrilled to hear when anyone actually decides to build the keyboard and I am also happy to help with any problems you may encounter. I would also welcome any feedback regarding the layout and so on. What do you think? What could be changed? Feel free to contact me through any channel: icons for email, twitter etc. are in both header and footer of this website.
Just keep in mind, please, that this is just a hobby and SofleKeyboard is only an opensource project rather than a commercial product. Therefore, I am not providing anything like commercial customer support.
Links
Footnotes
-
Serial is the default behaviour. If serial is used, you don’t need TRRS cable (4 contacts, used for headphones with a microphone) but just TRS (stereo audio jack). ↩
-
I2C requires additional pull up resistor at least on one half. You also need to cut a trace and change configuration of the firmware. At least that’s how I understand it, I haven’t tried it yet. ↩
-
That also means that sometimes you don’t have to update the firmware in both Pro Micros. If you, for example, do just changes to the mapping you can update just master half since the slave only scans the matrix and doesn’t care what is actually mapped to the particular switch. ↩
-
I had to do some troubleshooting regarding footprints. There are some custom footprints included in the project on Github but they seemed to be incomplete or maybe outdated. ↩
-
I used Zilents V2, silent tactile switches by ZealPC (and made by Gateron) which are very expensive. ↩
This article is Part 2 in a 7-Part Series.
- Part 1 -In search of the best custom keyboard layout
- Part 2 -Let me introduce you SofleKeyboard - a split keyboard based on Lily58 and Crkbd
- Part 3 -SofleKeyboard build log/guide
- Part 4 -Sofle Keyboard evolution: slow and not really steady
- Part 5 -Another year of Sofle keyboard
- Part 6 -Stáňa AKA Sofle Unsplit - a monoblock split keyboard
- Part 7 -Stáňa - a monoblock split keyboard, part 2