Update: for an up-to-date and improved build guide go to the SofleKeyboard’s website.
This article is partly a build log and partly a build guide for SofleKeyboard (introduced in the previous article) ~~since there’s no build guide for the keyboard yet and there are already people who would like to build it. ~~
This article is Part 3 in a 7-Part Series.
- Part 1 -In search of the best custom keyboard layout
- Part 2 -Let me introduce you SofleKeyboard - a split keyboard based on Lily58 and Crkbd
- Part 3 -SofleKeyboard build log/guide
- Part 4 -Sofle Keyboard evolution: slow and not really steady
- Part 5 -Another year of Sofle keyboard
- Part 6 -Stáňa AKA Sofle Unsplit - a monoblock split keyboard
- Part 7 -Stáňa - a monoblock split keyboard, part 2
Getting the PCBs
I currently don’t have any spare PCBs left. I also do not plan to organize a group by or to sell the boards. There might be others who would do that in the future. Some were already in touch with me.
If you decide that you wish to go through the PCB manufacturing process, you can. I think it’s easy even for people who don’t know much about PCB manufacturing process. But keep in mind, nobody can guarantee that there are not going to be some problems and if you have no idea what are you doing it might be more difficult for you to deal with them.
You can get source KiCad projects on Github. Open them in KiCad, plot Gerber files and drill files, compress them into a zip file. The instructions how the extract Gerber files from KiCad are everywhere and you can find them e.g. at the website of your chosen manufacturer. If you don’t want to install KiCad, you can find the Gerber files exported as I used them to order the first build here: Gerber files for SofleKeyboard.
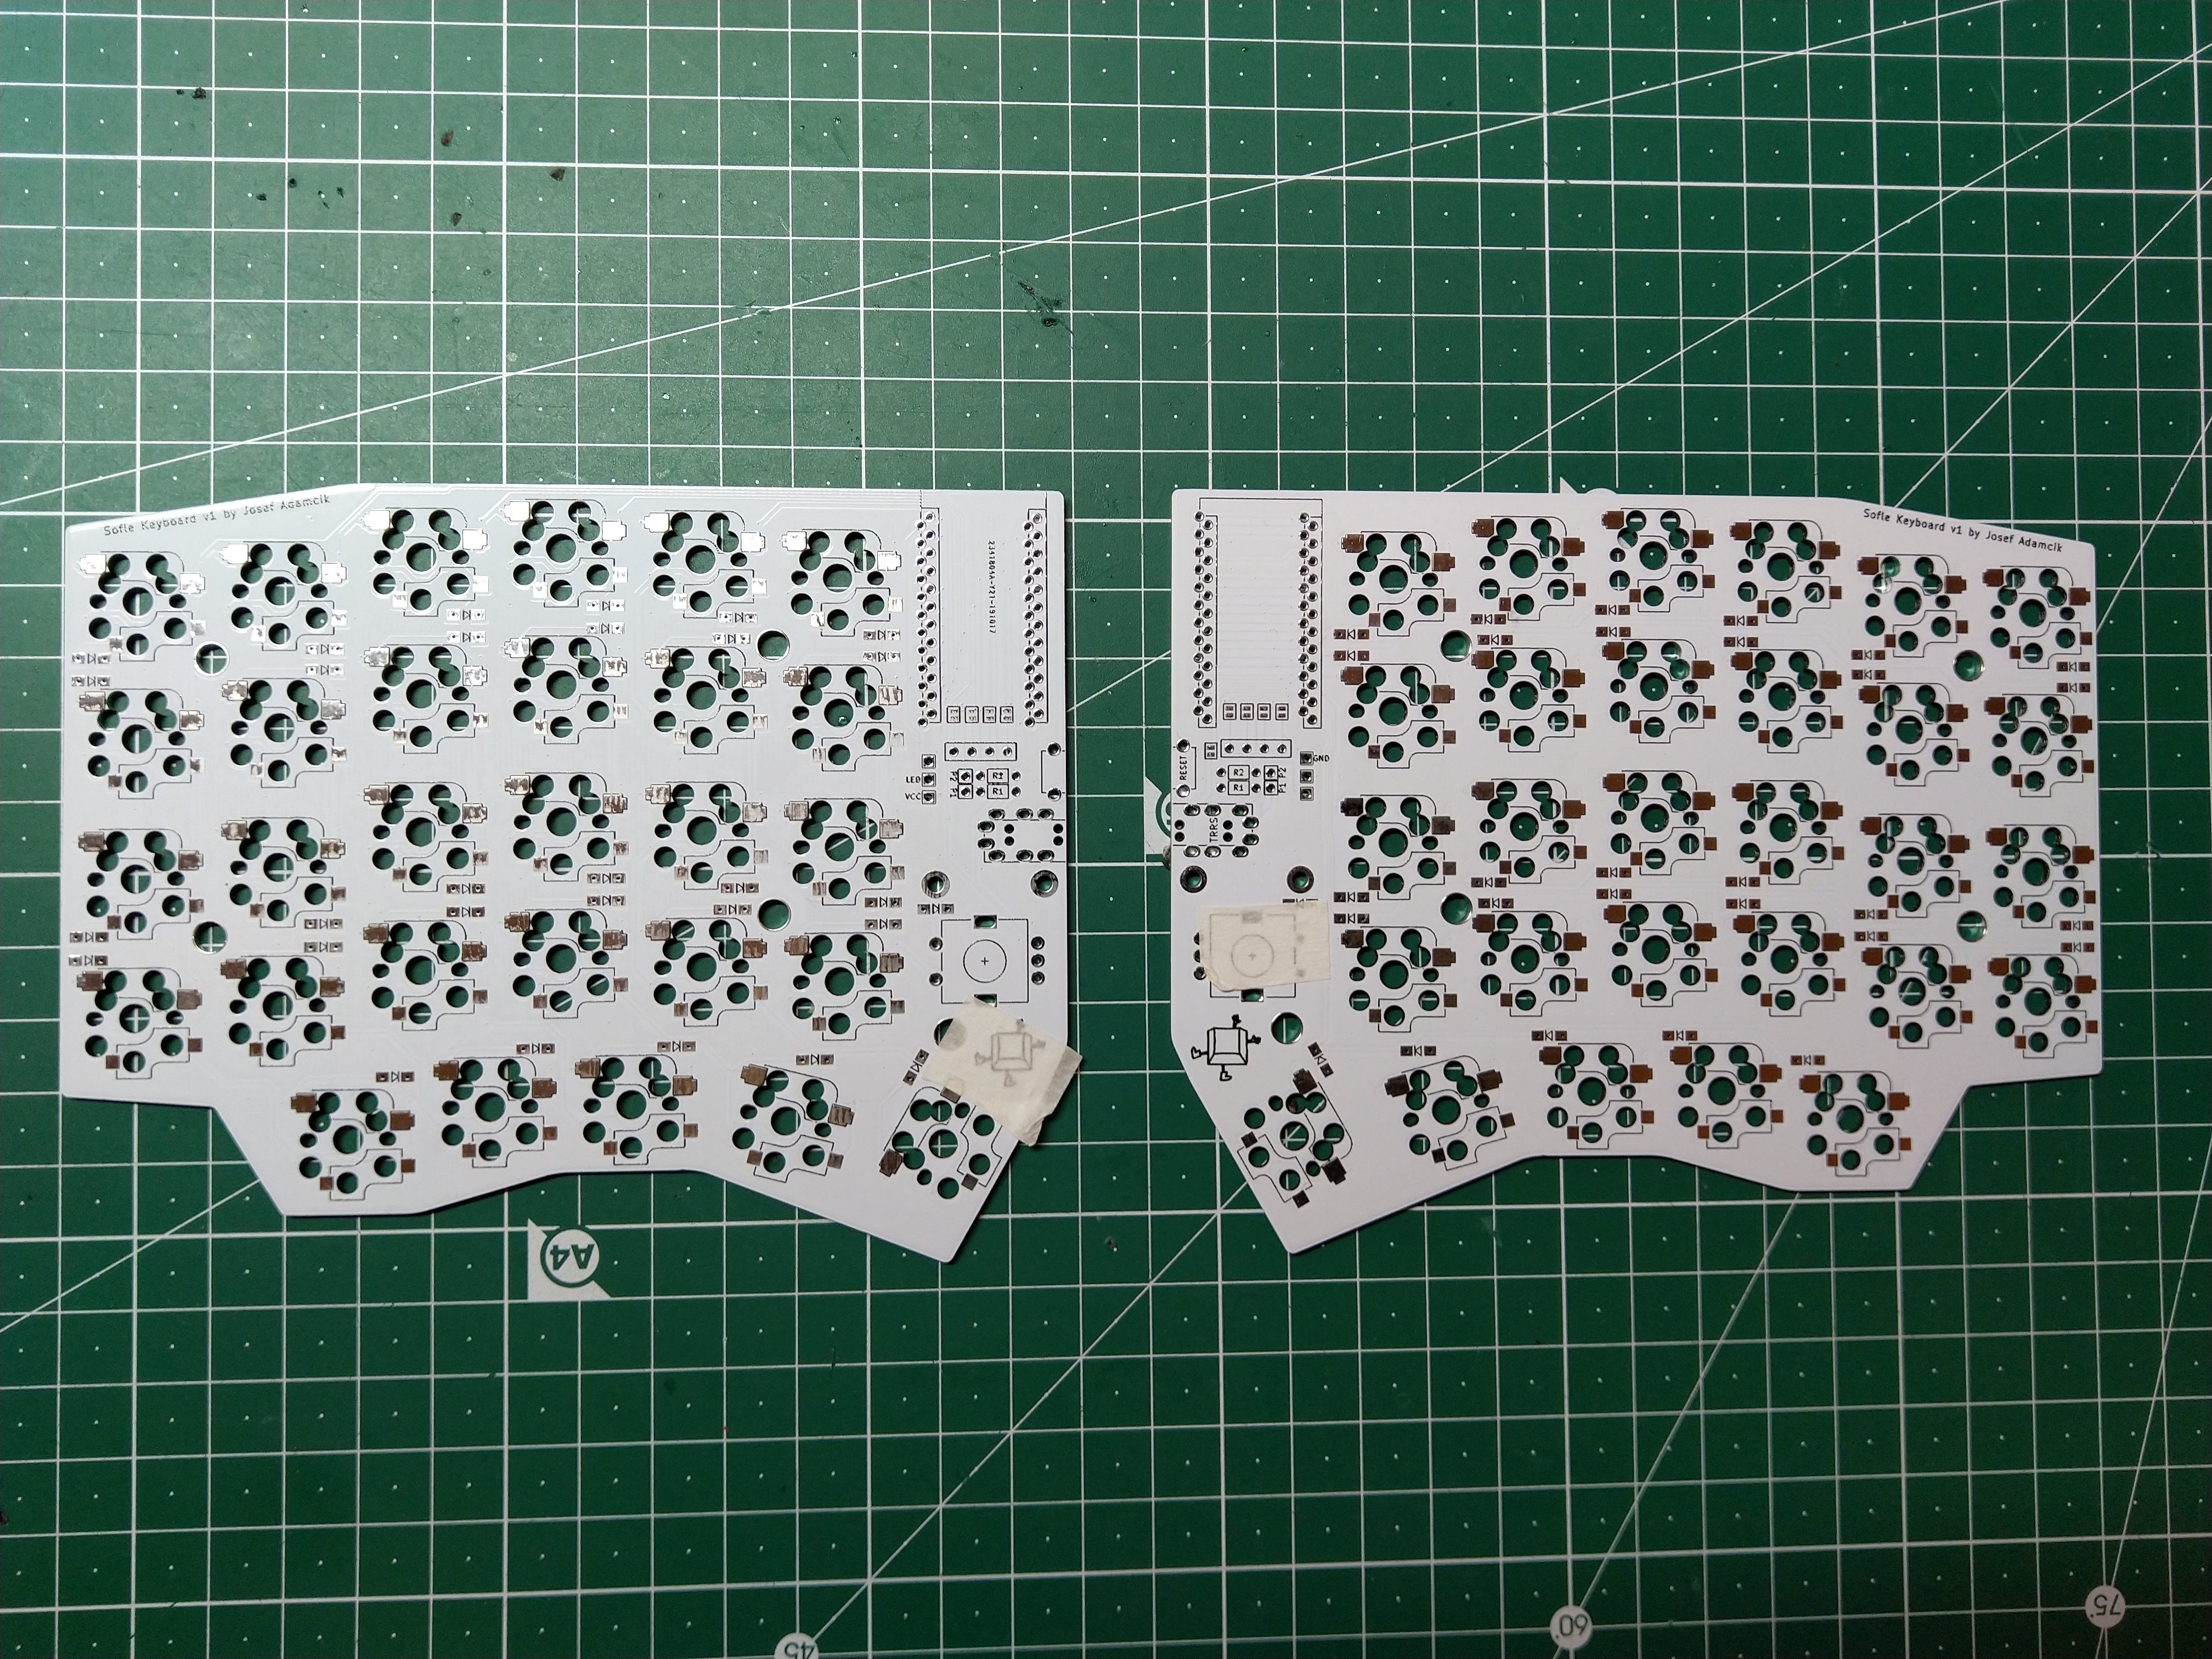
You should have 3 zip files which you need to upload/send to your manufacturer and have them made. There should be nothing special about the parameters you pick for manufacturing: 2-sided PCB, thickness 1.6 mm. Surface finish (keep in mind that the cheapest HASL contains lead. Lead is toxic.) and solder-mask color according to your taste. Other parameters could stay in their default values. You are going to need at least 2 pieces of PCB made from each zip file. Most likely the minimal quantity is going to be either 5 or 10 boards.
Also, keep in mind that Some vendors can have problems with the top plate. I had no issues yet, but I can’t guarantee that you will not.
Bill of materials
The following is needed to build the keyboard. For most of the components there are links to the AliExpress (just click on the small number which will lead you to the corresponding footnote).
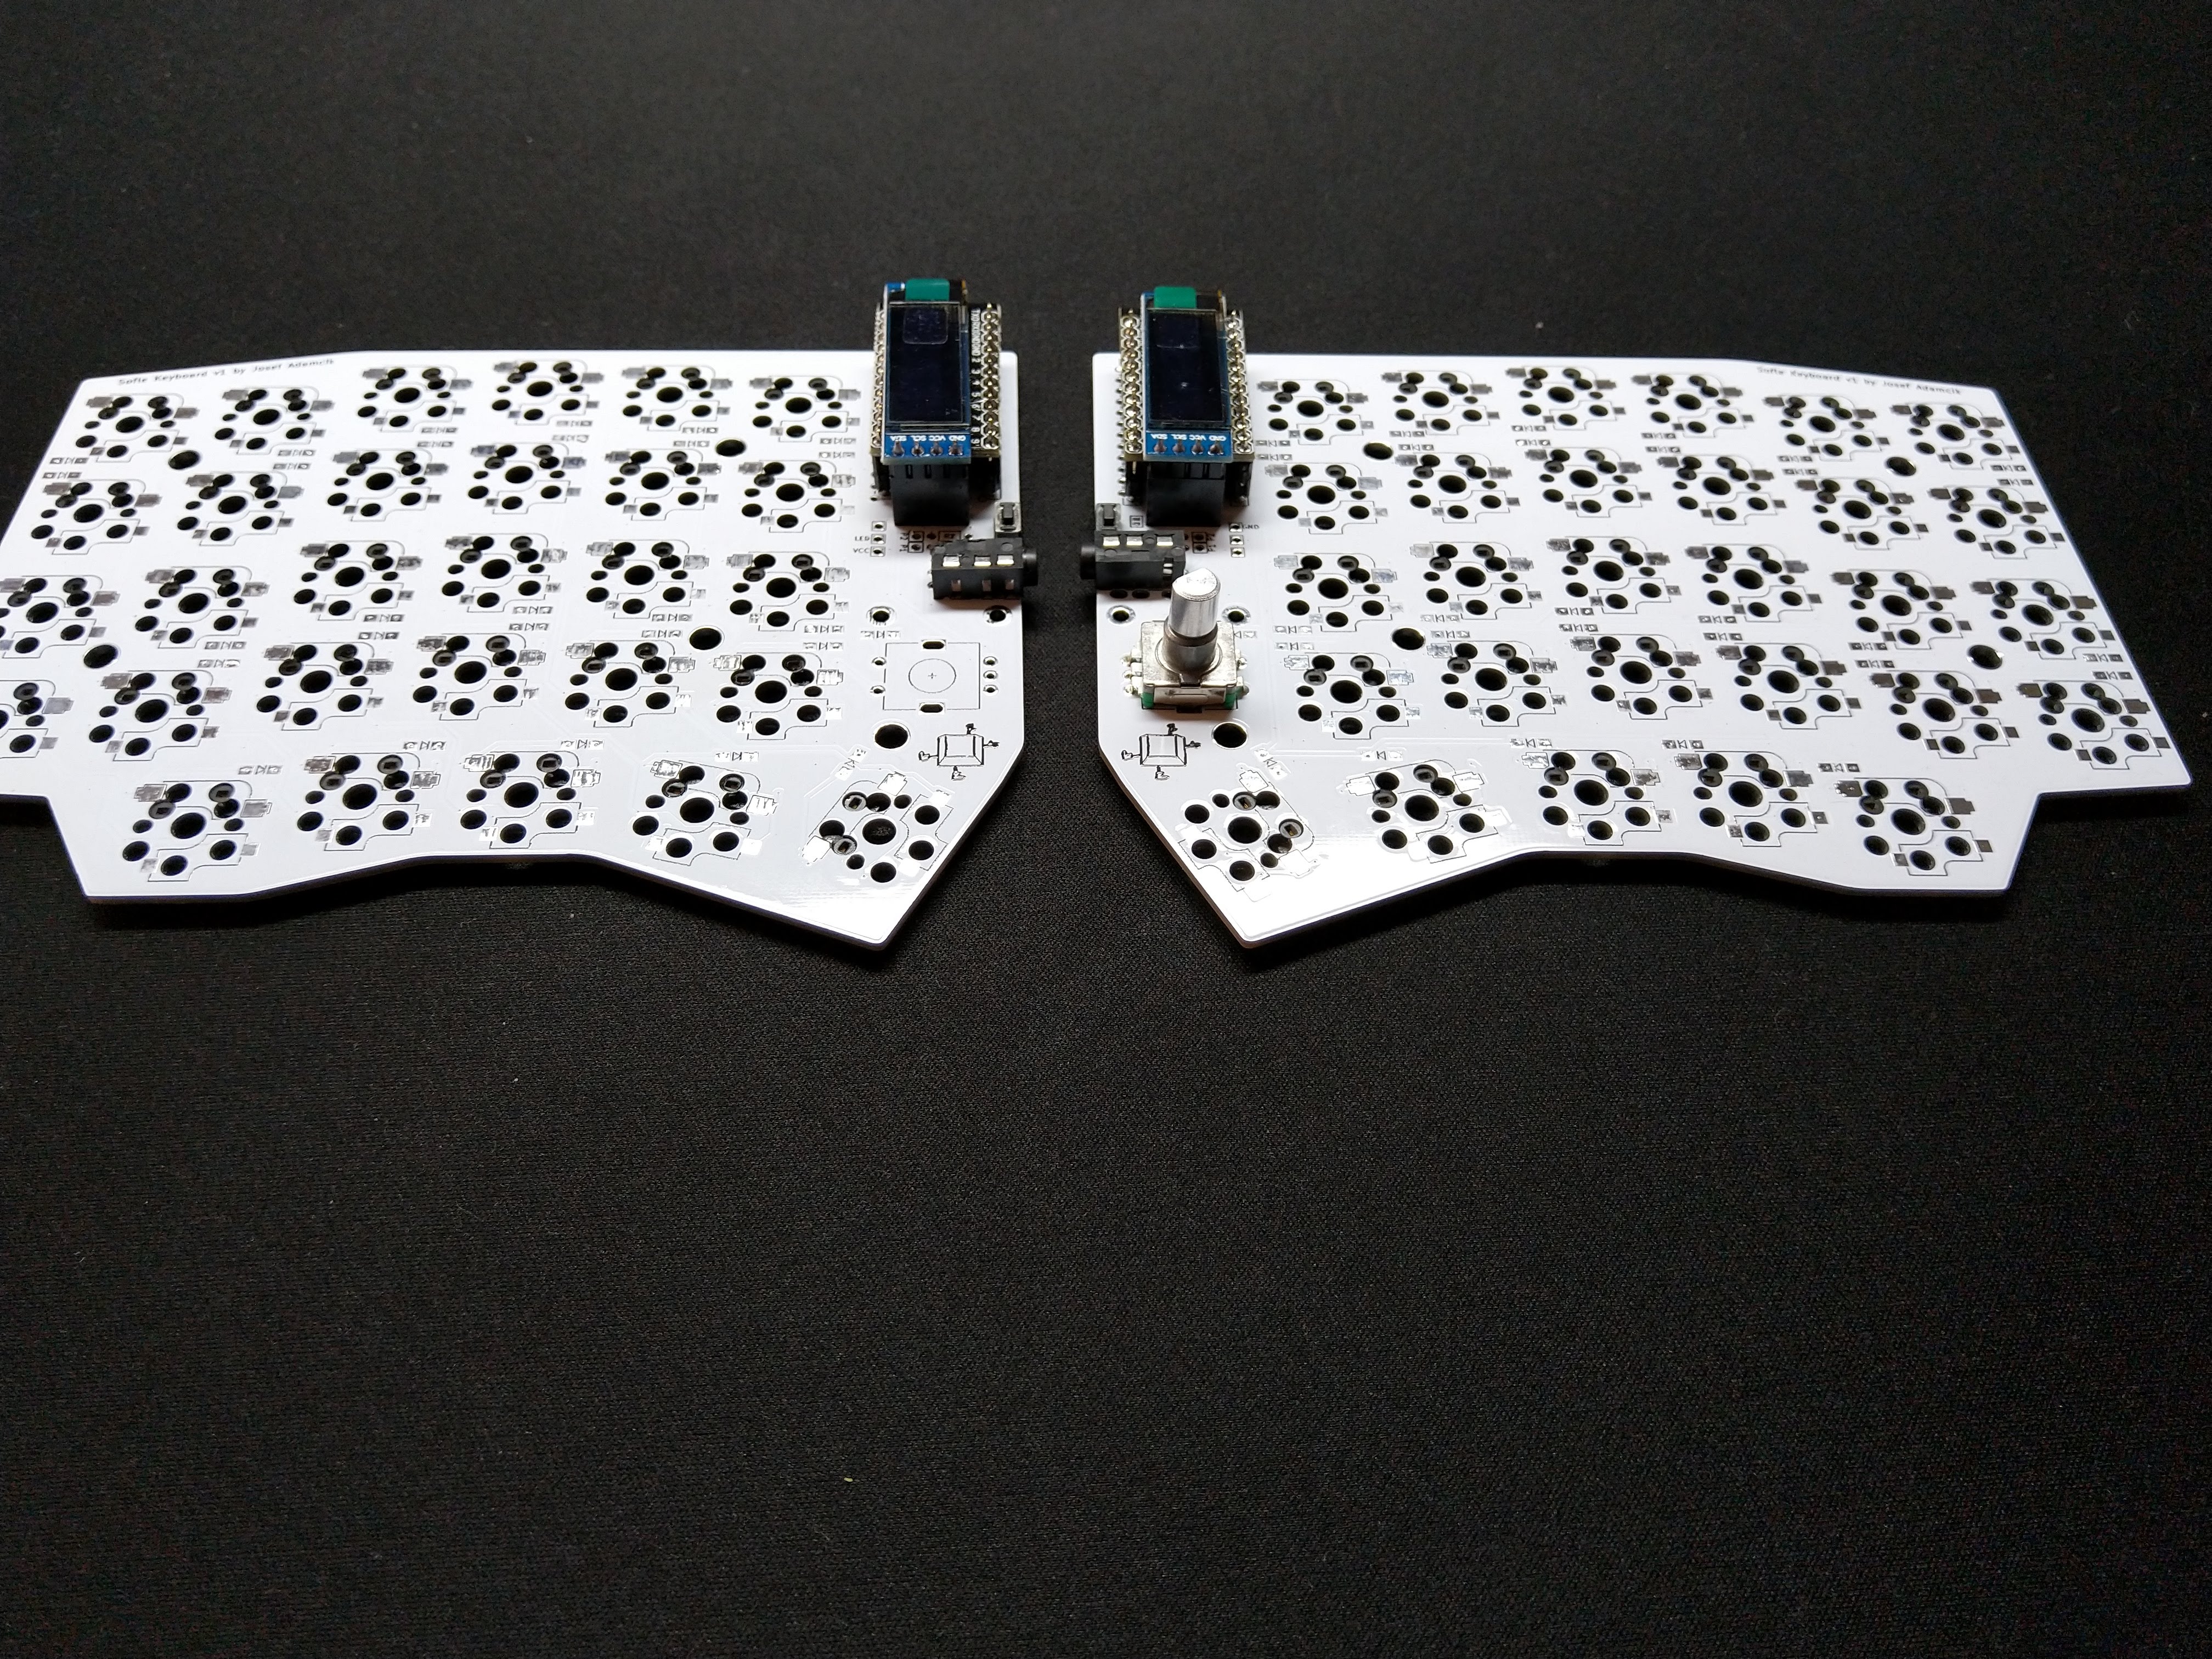
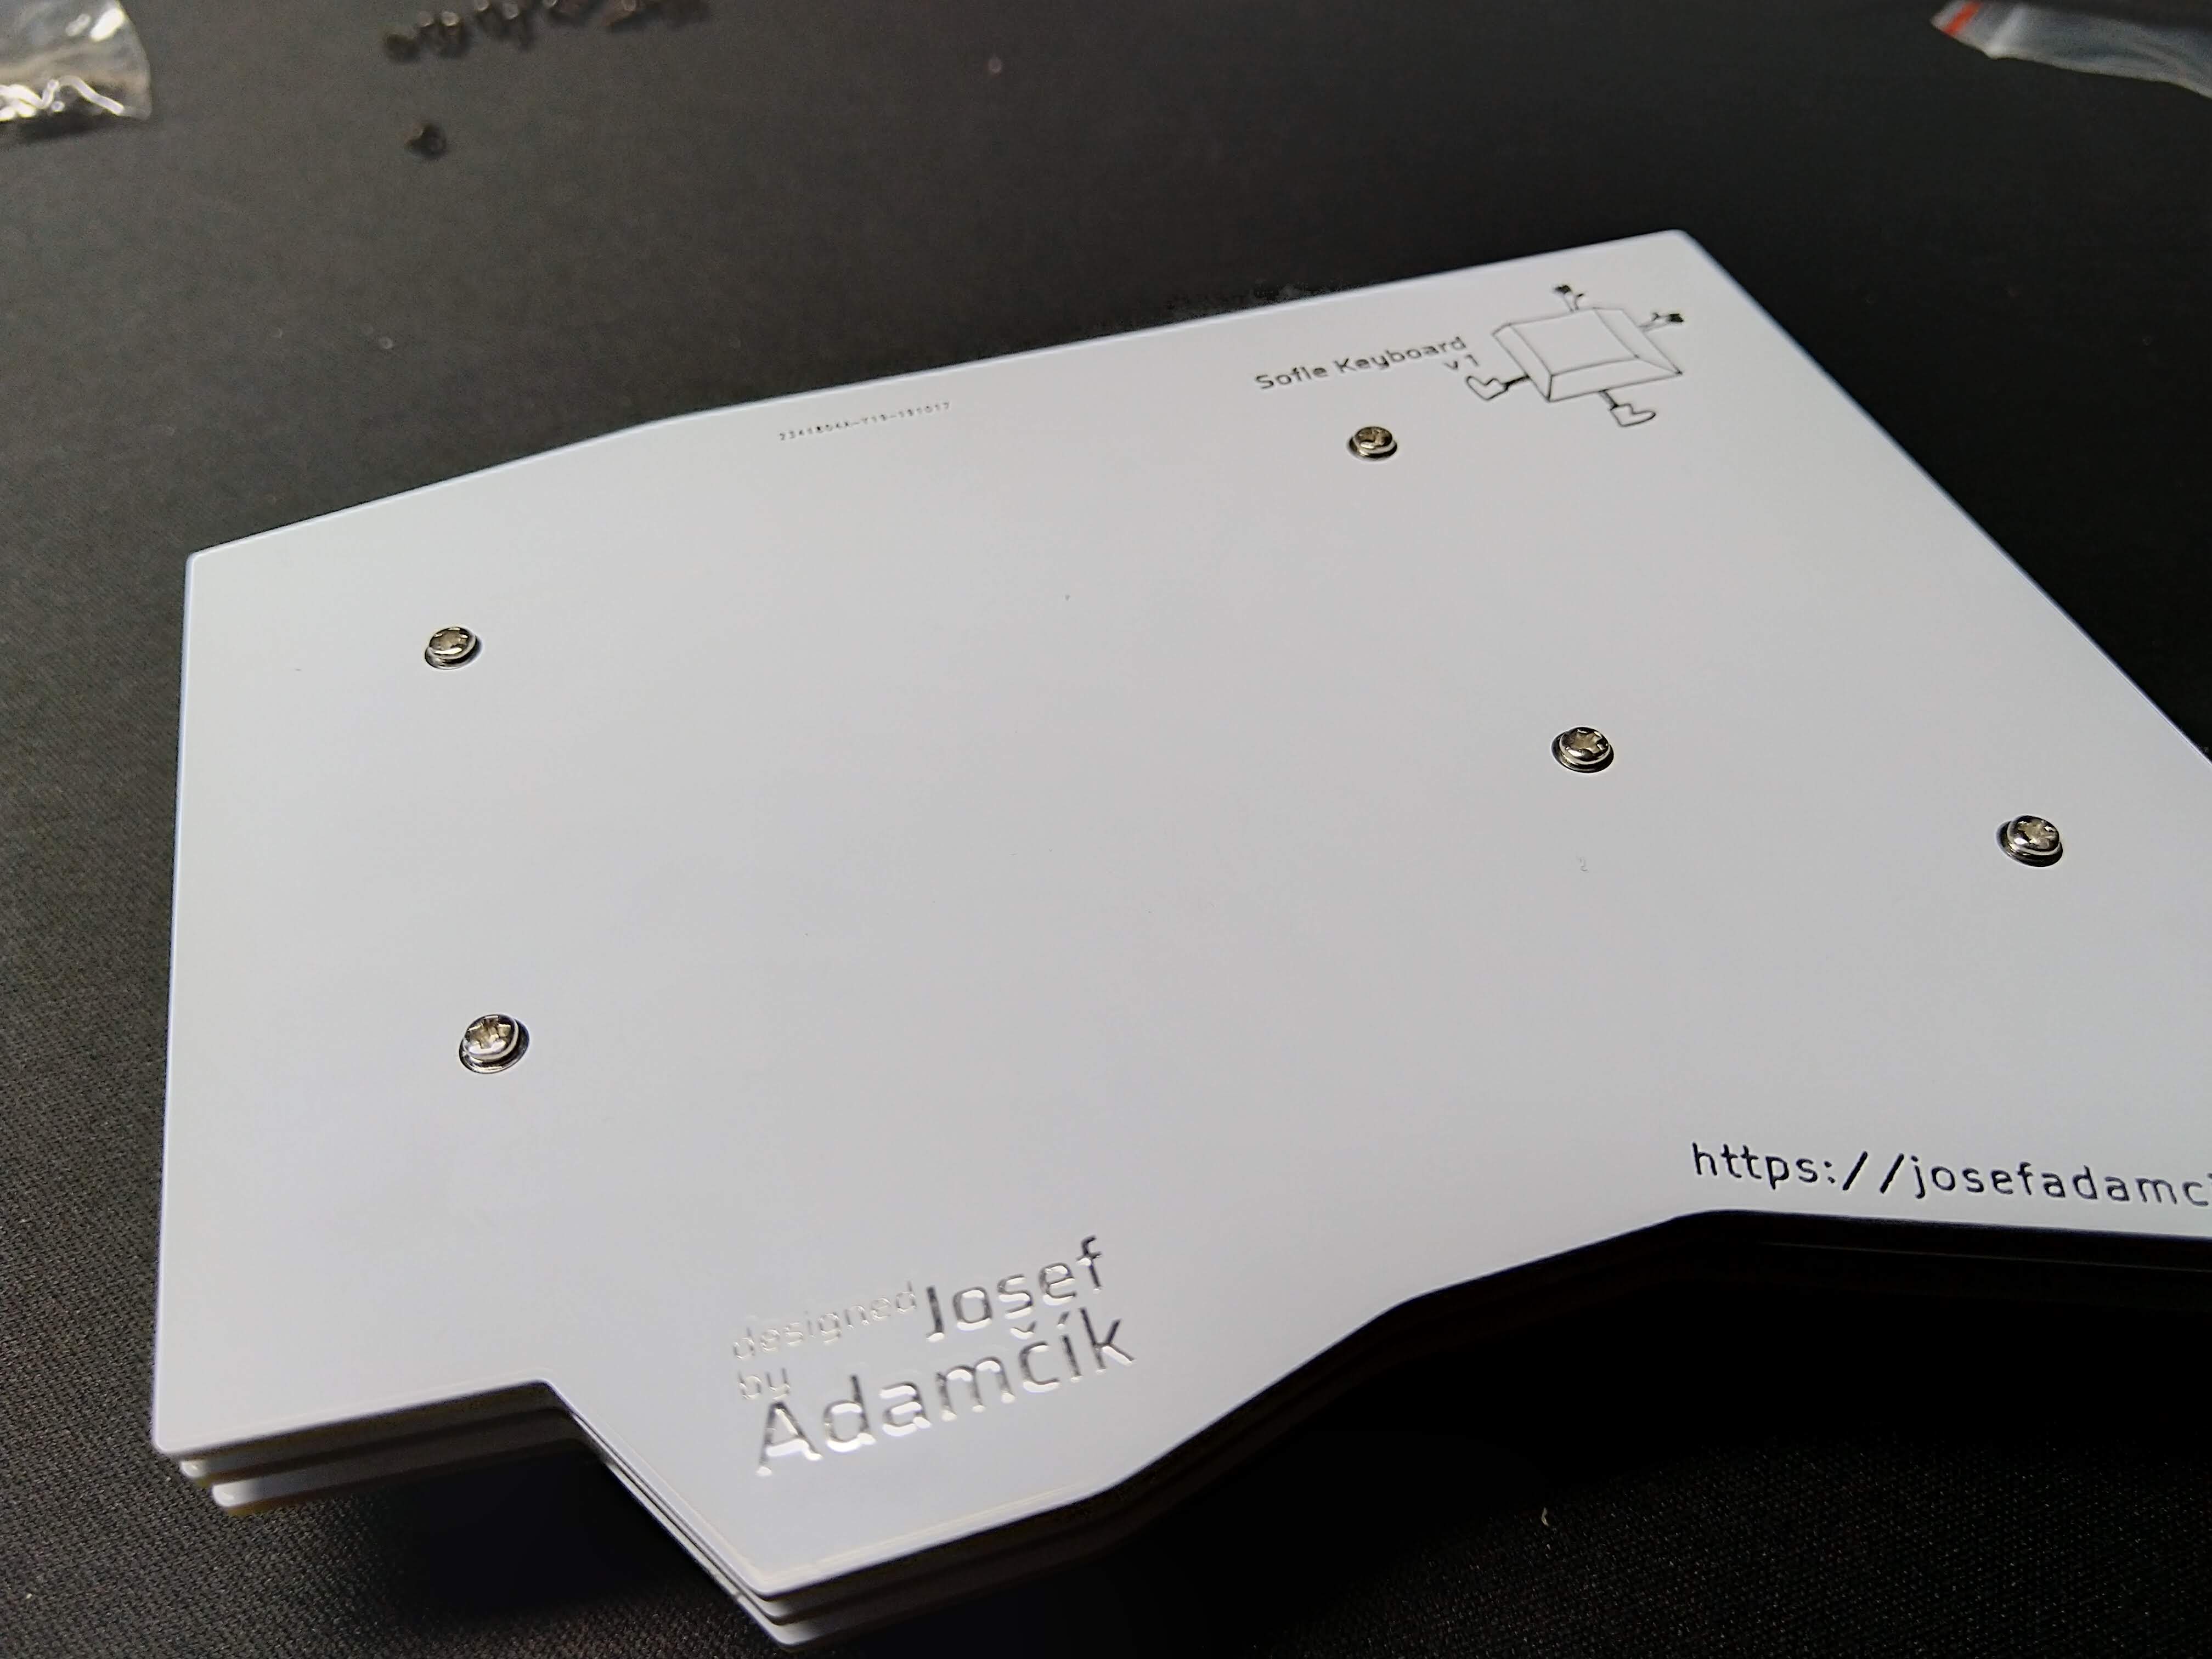
- 2 PCBs, 2 top plates, 2 bottom plates see above.
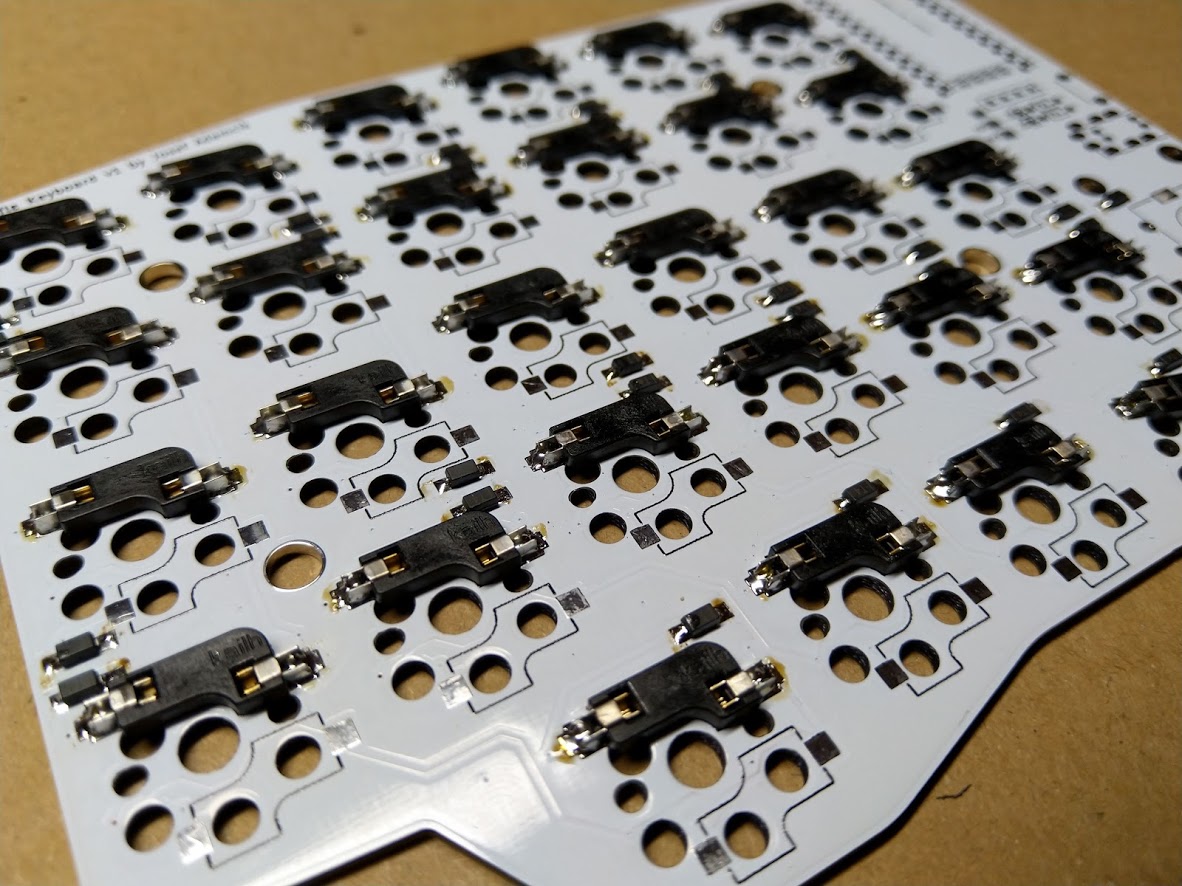
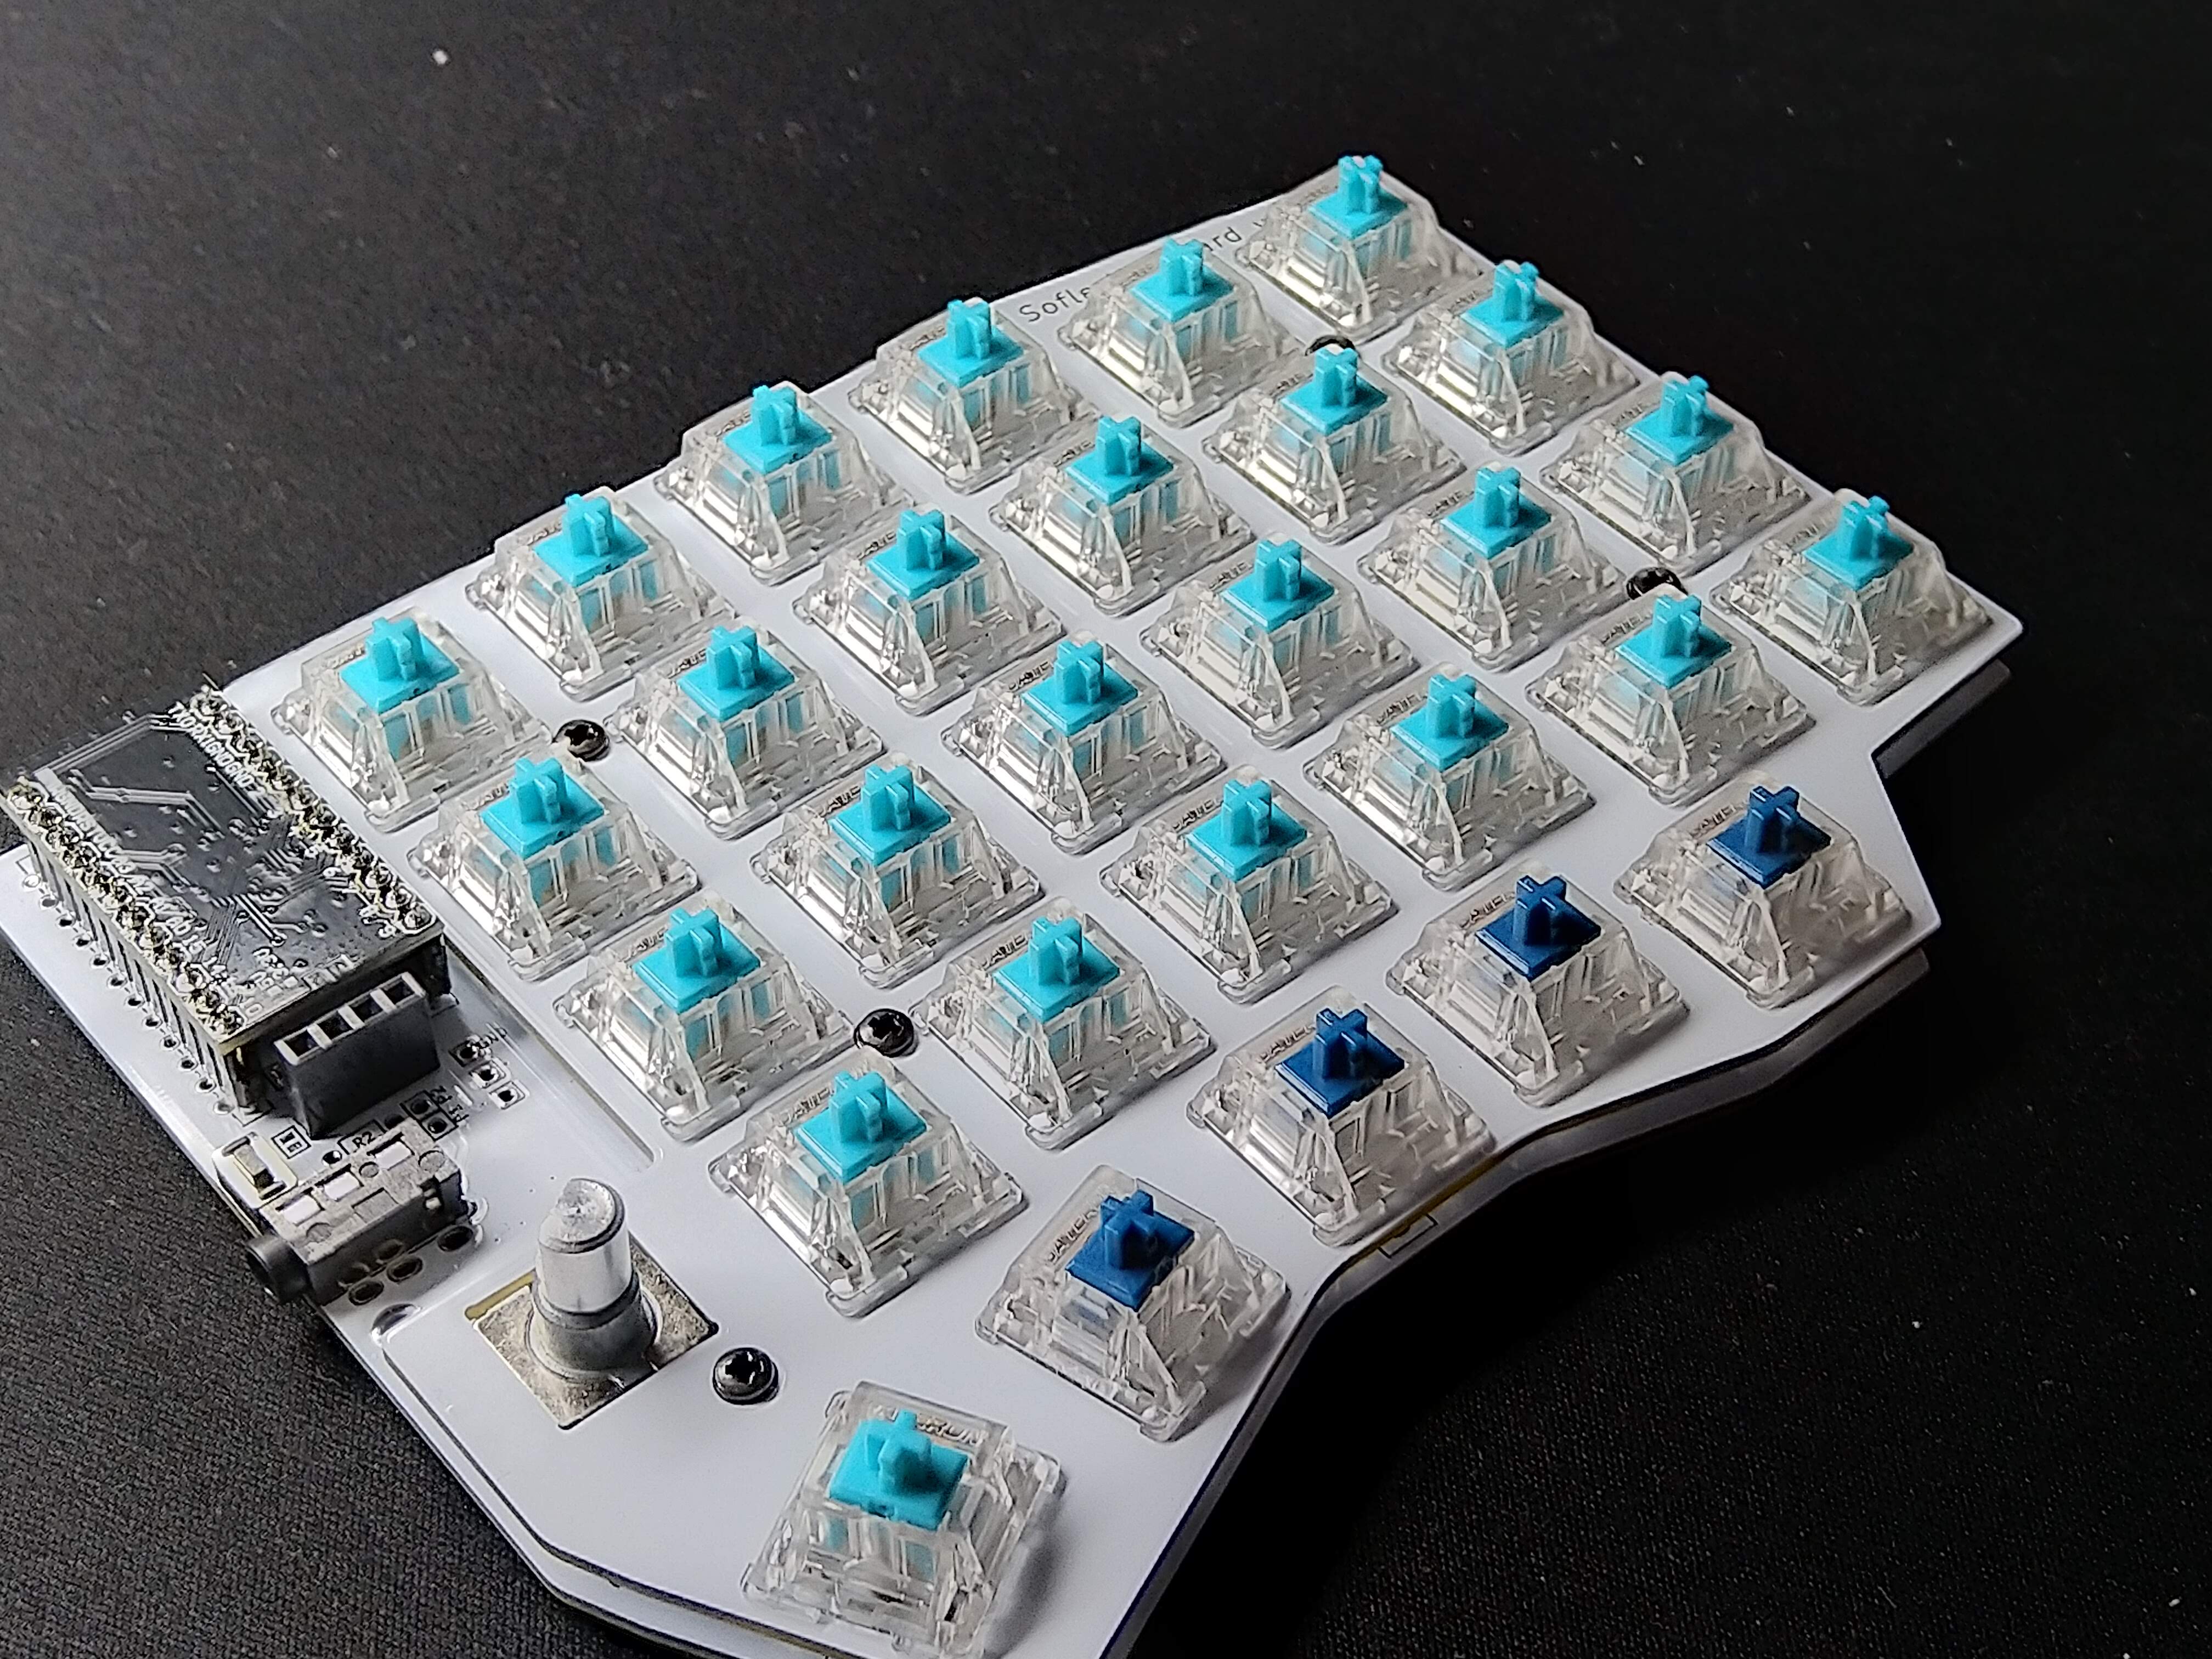
- 58 keyboard switch sockets by Kailh. The PCB supports either sockets for traditional MX switches1 or sockets for Kailh Choc switches2 (low profile mechanical switches). They are available on Aliexpress, KBDFans and others. Update: Please see a disclaimer for Kailh Choc switches3
- 58 keyboard switches of your preference4, either MX or Kailh Choc. Just make sure you have matching sockets for them. Update: Please see a disclaimer for Kailh Choc switches3
- 58 keycaps. You can use either all in
1usize but it looks nicer with two1.5ufor the thumb keys. - 58 diodes 1N4148W5. They are surface mount diodes in SOD123 package.
- 2 TRRS connectors. The same type which is used for Corne, Lily58 etc. Technically even TRS should work6 if you stick to (default) serial communication7.
- 2 tactile buttons through-hole, 2 pins.8. Technically optional: you can use metal tweezers whenever you need to reset the microcontroller. There’s also a reset key on default layout so as long as you have firmware flashed and working you shouldn’t need reset button on the board.
- 1 TRRS cable. TRS should work6 if you stick with Serial.
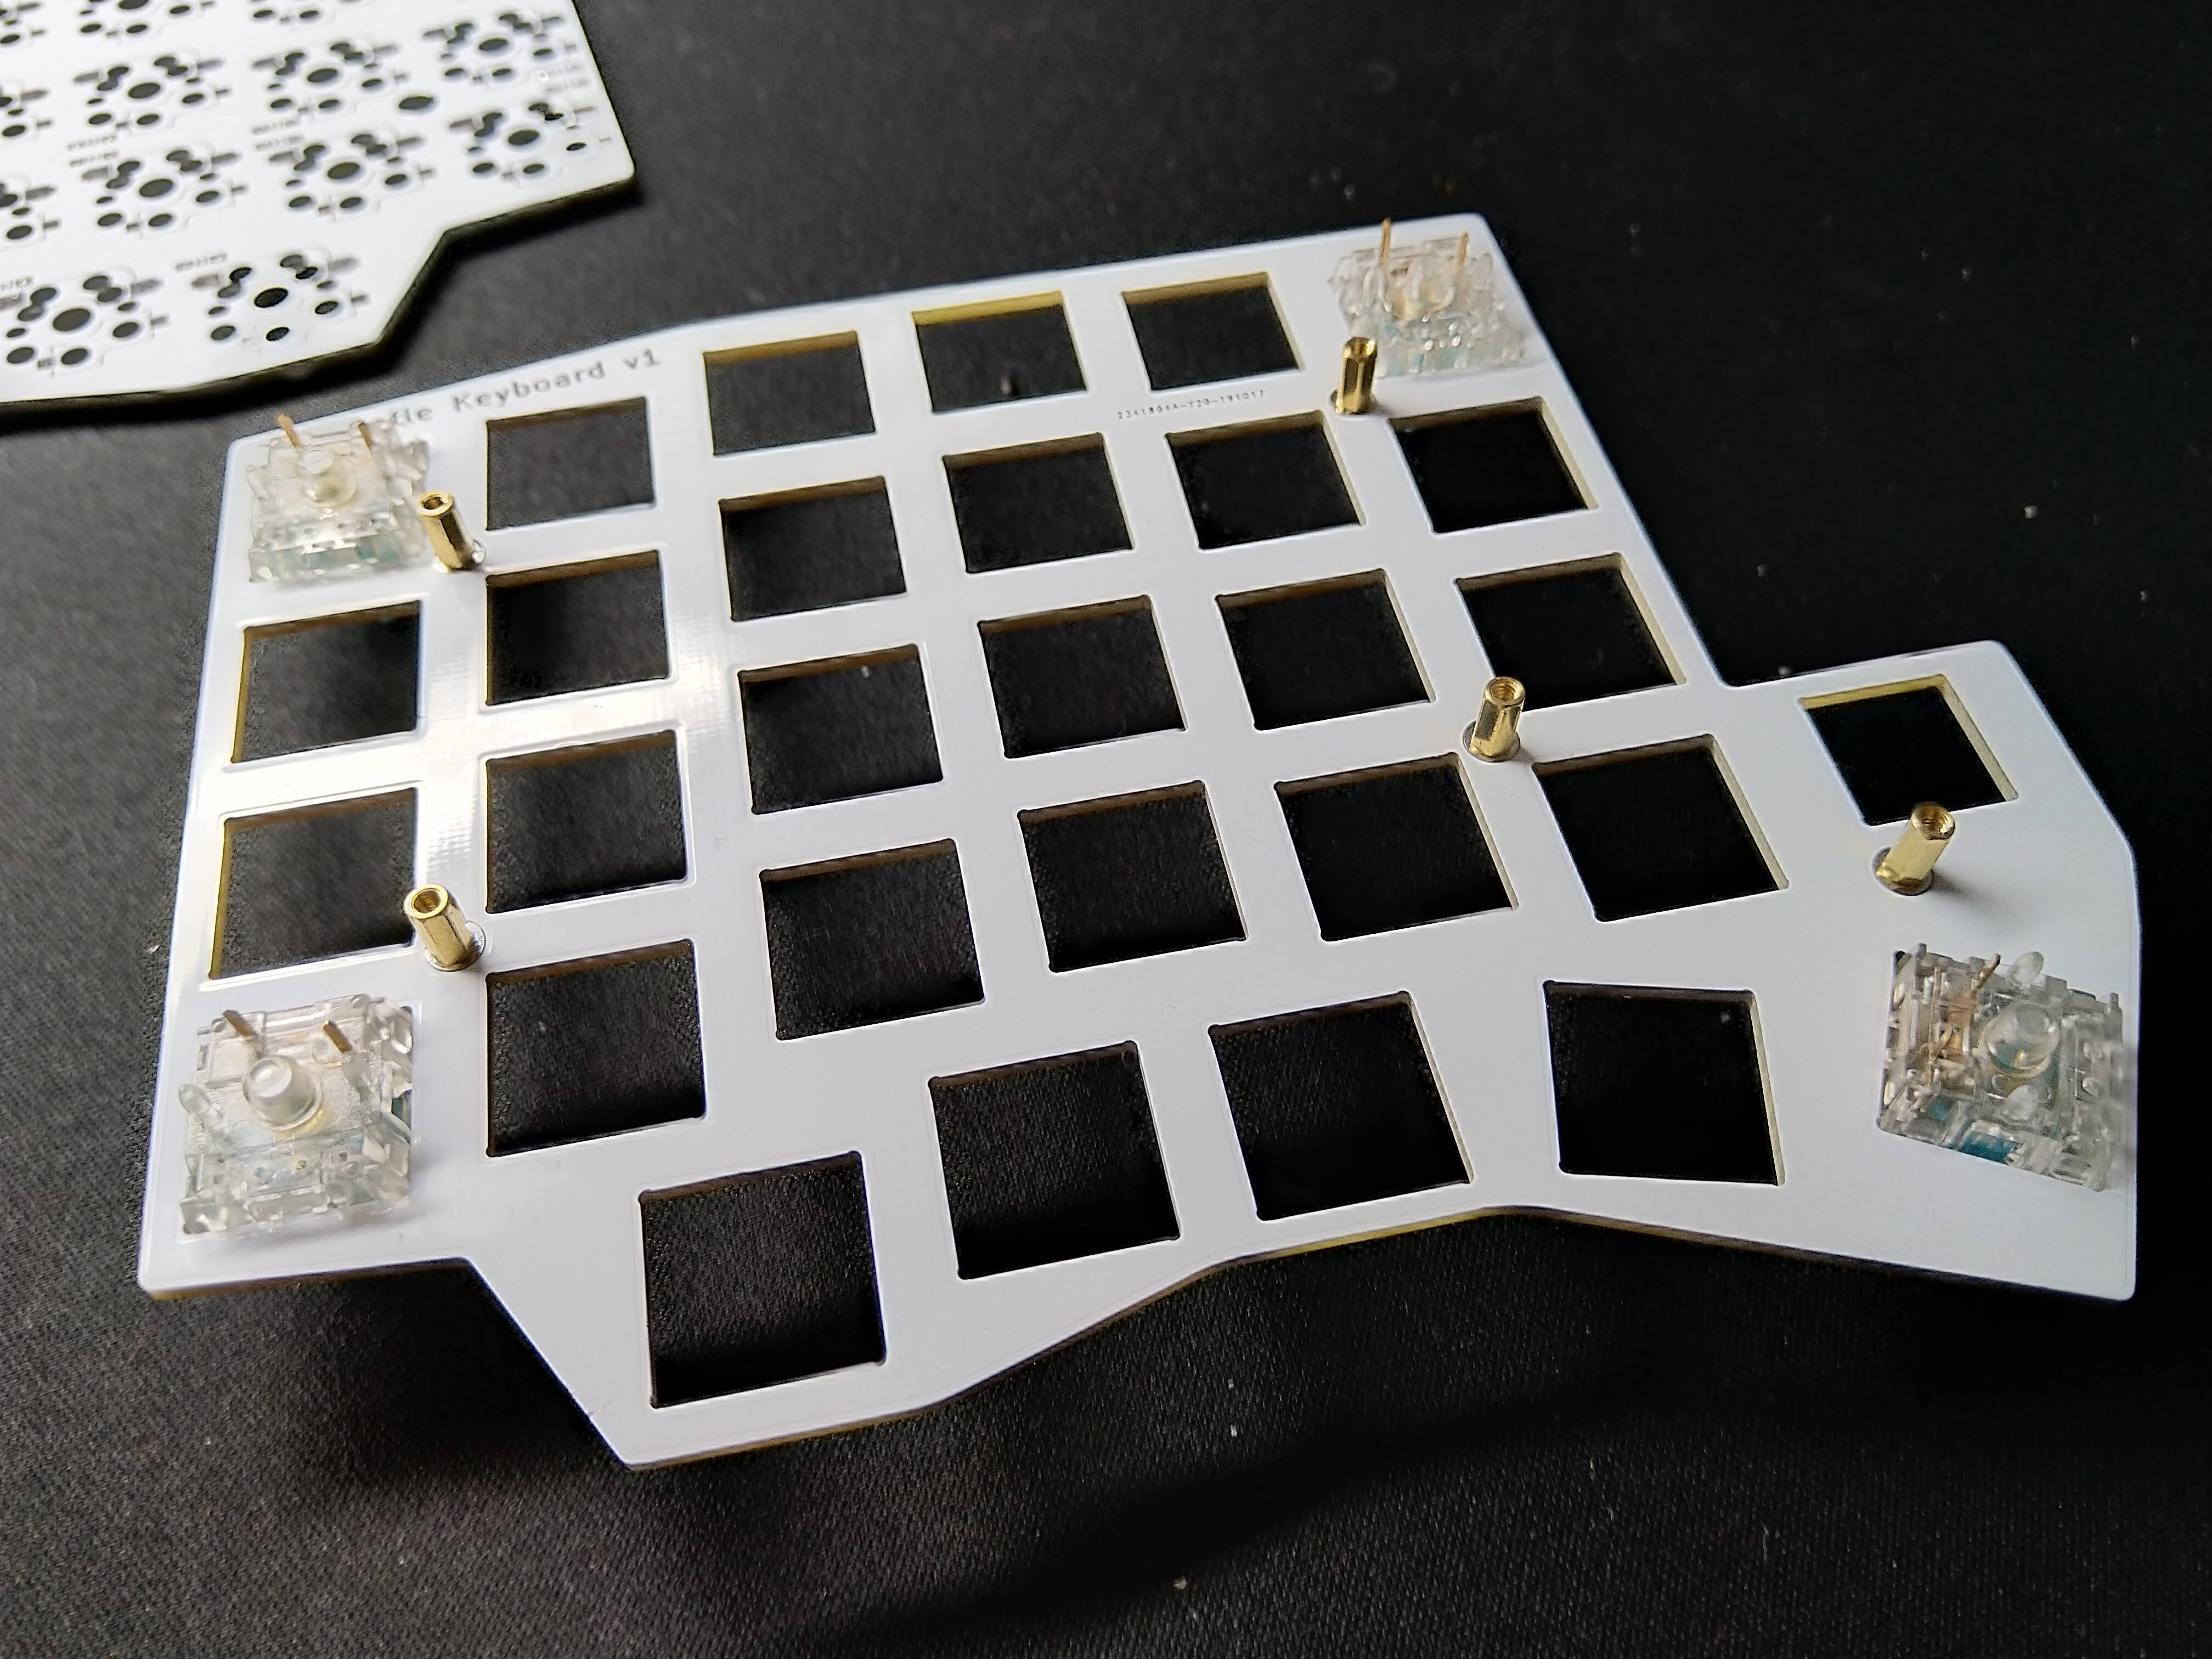
- 10 (+4) M2 spacers9. 10 are going to hold the bottom and the top together. Their height depends on which switches you use. A build guide Lily58 Pro suggests
4mmfor Choc and7mmfor MX. I was not able to get7mm, but6mmworked well for me with MX switches. I used brass ones but you can also buy nicer from anodised aluminium. Another 4 would be needed to hold transparent OLED cover but even though there are mounting holes in the PCB there is no OLED cover designed yet. - 20 (+8) M2 screws. 20 are going to hold the boards together (via spacers). I used some I had in my stock so I am not going to tell you exact length. But they need to be long enough to fix a
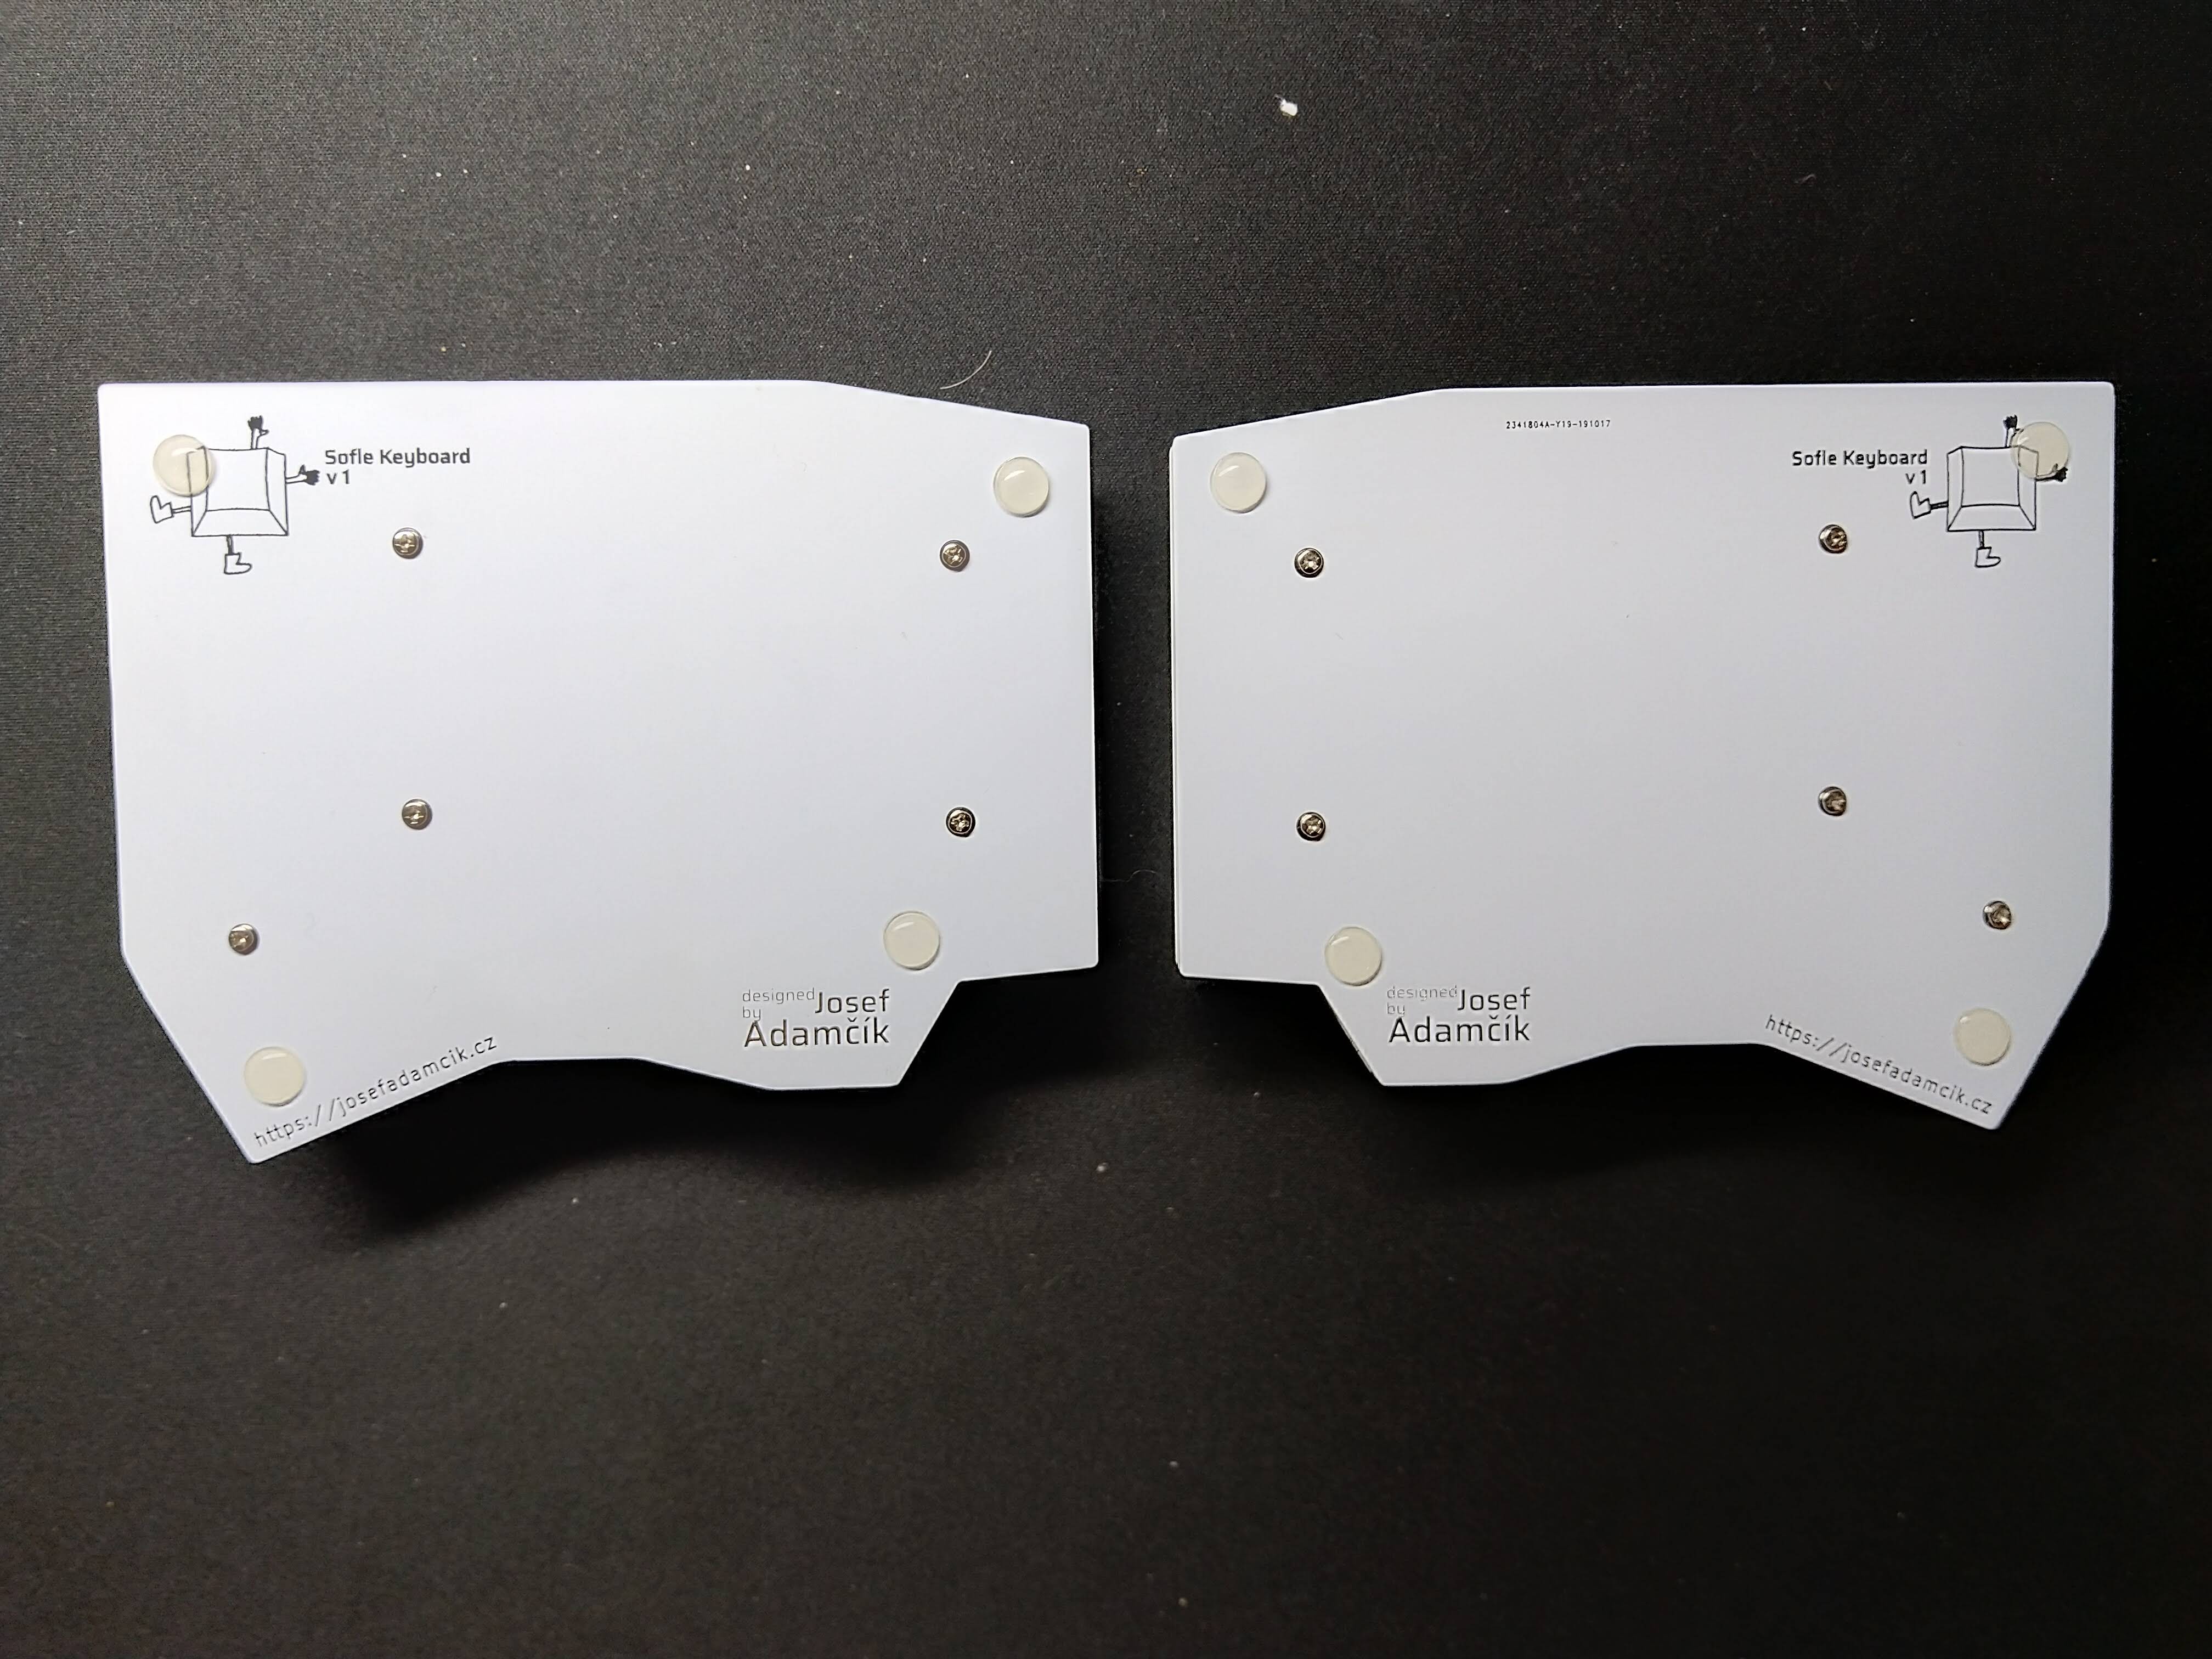
1.6mmthick PCB to the spacer and short enough so two of them can fit in one spacer (might be trickier with 4mm spacers for Choc switches) - 8 - 10 adhesive rubber feet10. They are really important, trust me.
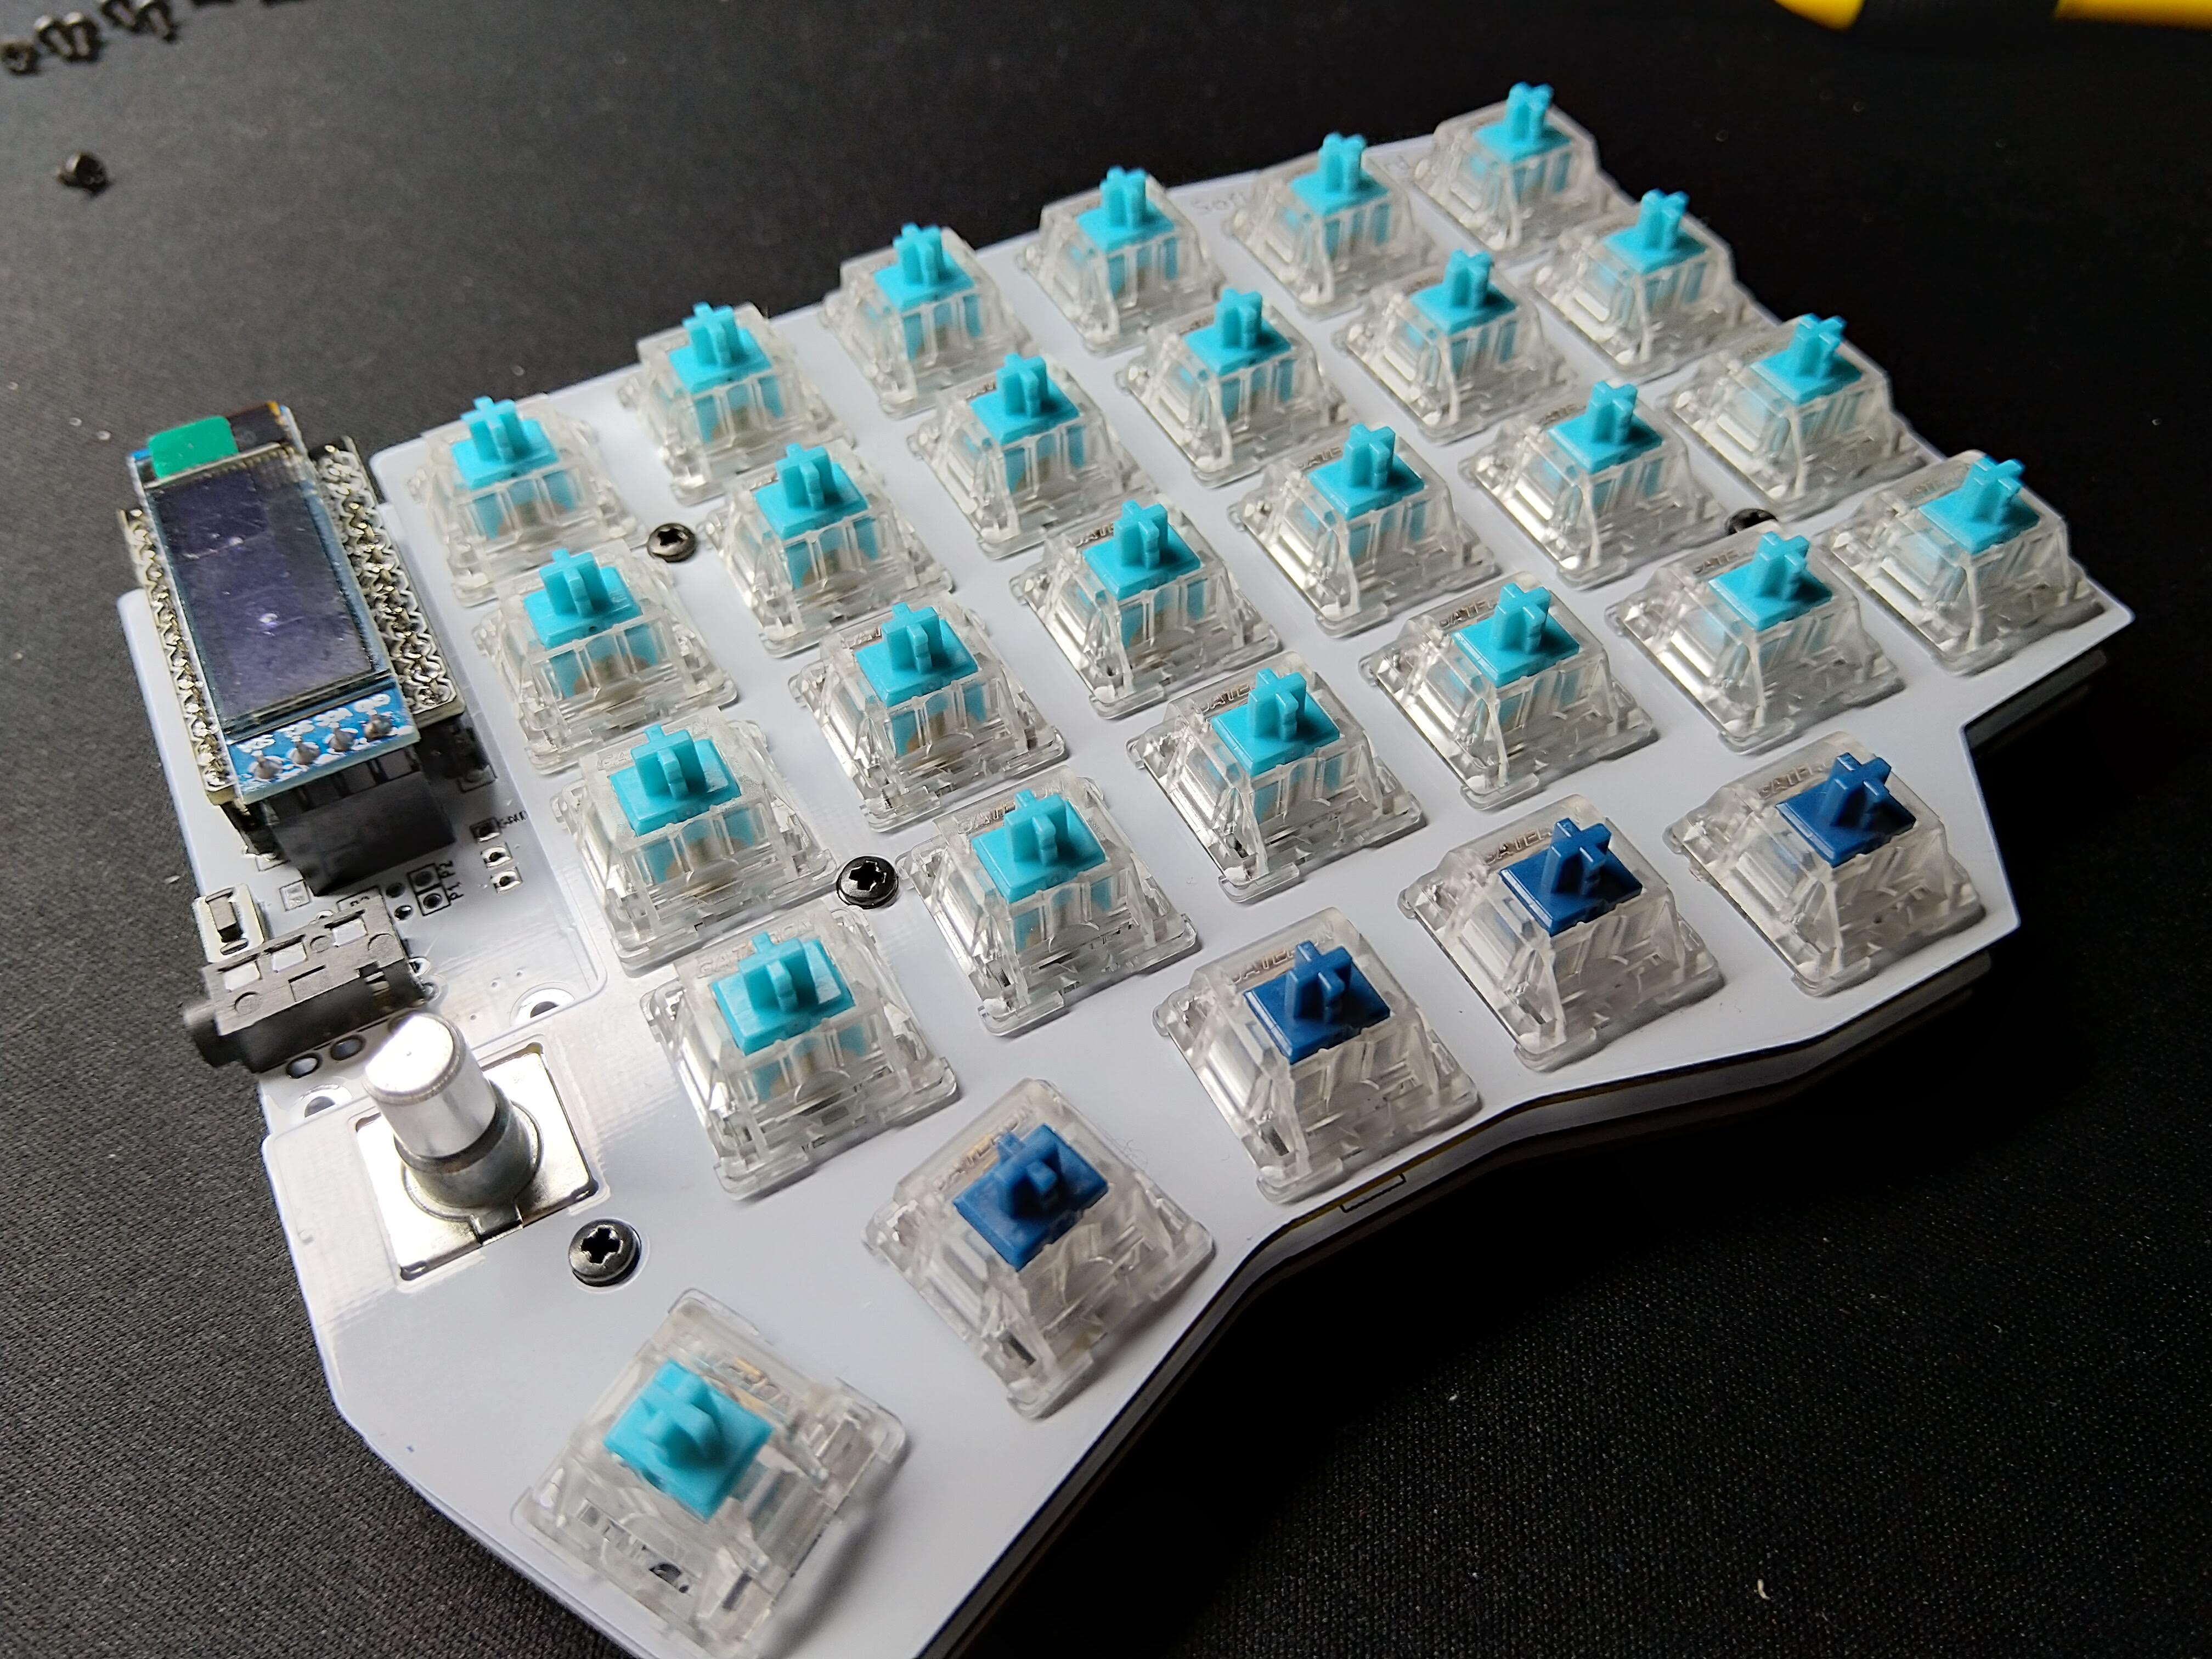
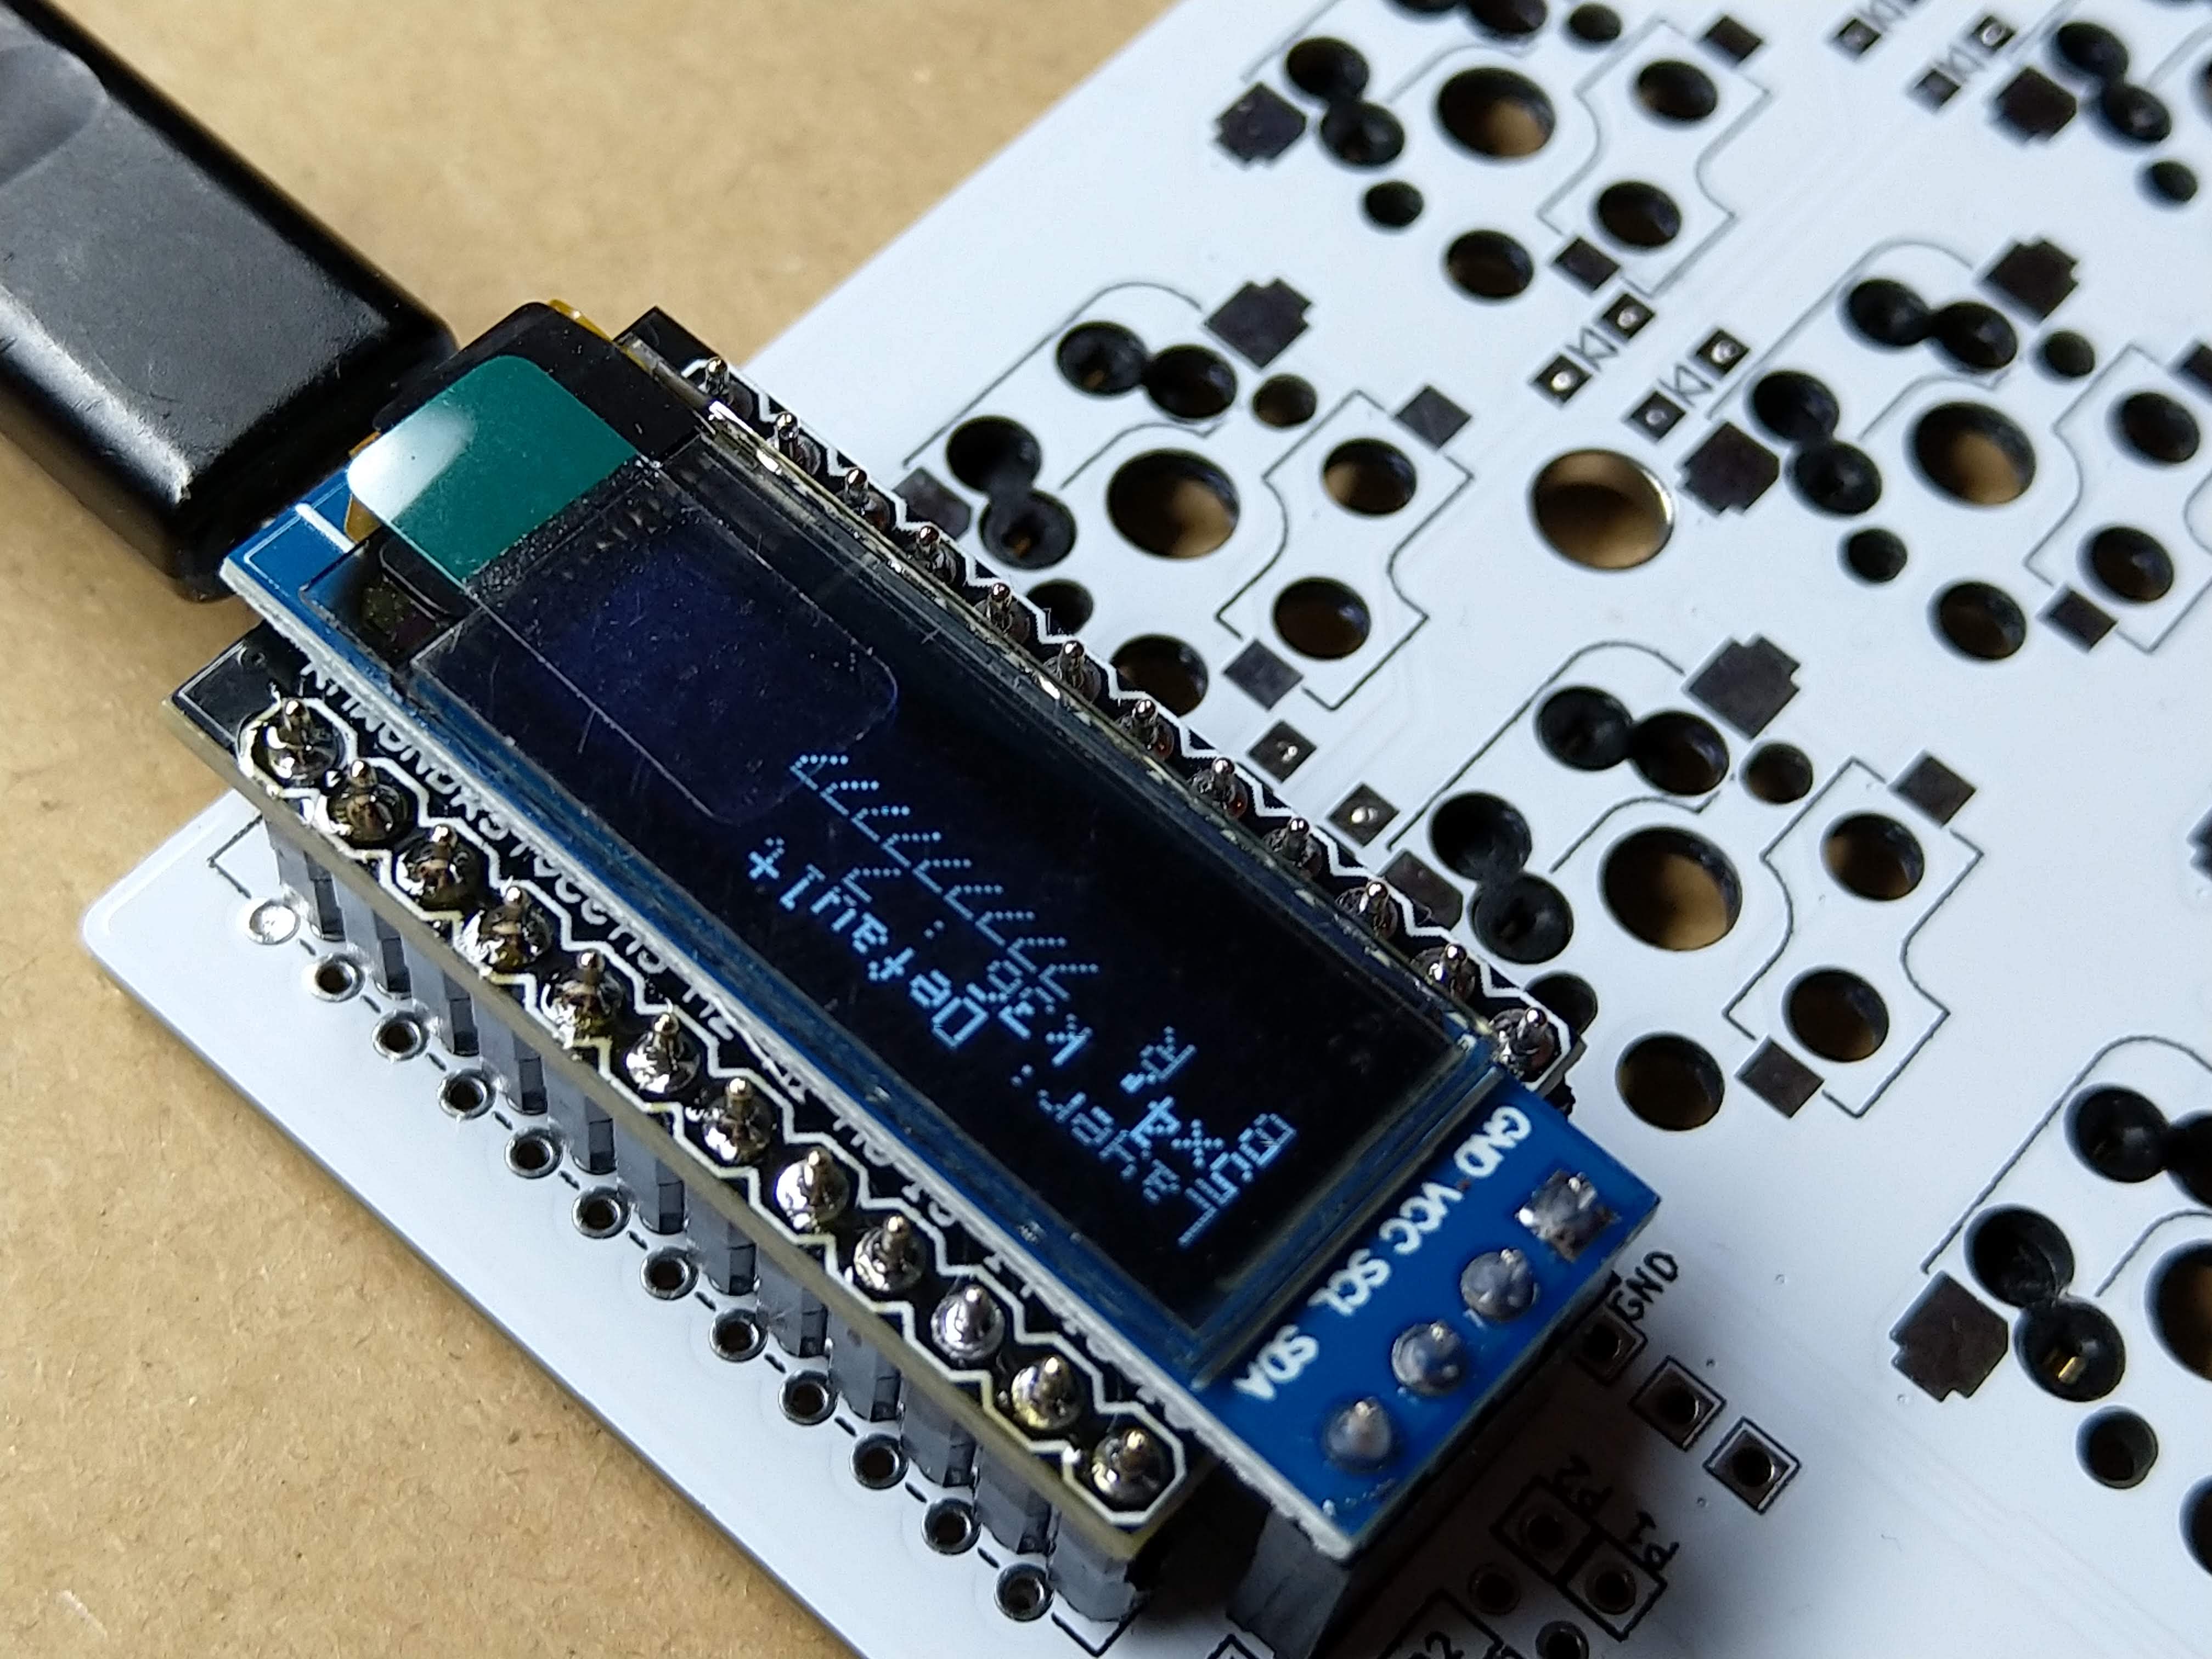
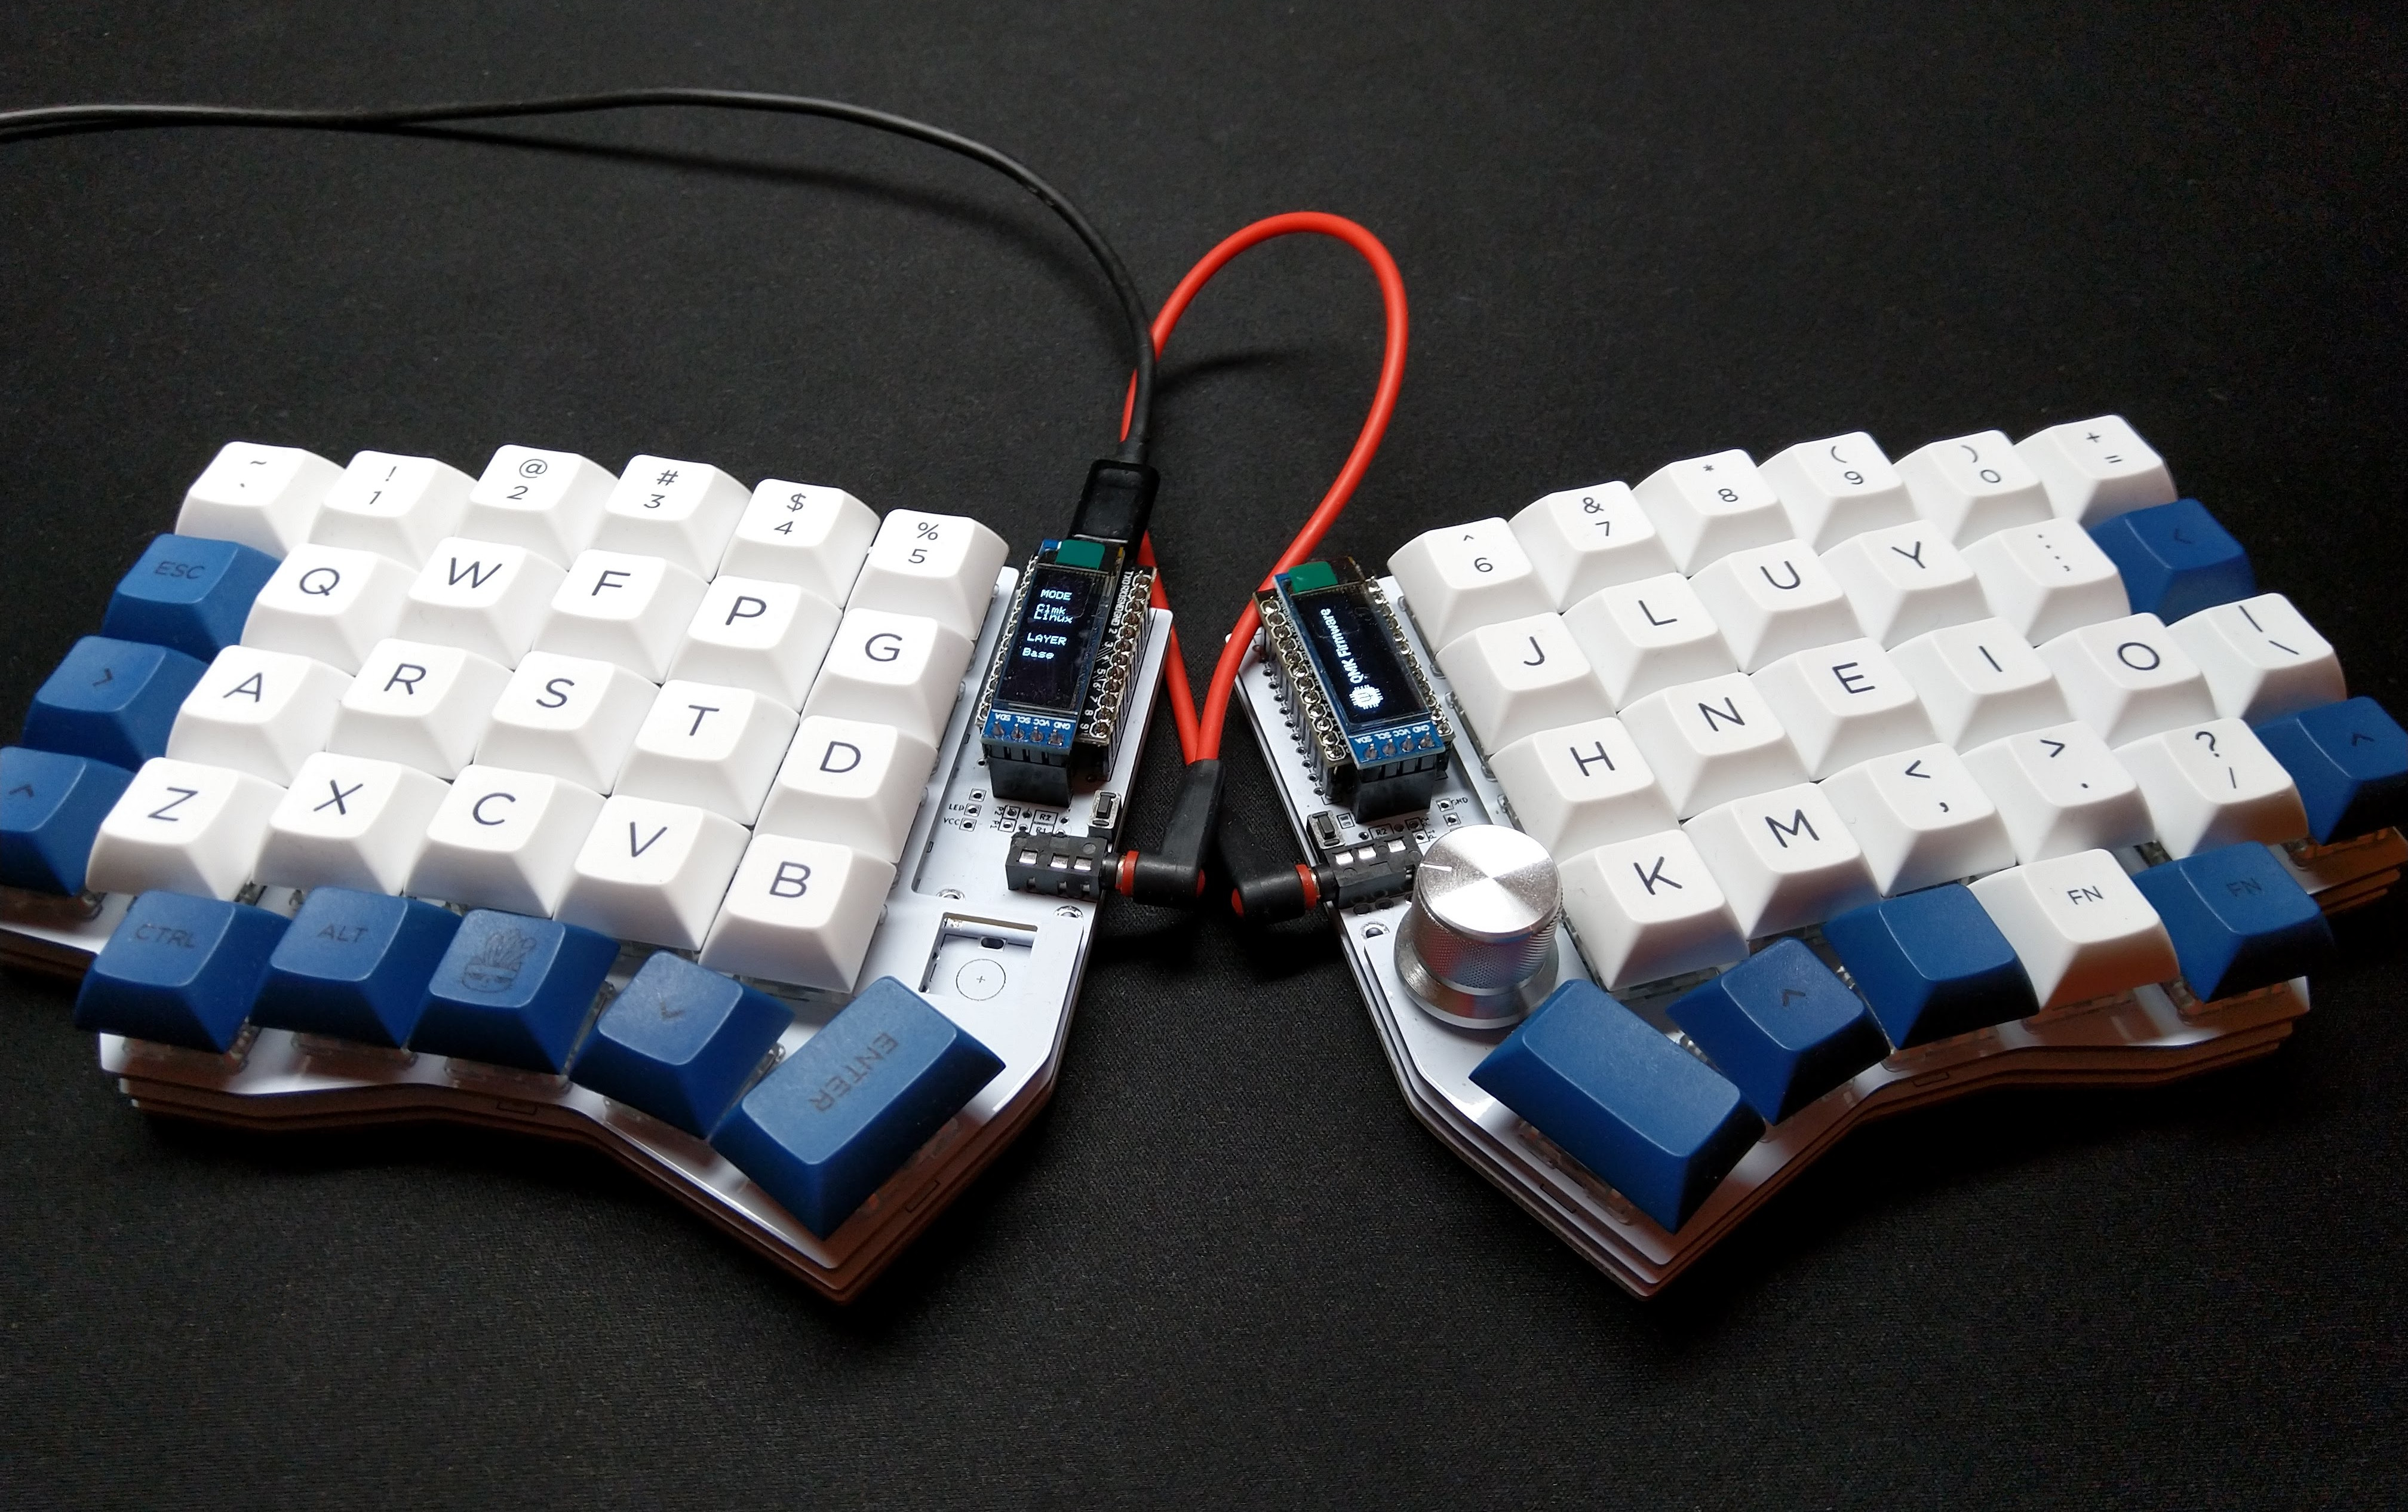
- 2 ssd1306 128x32 OLED display module11. Very common everywhere.
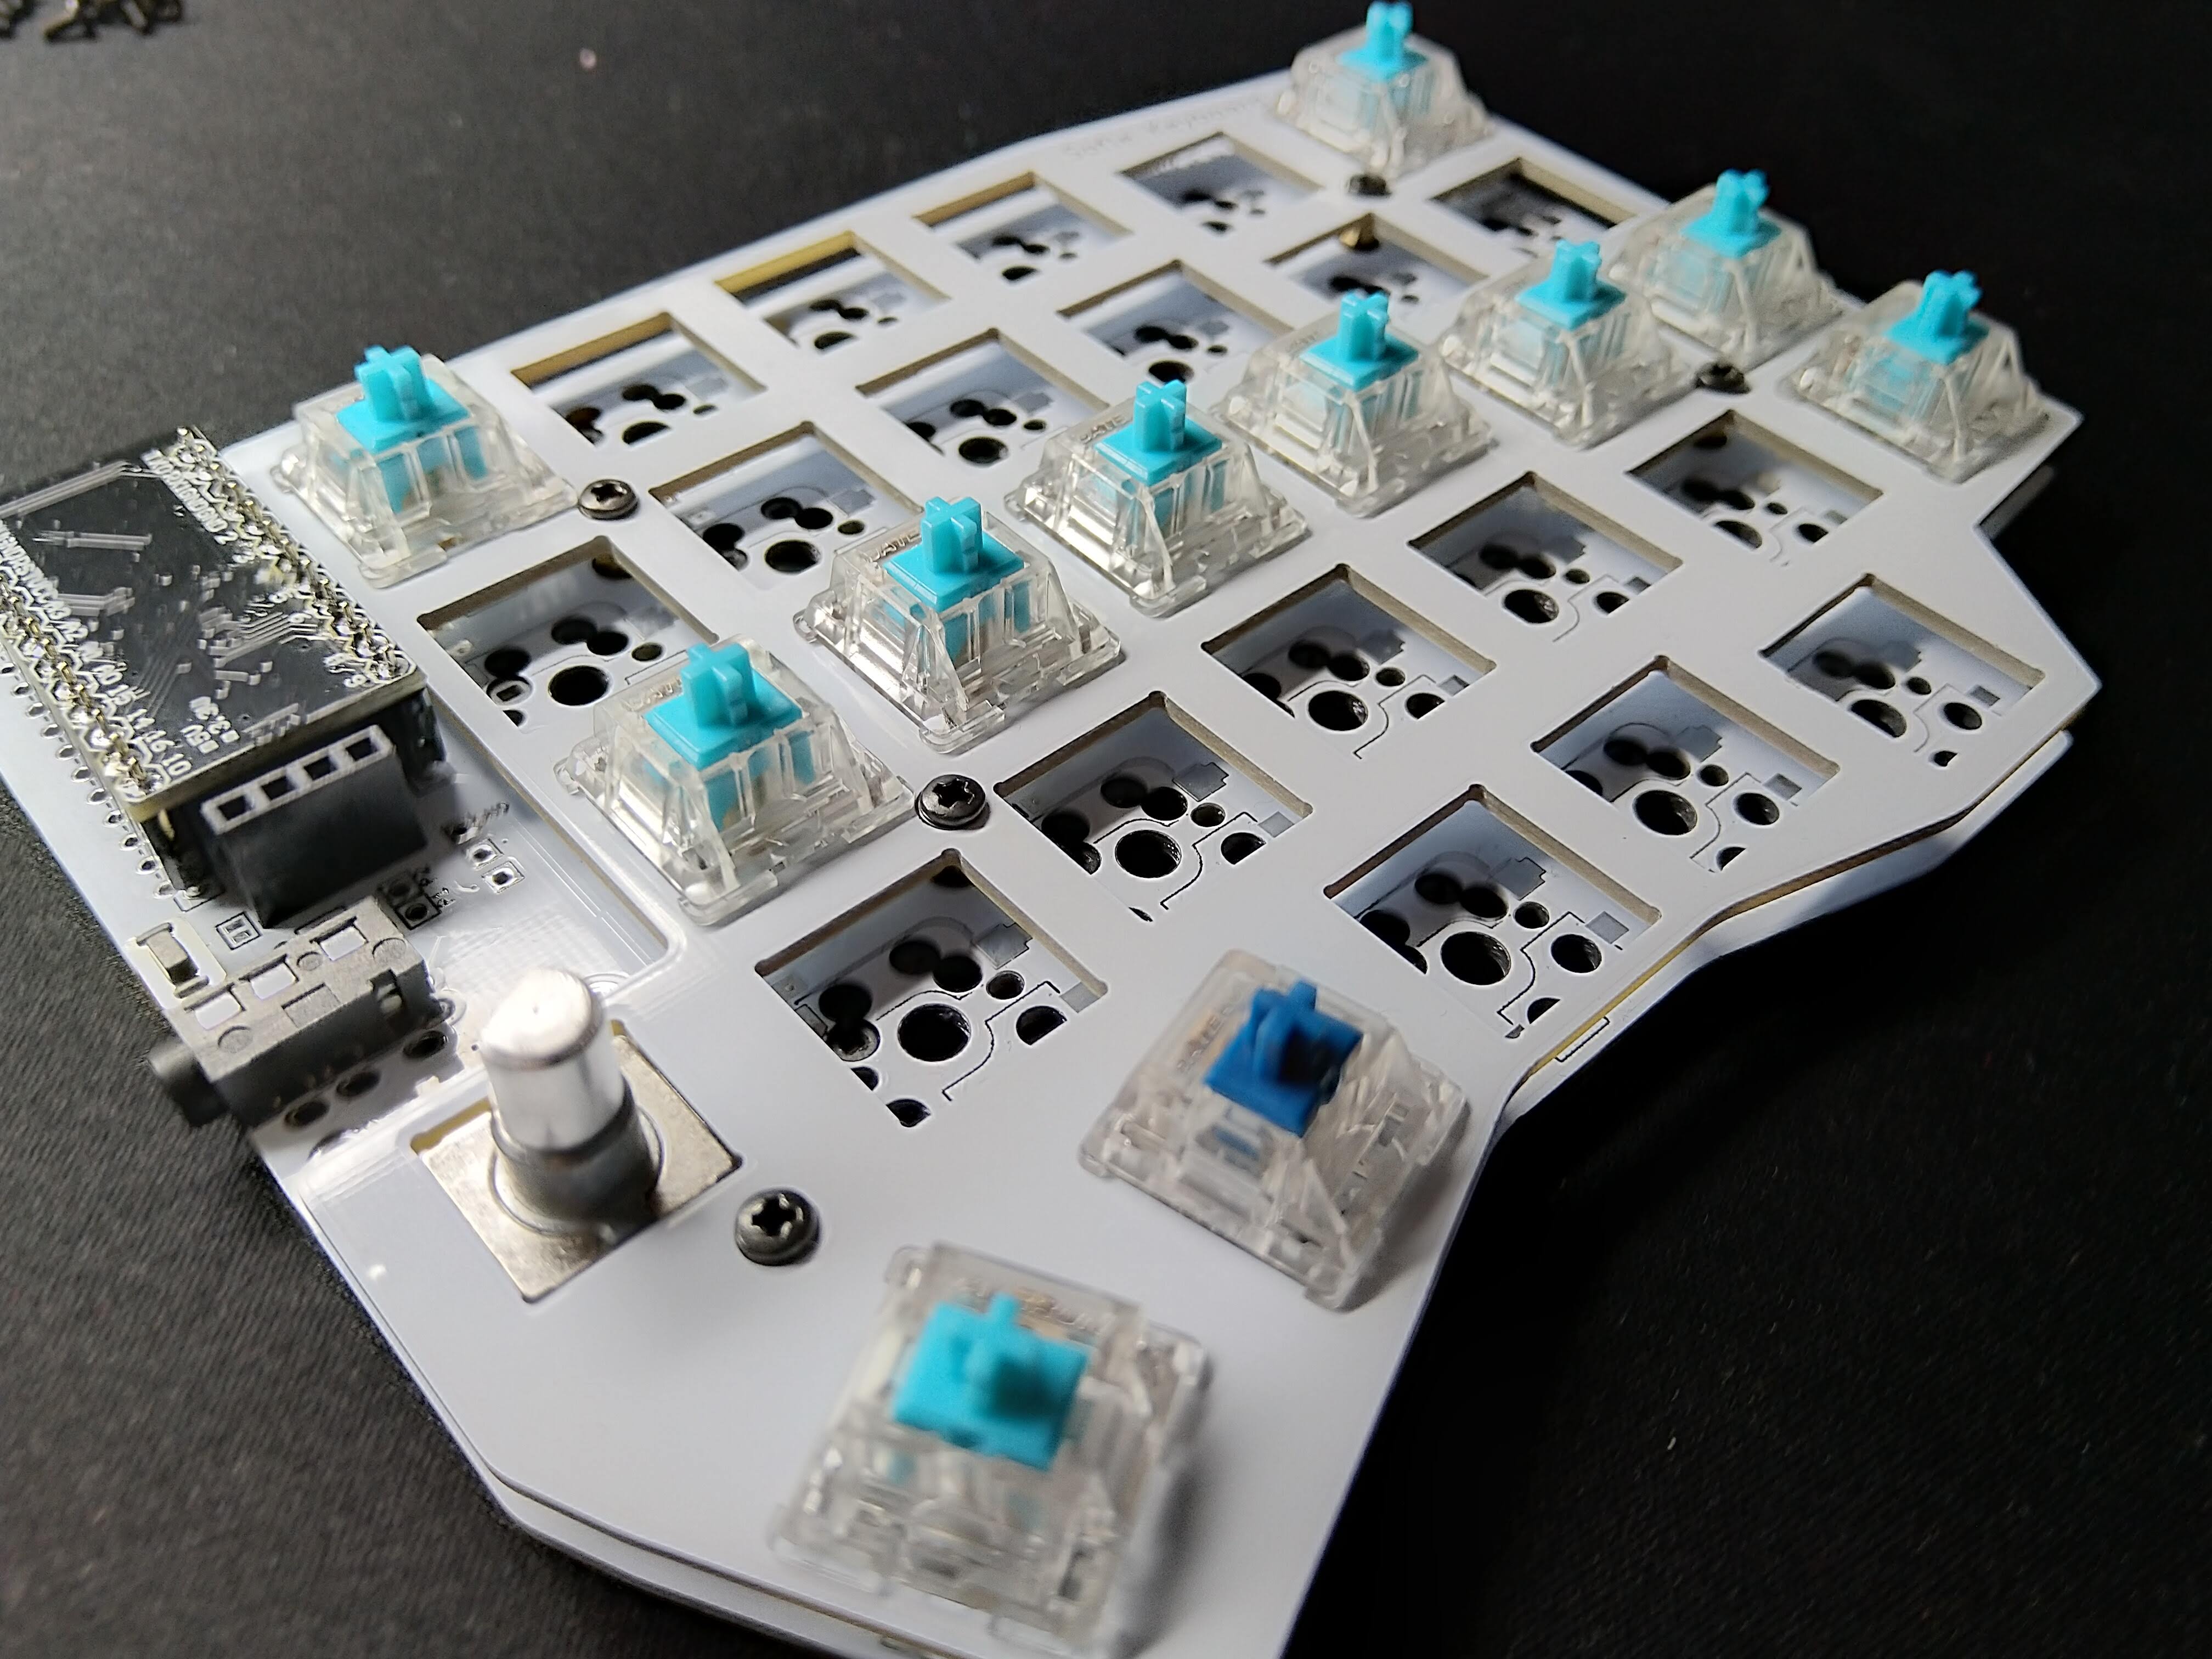
- 2 Rotary encoders EC1112, optional. So far I have used only one but 2 are supported. If you are not sure take EC11E. Some other variants (EC11K) may have some additional plastic pins for and require mounting holes for them (which are not included on the PCB).
- A matching knob13 for each encoder.
- 2 Pro Microboard or clone14. With 2x12 pins and ATmega32U4 microcontroller. Just make sure you don’t buy something like Arduino Micro (a different pinout) or Arduino Mini (different microcontroller). You could also use Elite-C which basically Pro Micro with USB-C.
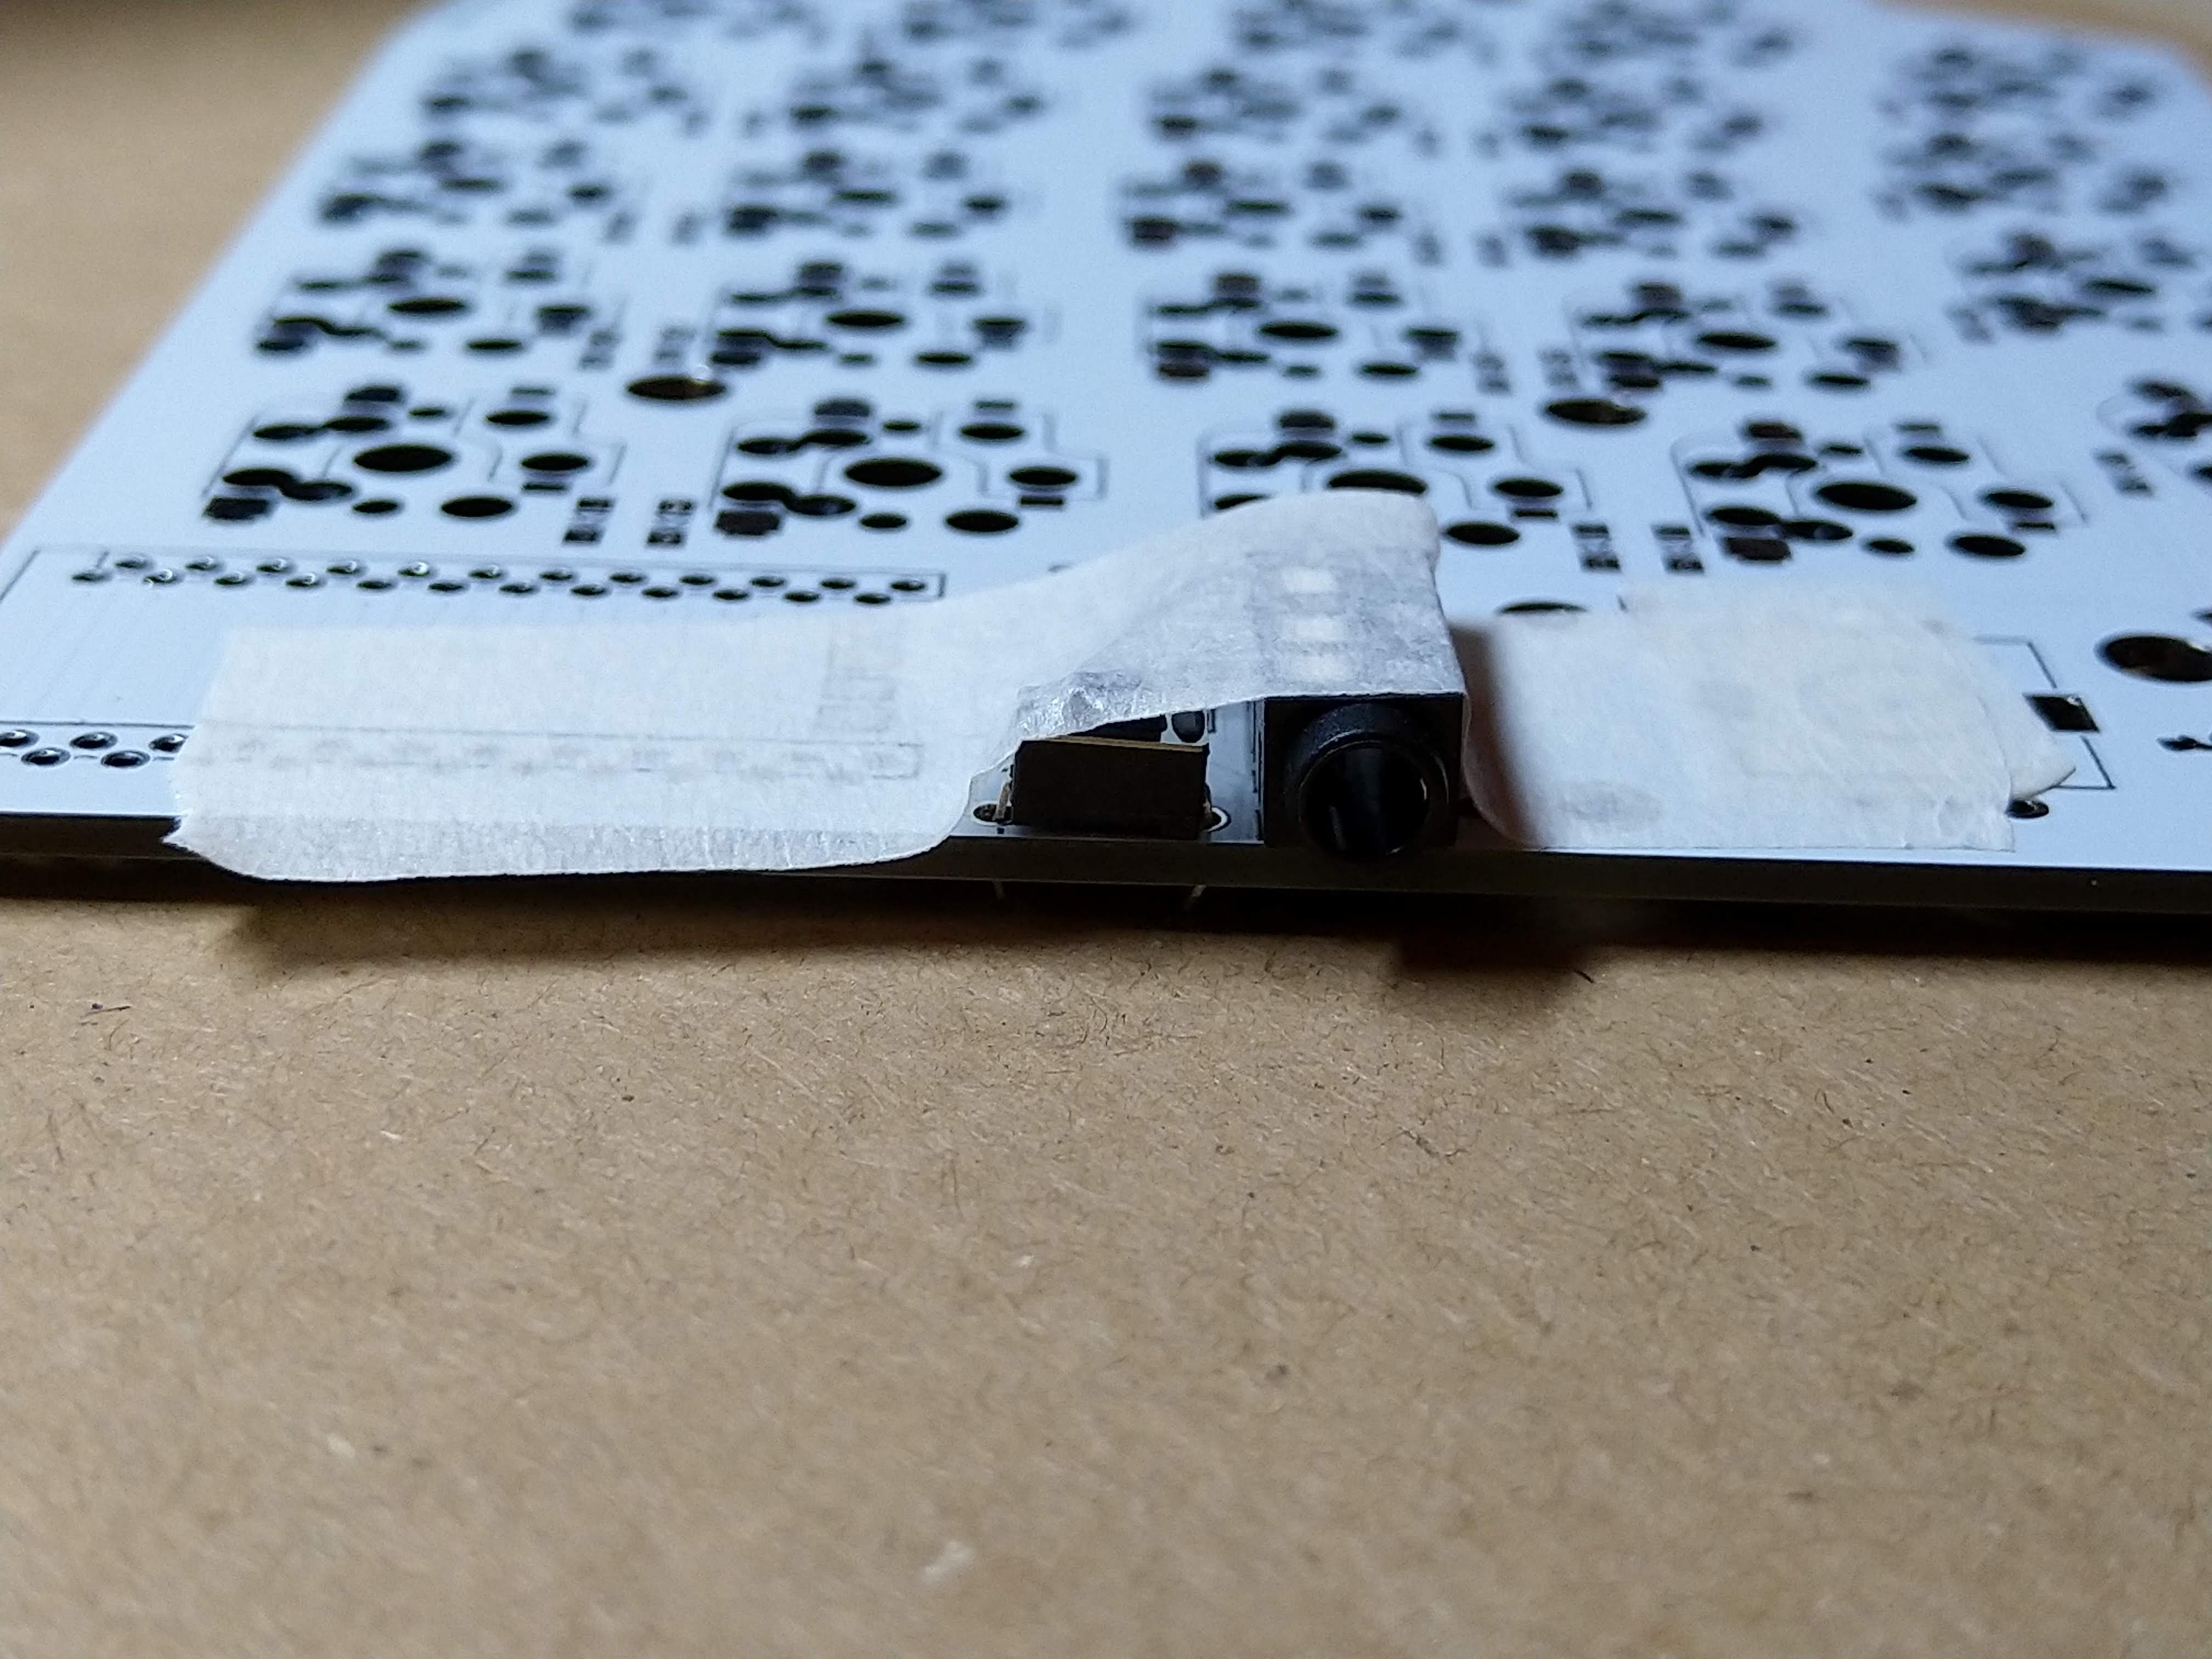
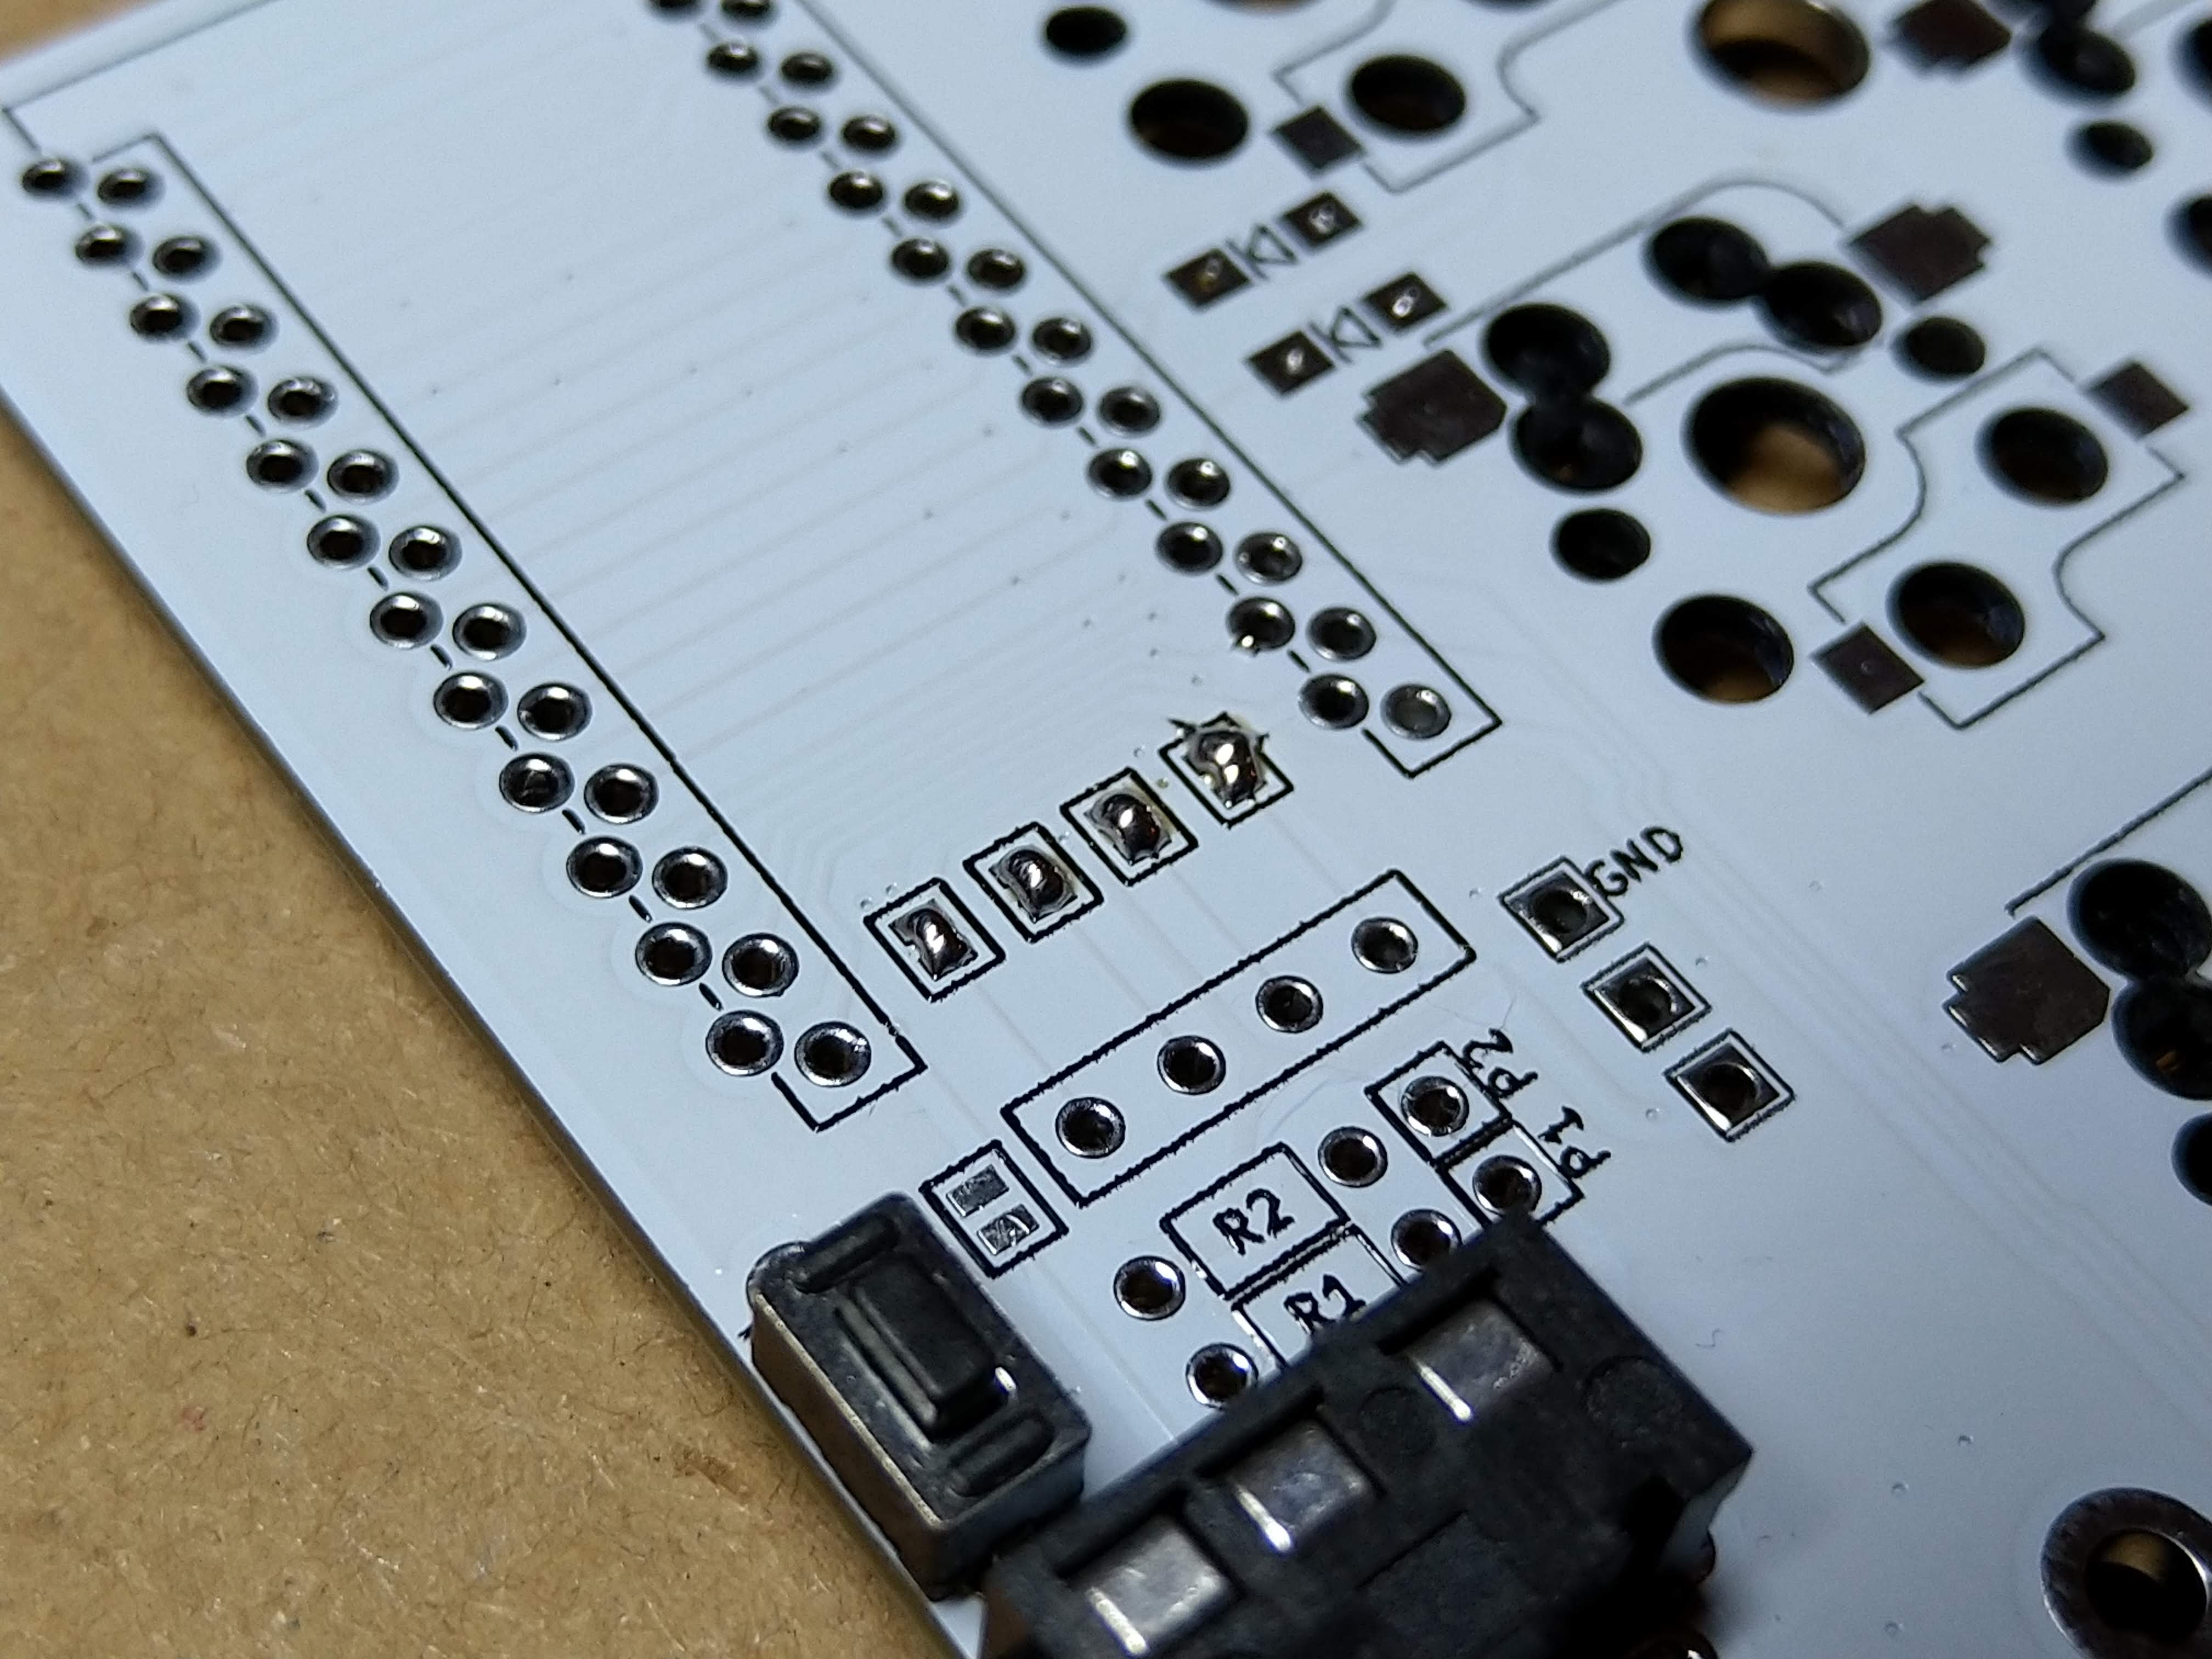
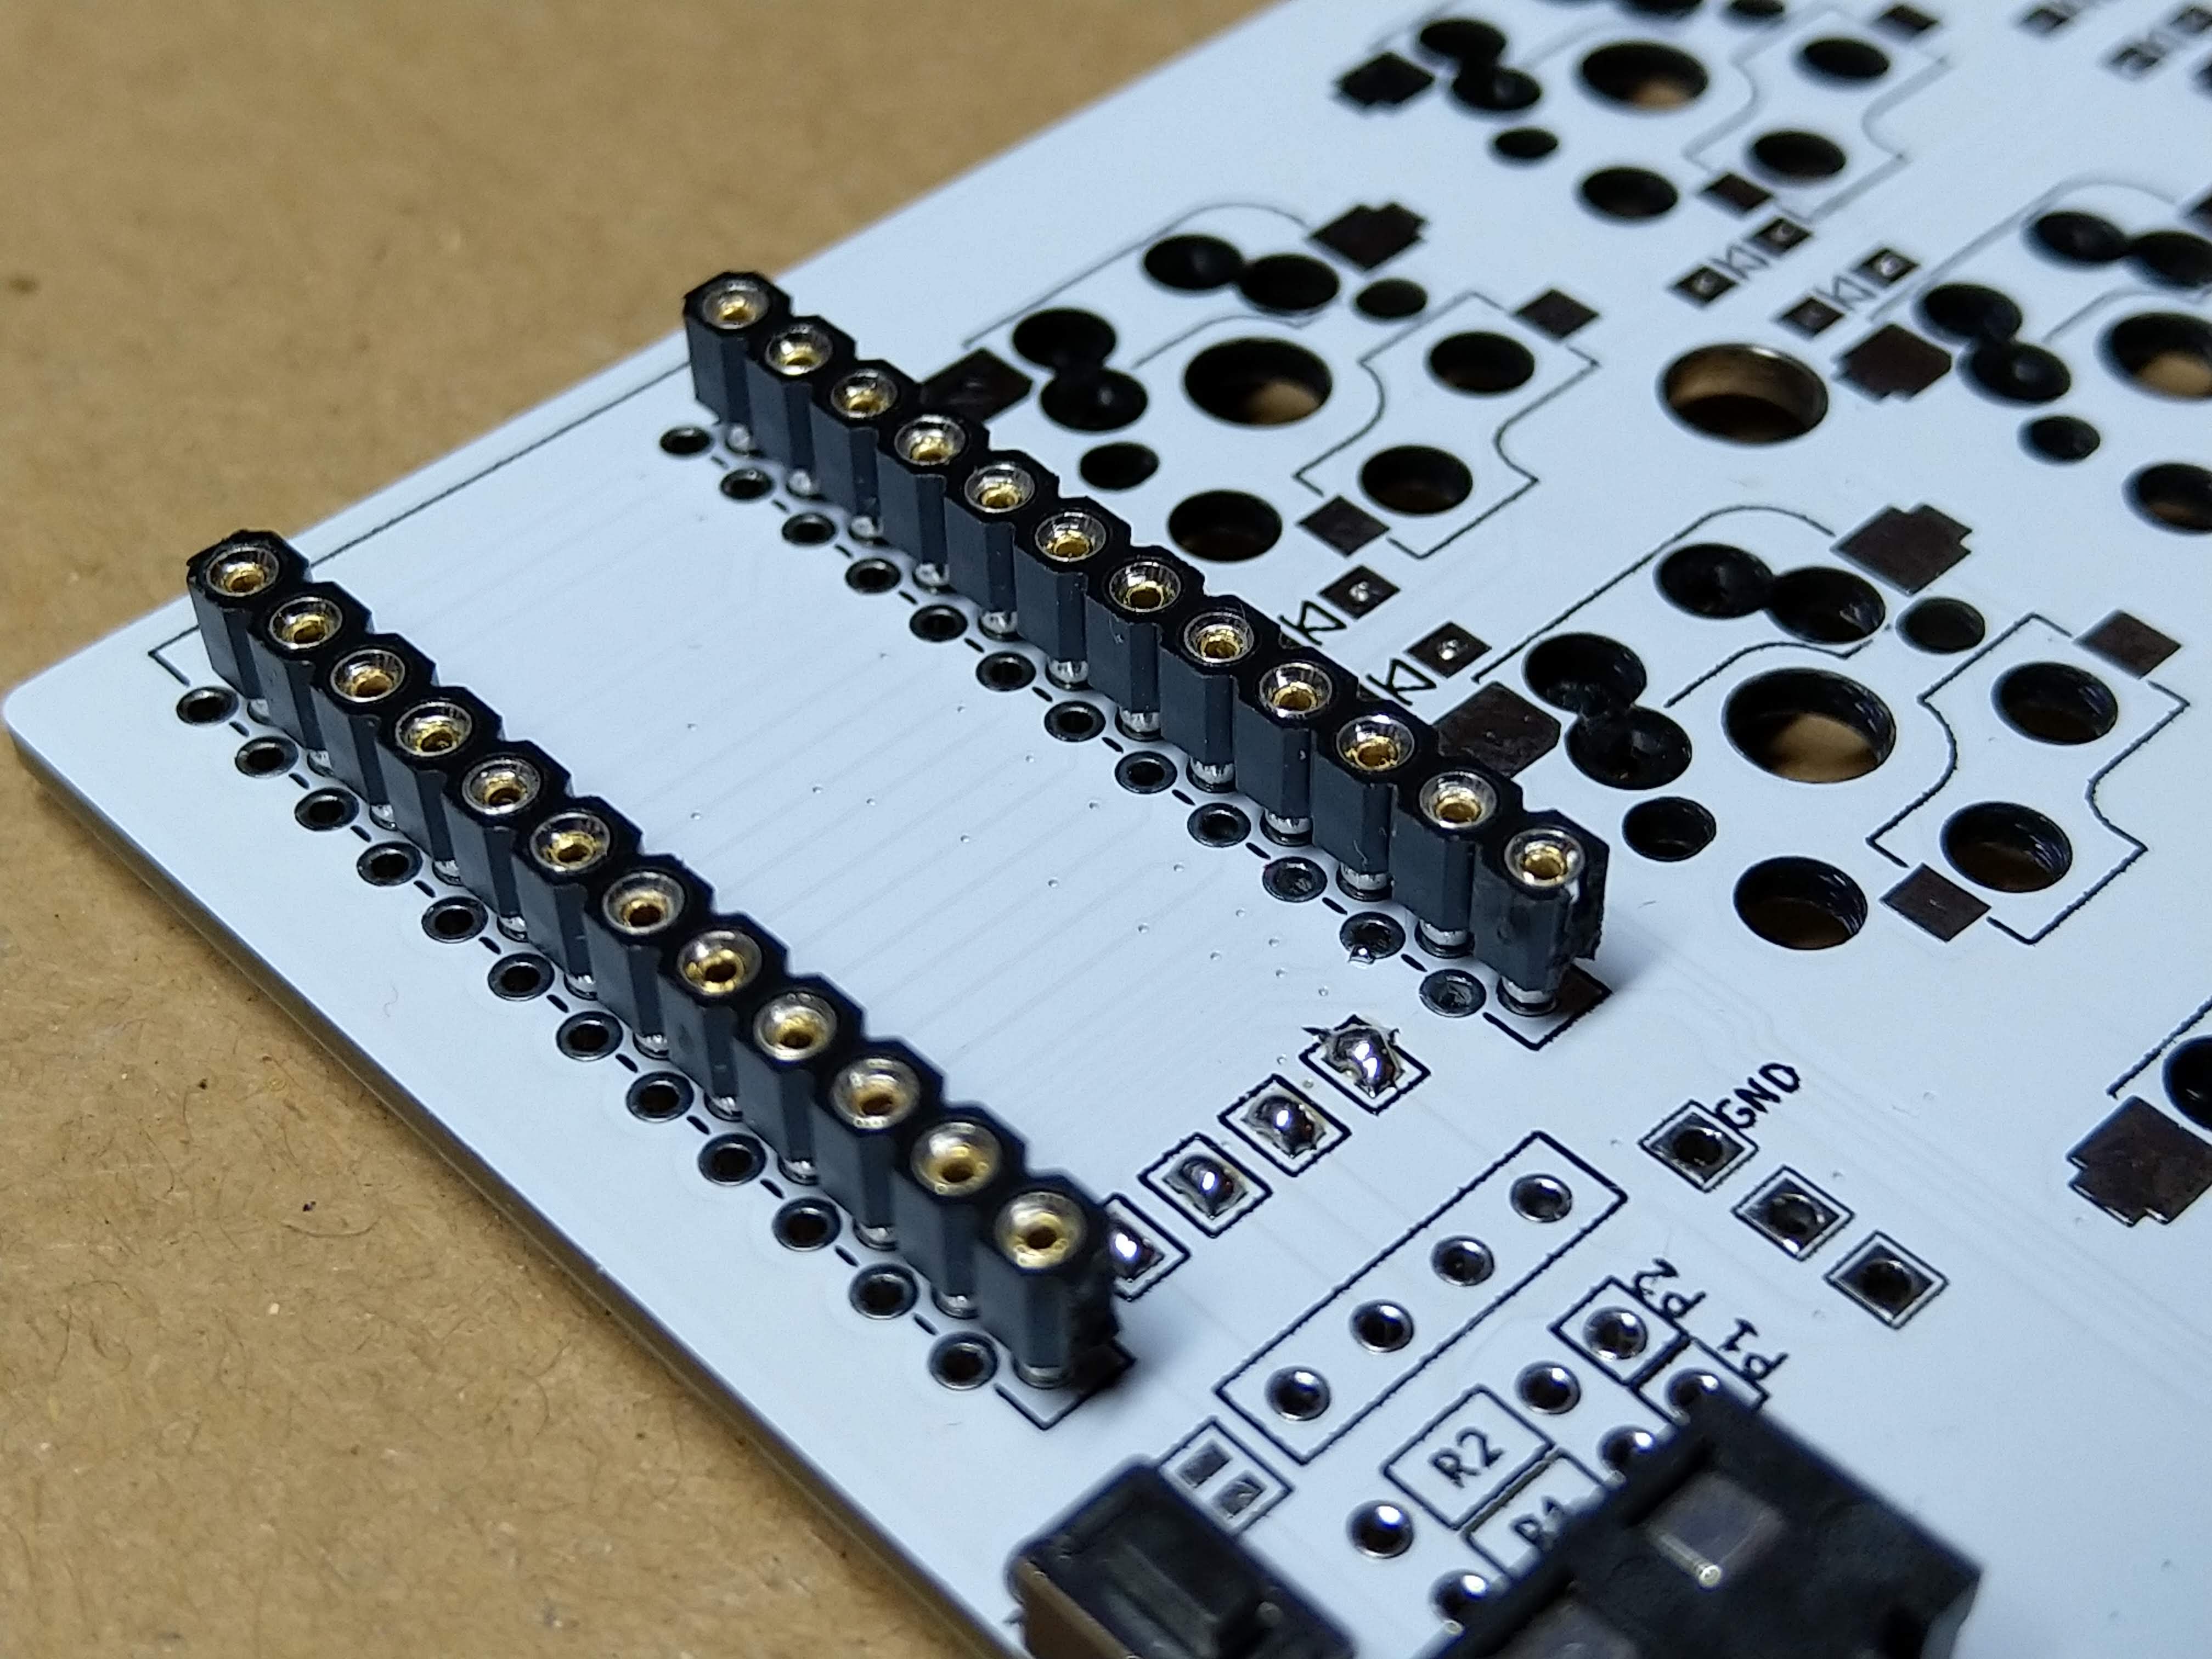
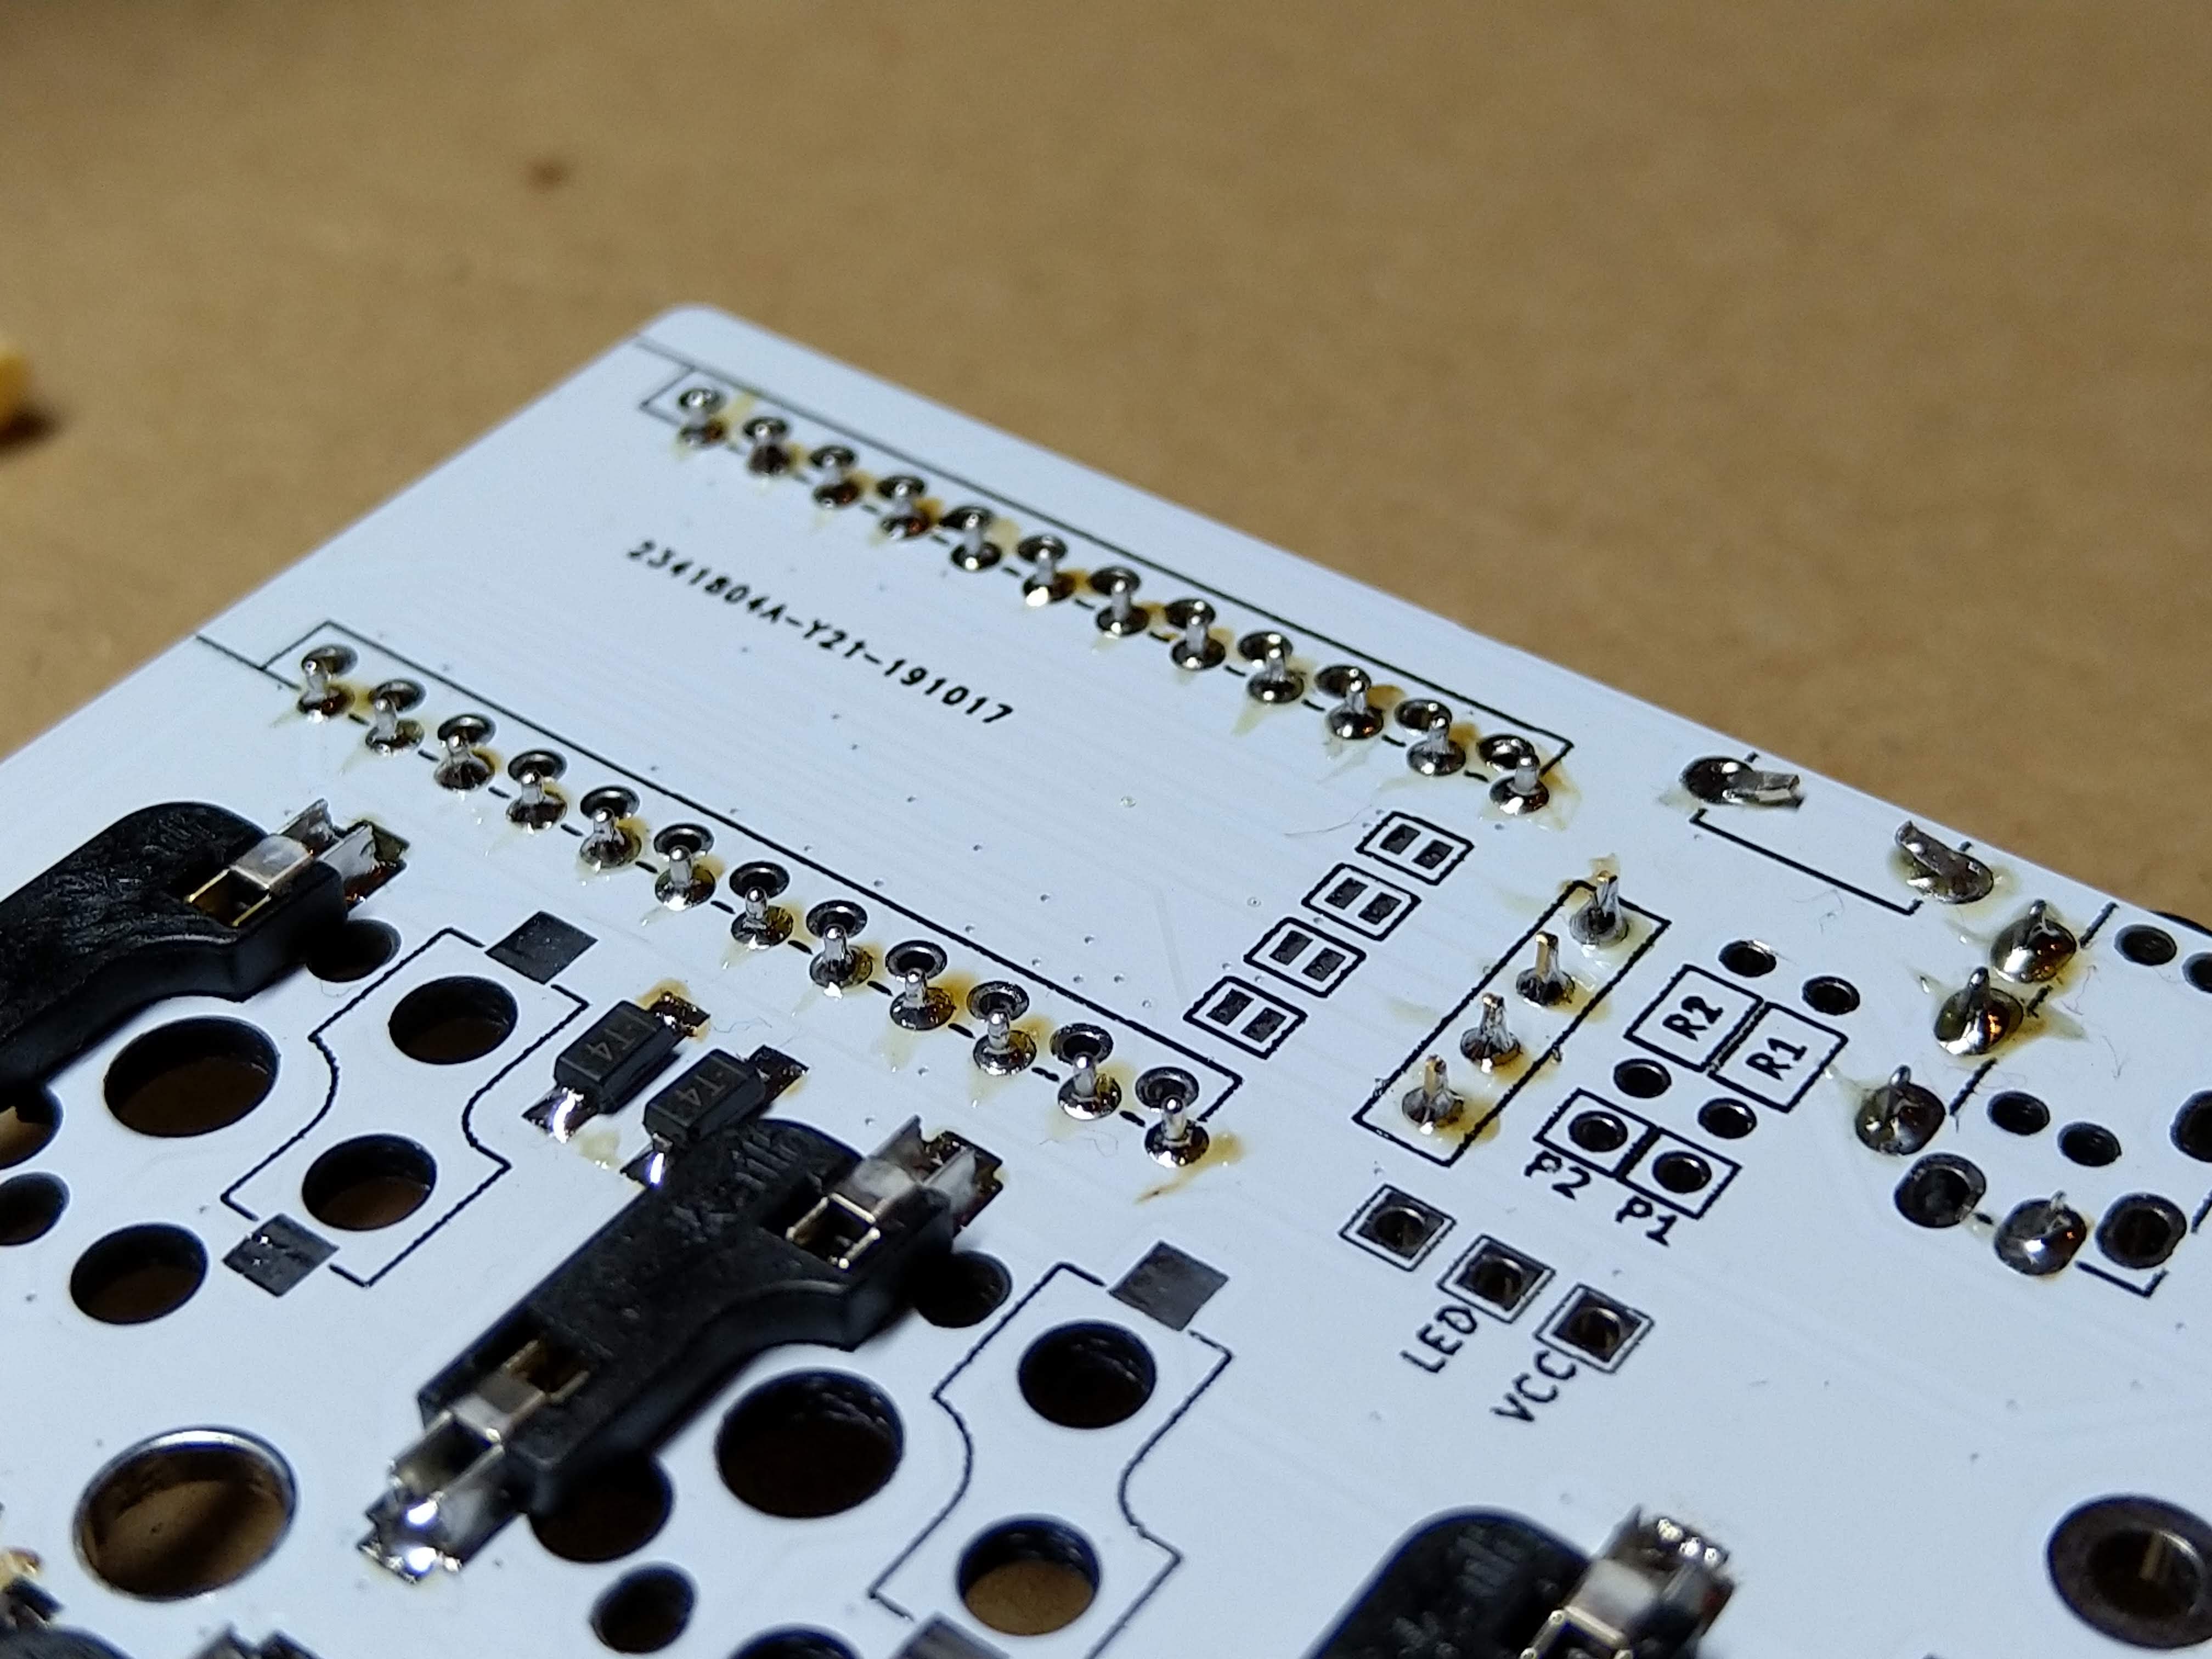
- 4x12 pin header (and optionally socket) for Pro Micros. There are several ways how to mount Pro Micros to the board. Either the male PIN headers you most likely got with the board from the supplier could be used to solder it directly to the board. Build guides for Helix, Corne and Lily58 suggest those spring pin headers which are very compact and give you non-permanent connection (you can remove or replace Pro Micros). But the link goes to a Japanese e-shop which is not shipping to Europe. I haven’t found any other place where those are available. All I can find is Japanese datasheet and this e-shop. I ended up using low-profile round pin headers which take a bit more height but also allow me to remove Pro Micros and use them elsewhere. But for Corne, I just soldered them permanently. Another possible approach is described at splitkb.com.
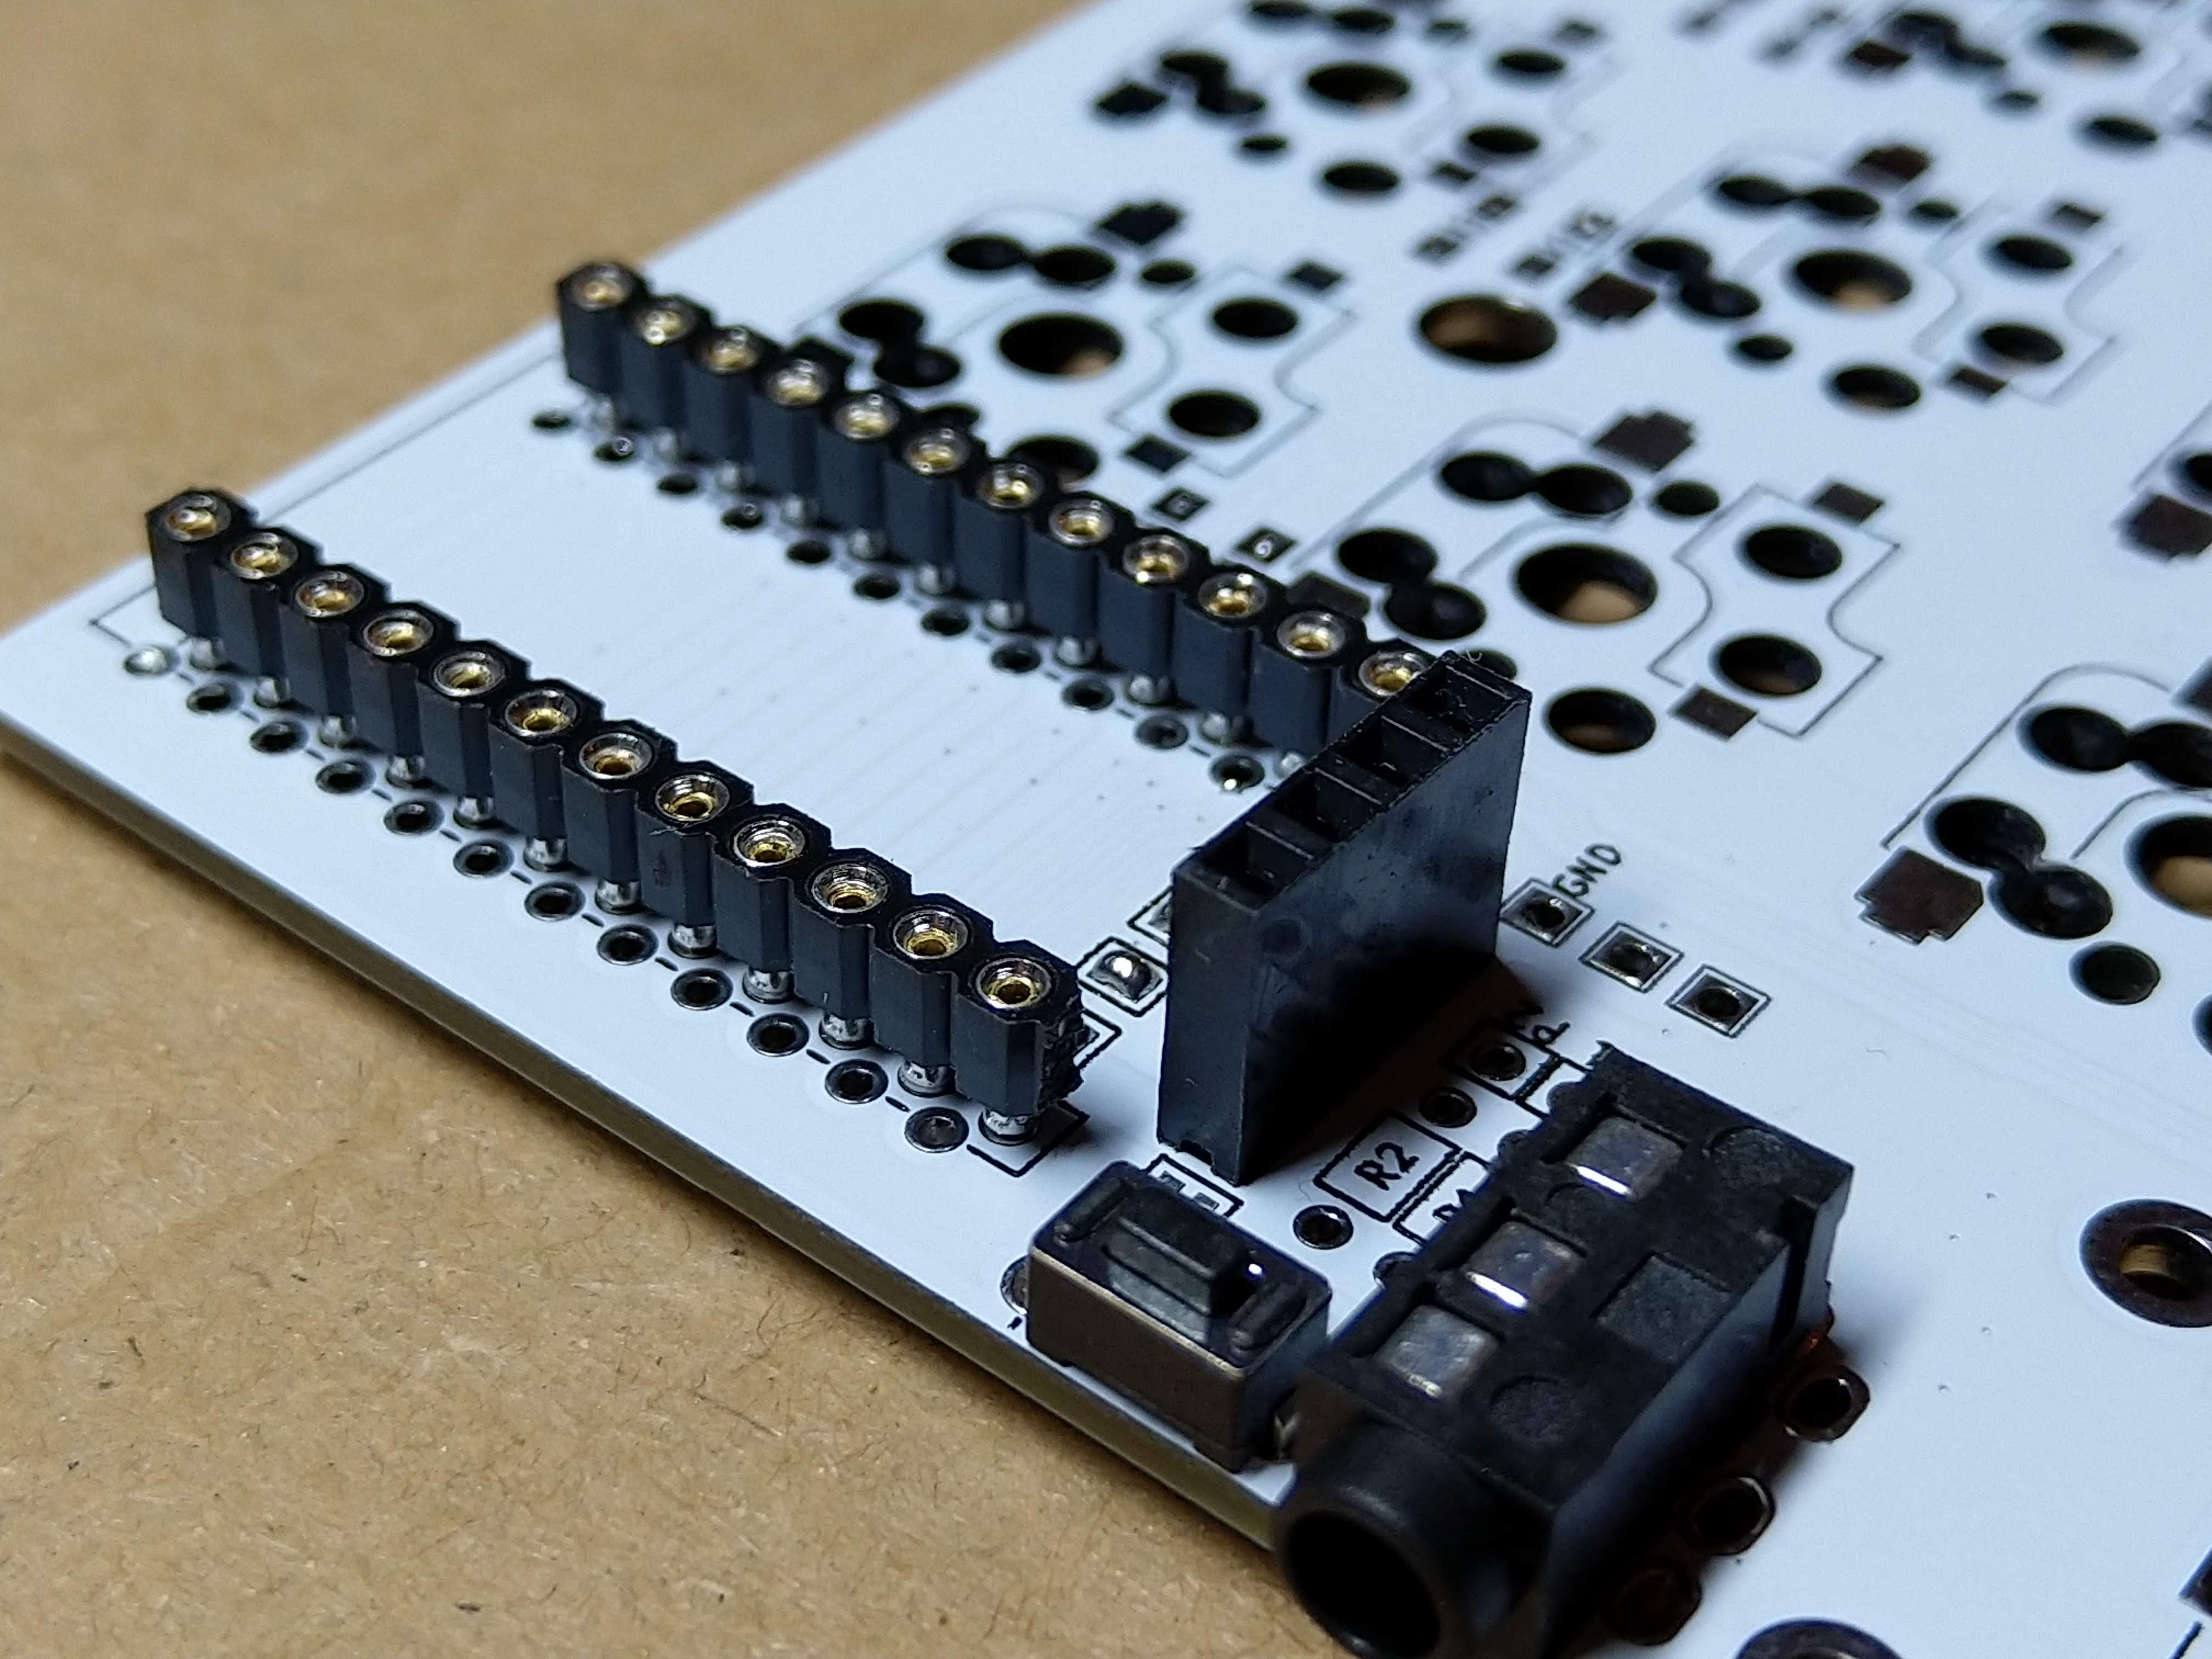
- 2x4 pin header (and optionally socket) for OLEDs. I have used the most common 1x4 female pin sockets which are quite tall but they also fit the height of ProMicro with the sockets I have used. Unfortunately, the pin headers on my OLED modules (again those very common square male headers you would get with the modules) are loose in the sockets. It works but it’s fiddly. I’ll have to find a better solution.
- Micro USB Cable to connect the keyboard to a computer.
That’s it. There are no RGB LEDs on the board. But if you really need underglow it should be possible to connect RGB LED strip since there are 3 pads (VCC, GND and data) on the board. You would need to figure out support in the firmware on your own.
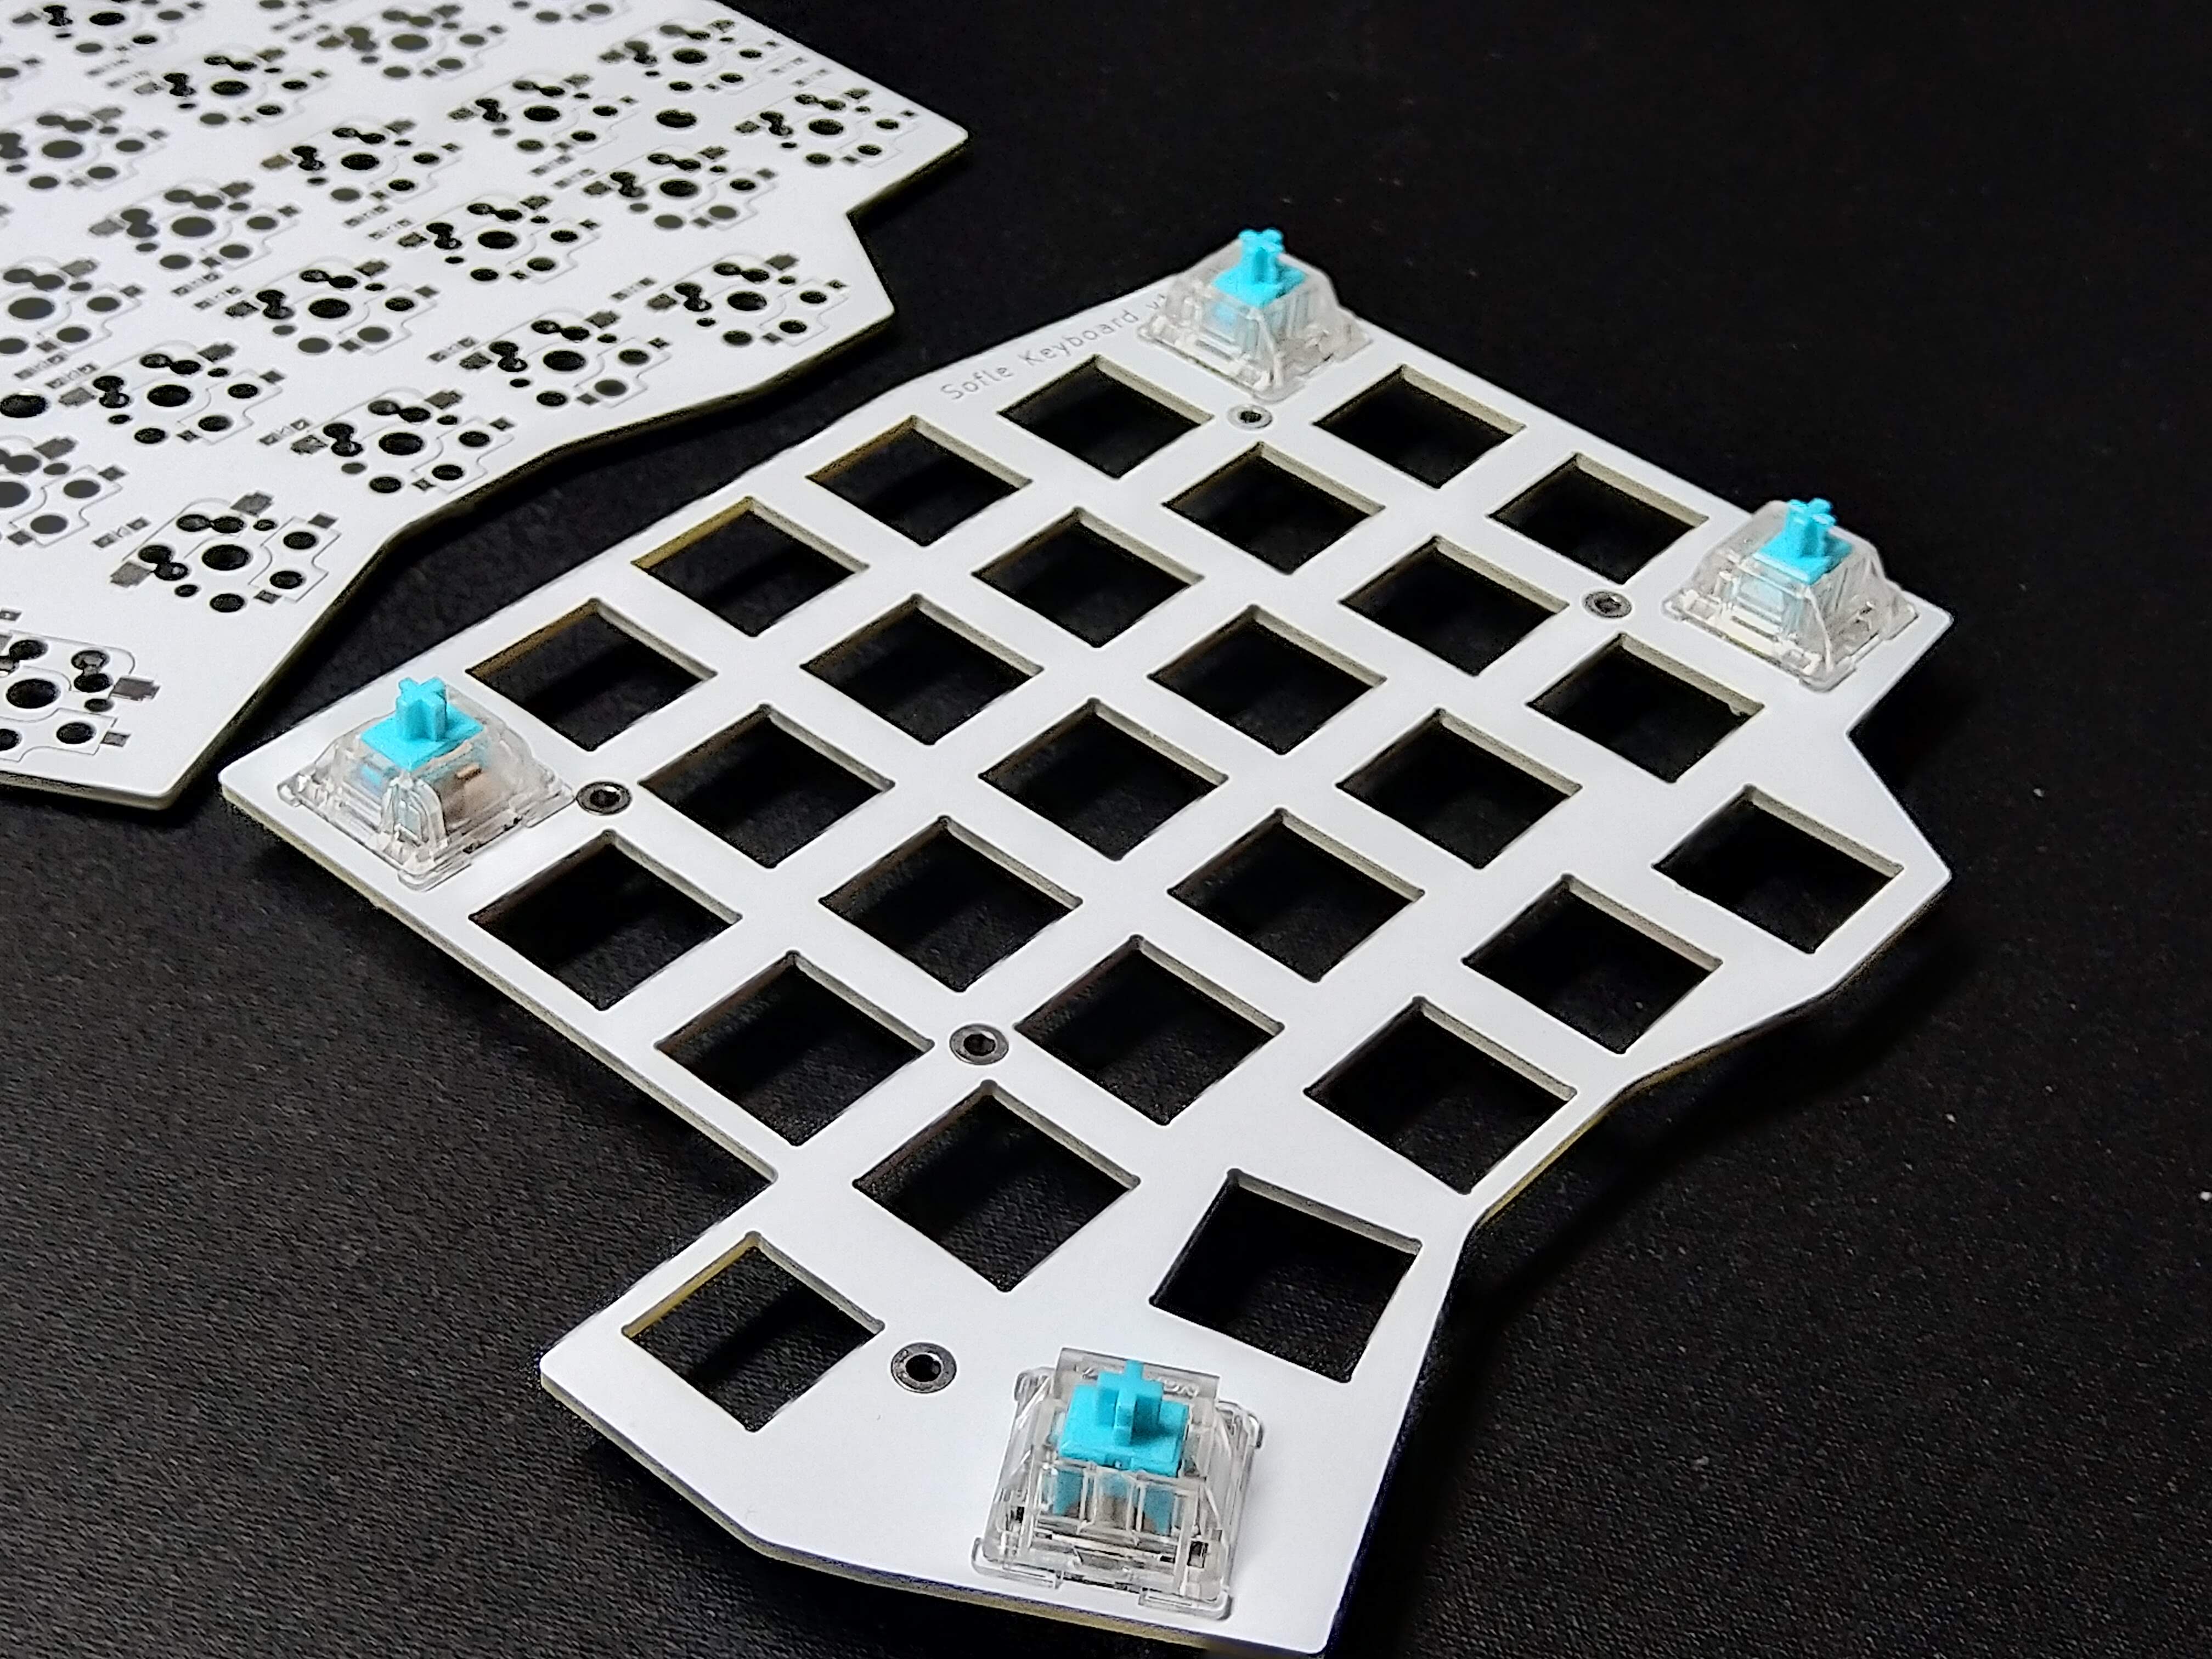
Steps
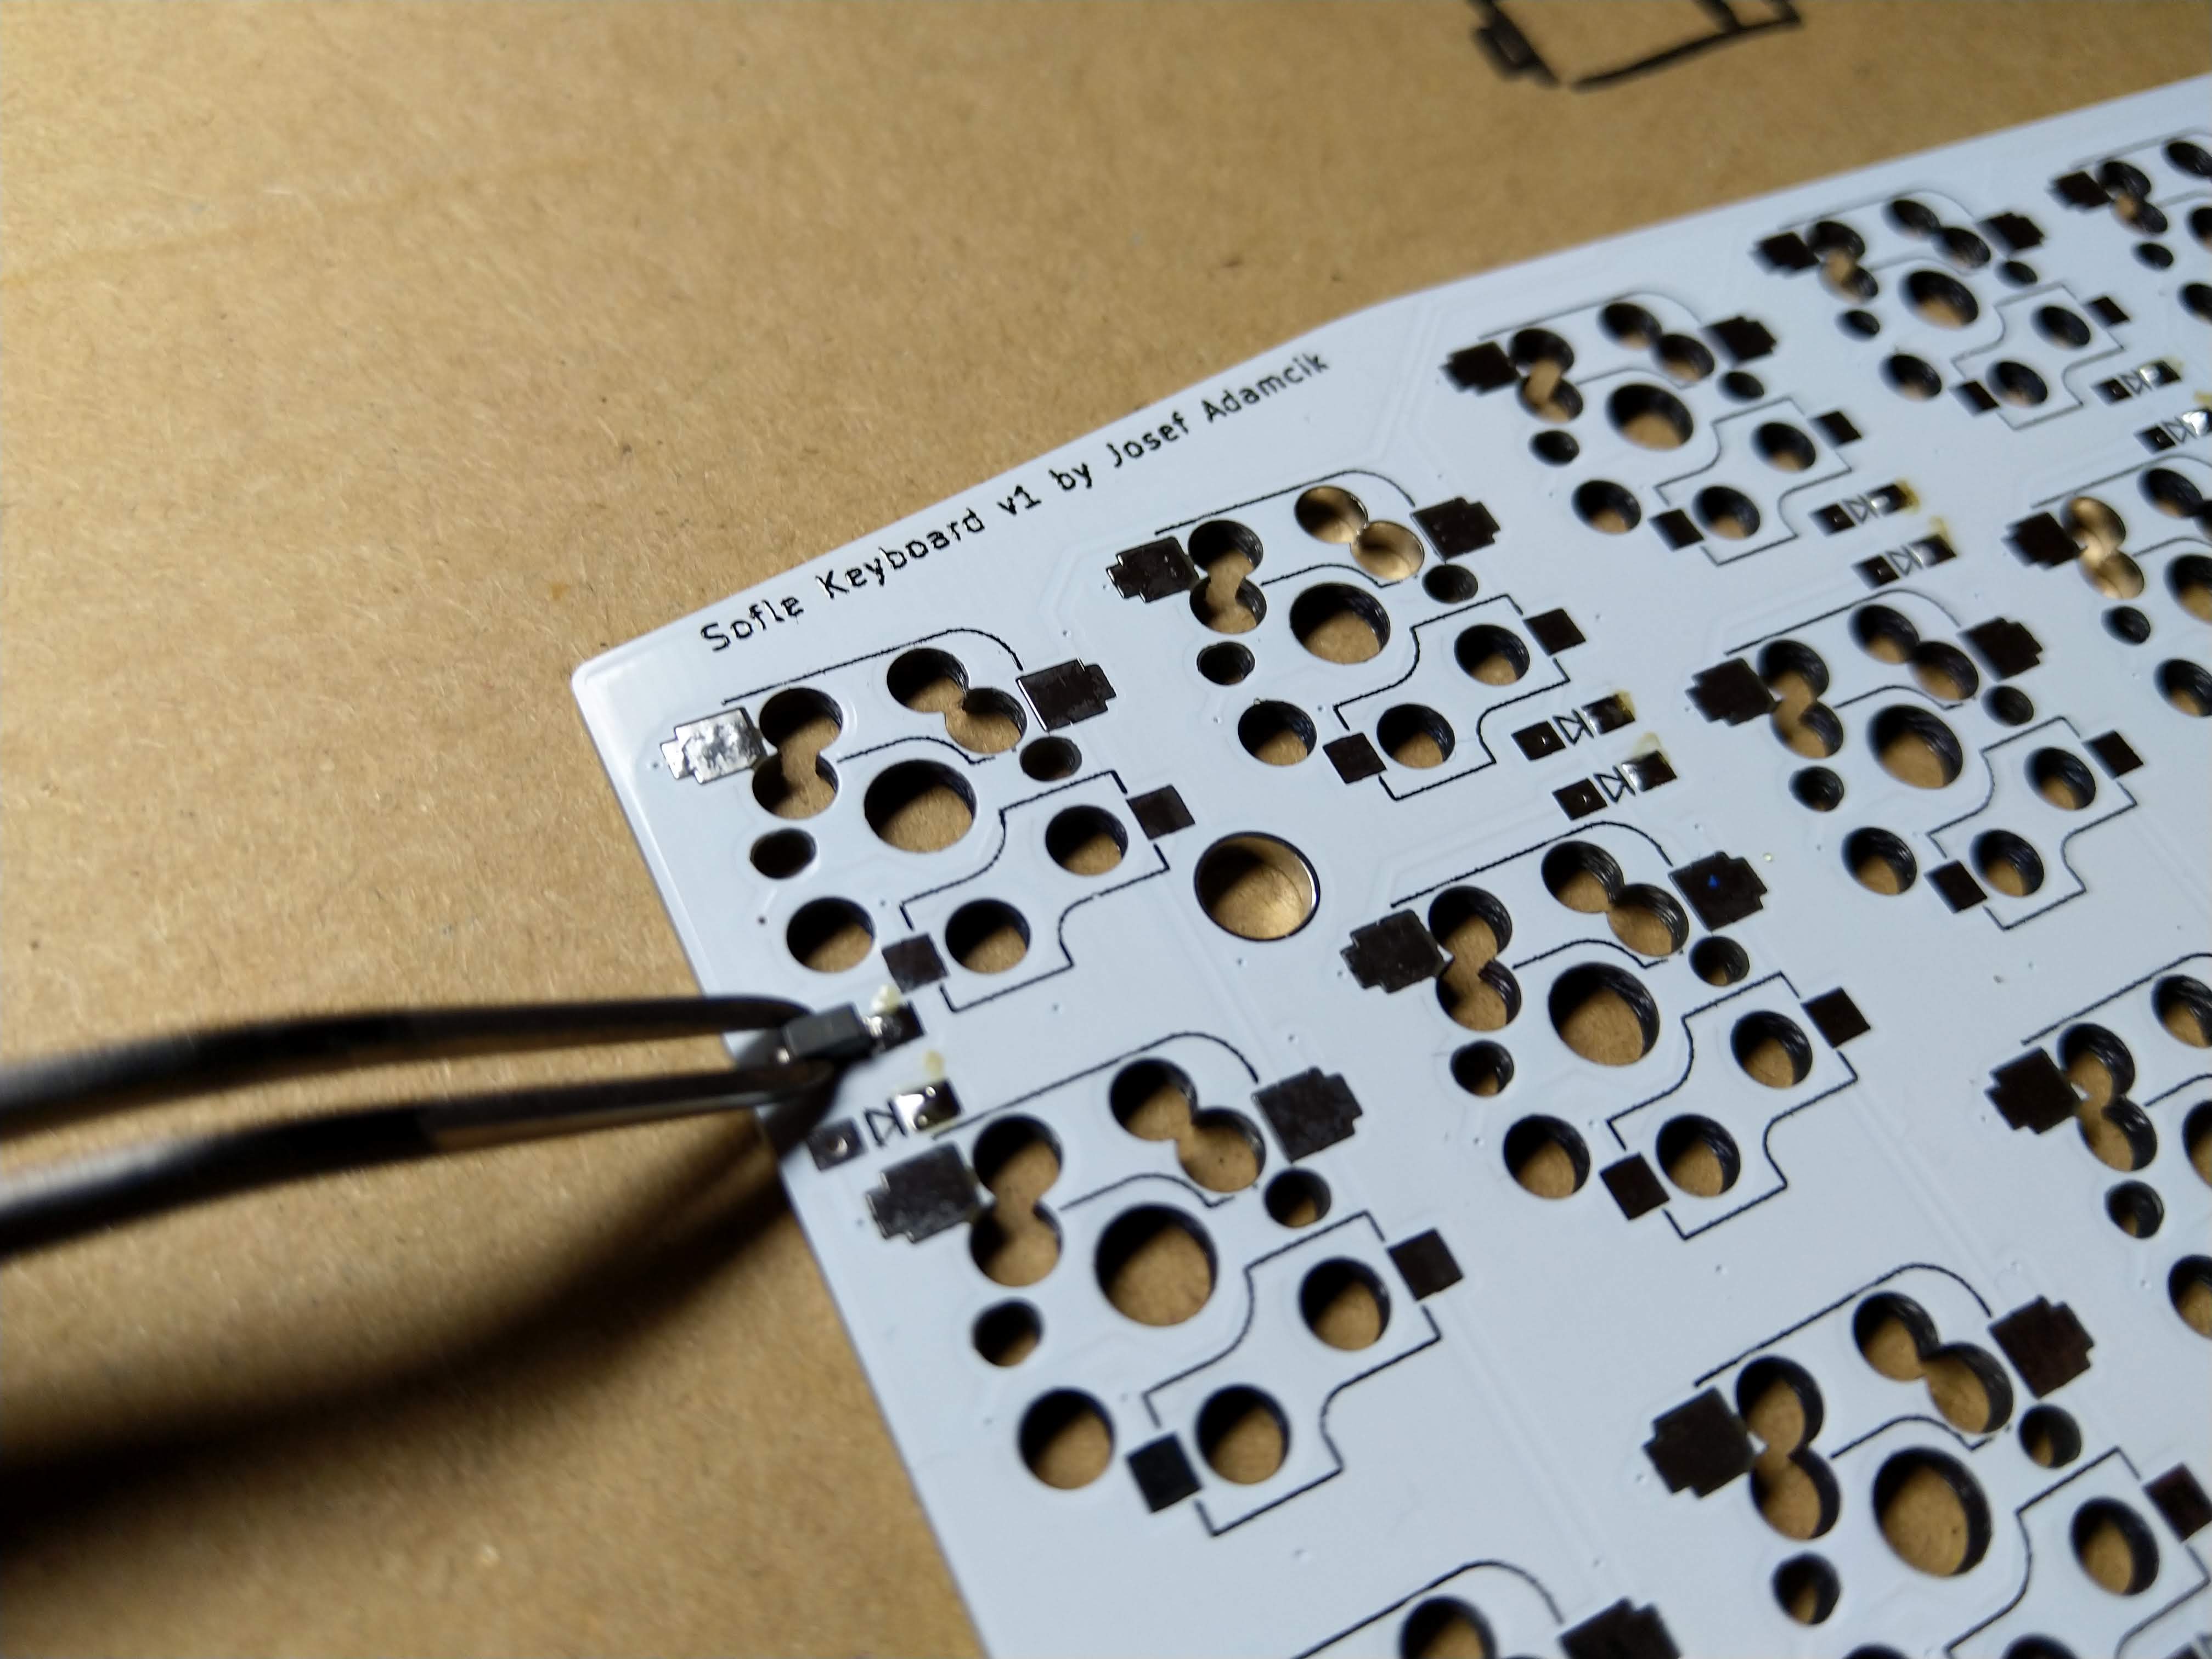


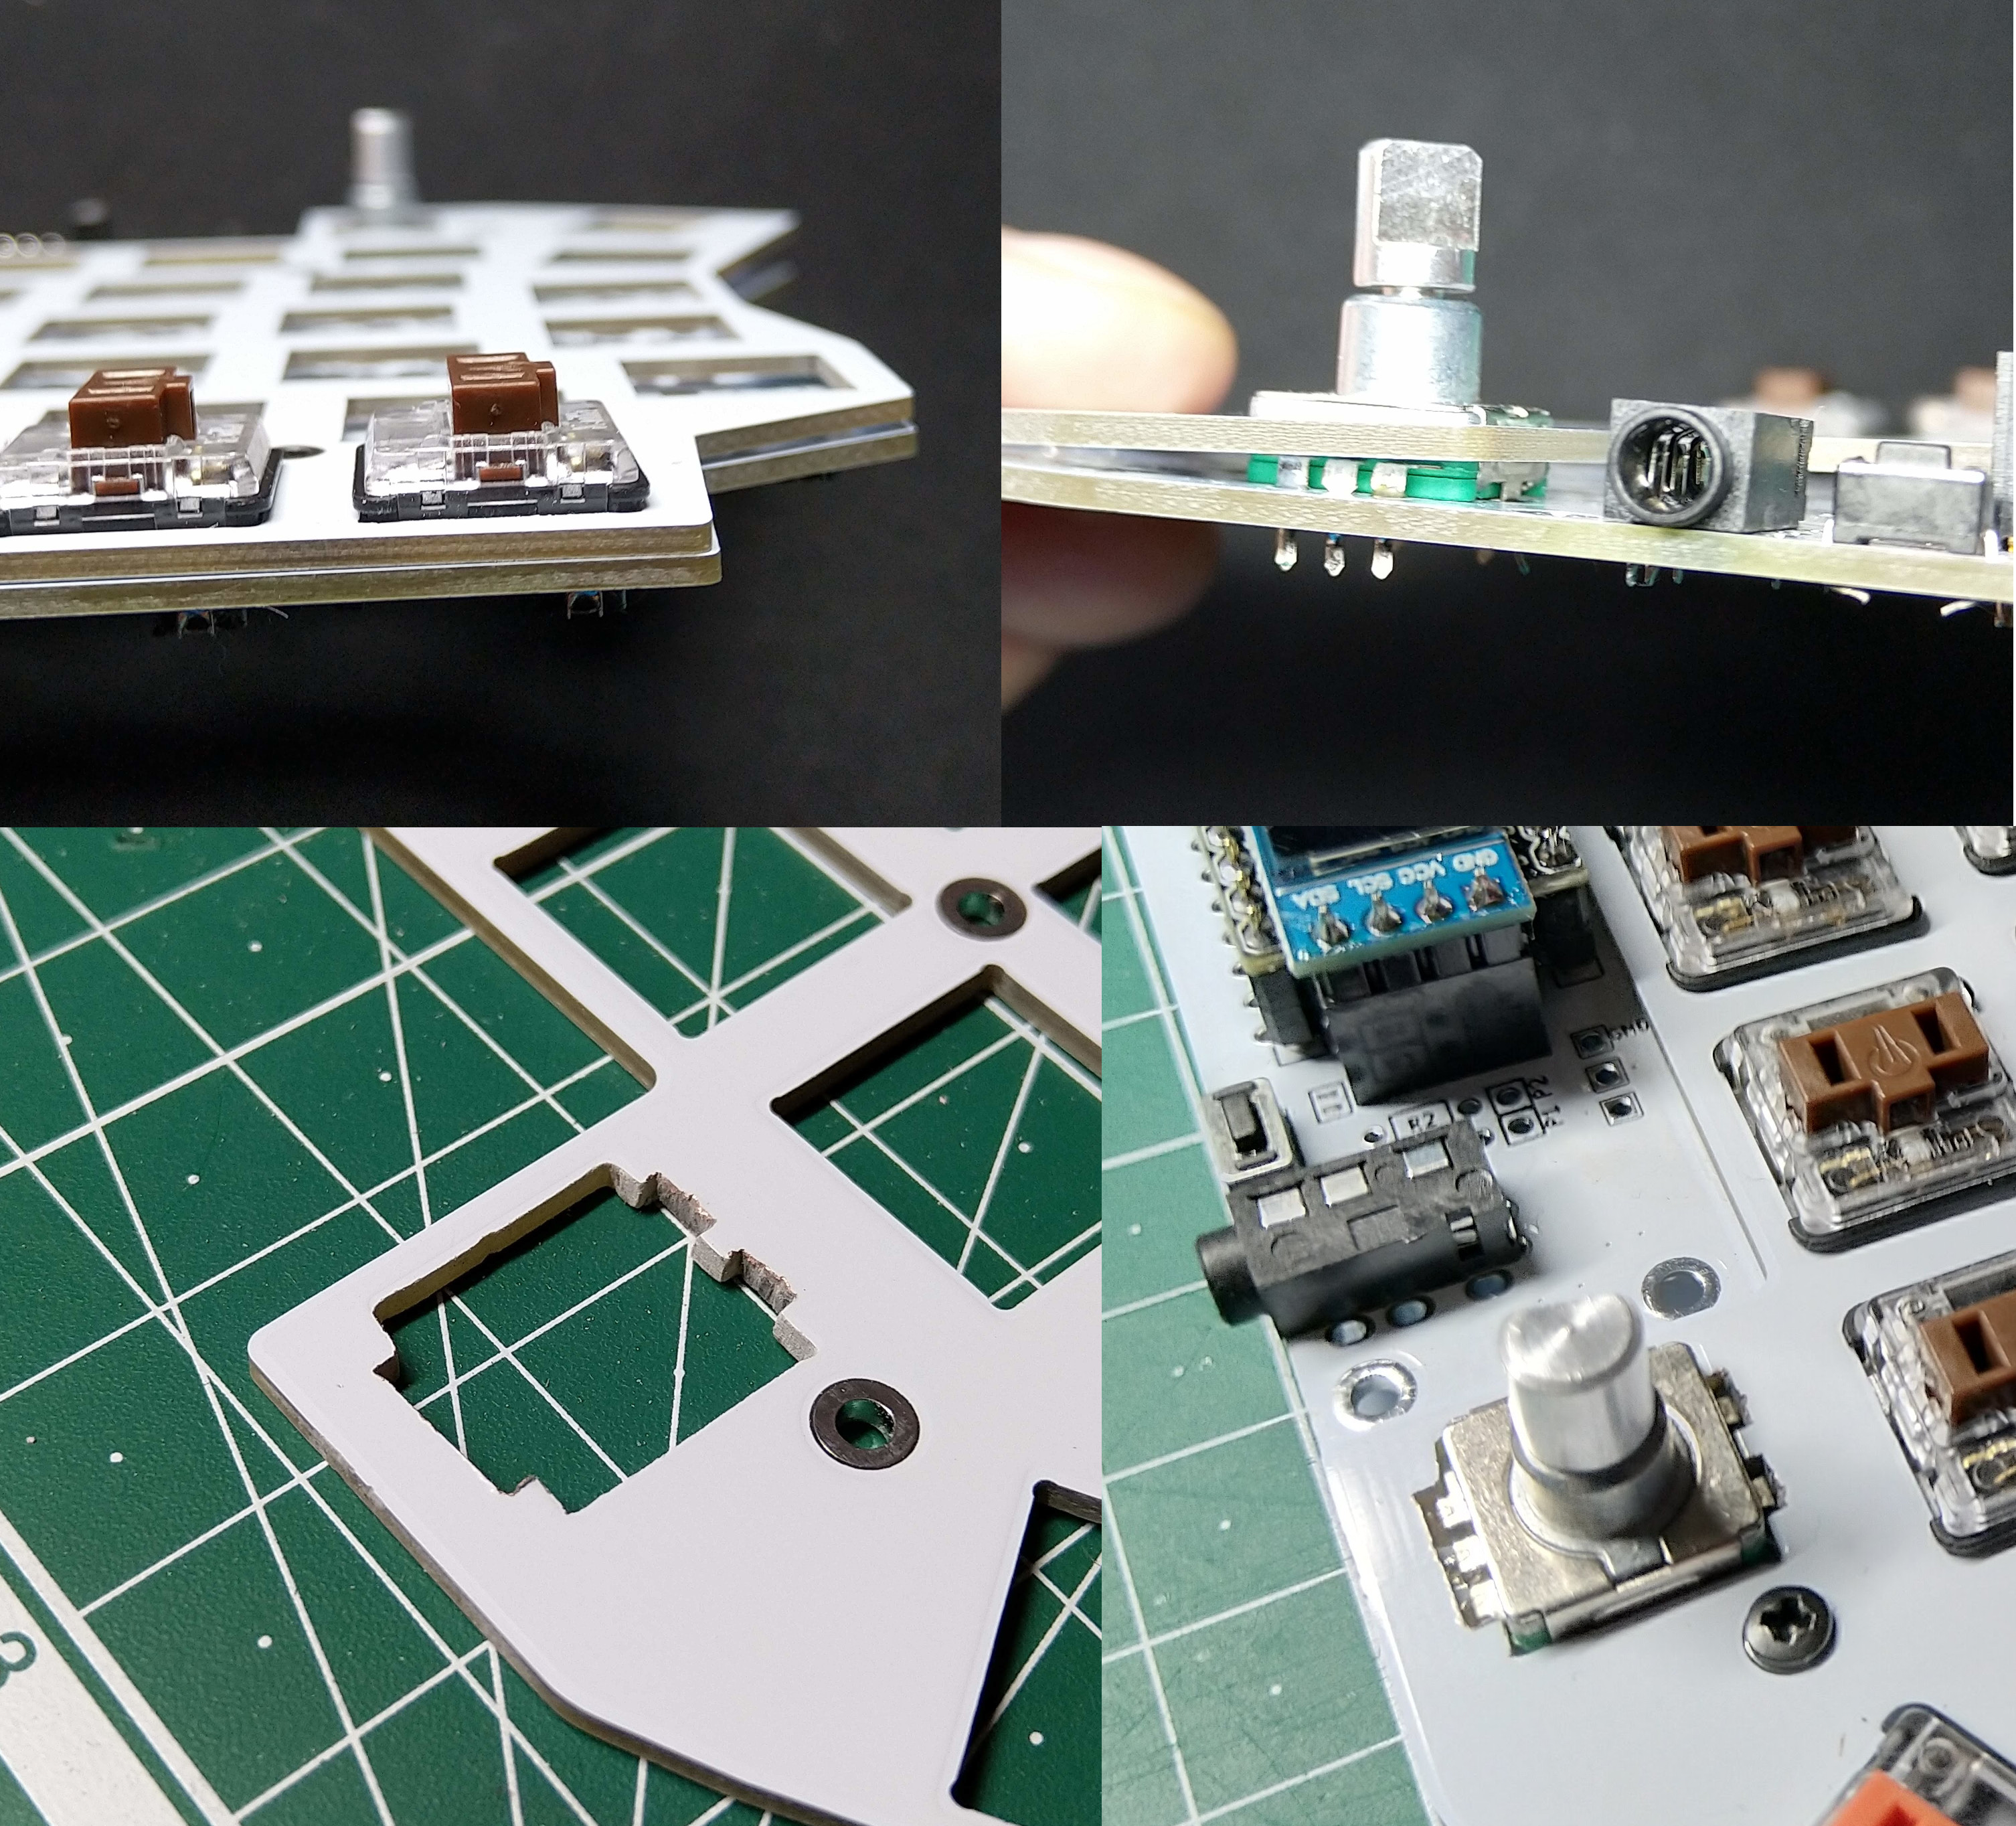
Note: If you are building version witch Kailh Choc switches and want to use encoders and have the first version of the top plate, you have to fix the top plate by filing off cutouts for encoder legs3. This was fixed in the version 1.1.

Warnings and disclaimers
- Don’t connect or disconnect the TRRS cable when the keyboard is powered. It may short out. Always disconnect the USB cable first.
- Be gentle with micro USB ports on your microcontrollers. They are easy to break.
- Keep in mind that this is a prototype of a DIY keyboard. It’s not a polished product.
Firmware and programming
So far the firmware is not part of the QMK Firmware repository. There’s also no support for QMK Configurator. Keep also in mind that the layout is tailored to my needs (e.g. default layout is Colemak even though QWERTY is supported) and you’ll most likely need to adjust it.
Sofle keyboard uses QMK Firmware and support for the board is part of the main QMK repository. It’s no longer needed to checkout my fork. Also the default layout is improved to be more accessible to average user. There’s also a basic support in QMK Configurator but there’s no default layout yet and encoders are not supported.
Suggested approach is to build the firmware yourself. You should be familiar with QMK and be able to make it work on your local environment. If not, please follow the instructions in the documentation.
- Make sure your QMK environment is setup.
- Make sure halves are not connected together with TRRS cable.
- Connect one half to USB, flash the firmware:
make sofle:default:avrdude(you may need to usesudodepending on your setup). Use the reset button to reset the keyboard when you are asked to in console. - Connect the second half and flash it in the same way as the previous one.
- Disconnect the USB cable. Connect both halves together with TRRS cable.
- Connect USB cable to the left side15.
- Enjoy SofleKeyboard!
Troubleshooting
Elite-C v3.0
Elite-C v3.0 had problems when used with split bords (on both halves). Those are fixed in version 3.1. For v3.0 add #define SPLIT_USB_DETECT to config.h file. I don’t have Elite-C so this is untested, but should work.
Typing lag when used without OLED
If you chose to not use OLED for both halves you should disable support for oled (set OLED_DRIVER_ENABLE to no in keymaps/defualt/rules.mk).
If you don’t use OLED only on one half you are need to do one of the following to fix the lag:
- Solder pull-up resistors (4k7) to the PCB (R1, R2) without OLED.
- Use a workaround explained in this issue.
- Stop using OLED completely and turn it off as described above.
Feedback welcome
I would be thrilled to hear when anyone actually decides to build the keyboard and I am also happy to help with any problems you may encounter. I would also welcome any feedback regarding the layout and so on. What do you think? What could be changed? Feel free to contact me through any channel: icons for email, twitter etc. are in both header and footer of this website.
Just keep in mind, please, that this is just a hobby and SofleKeyboard is only an opensource project rather than a commercial product. Therefore, I am not providing anything like commercial customer support.
Links
Footnotes and links to components
Most of the links are to AliExpress and usually are the same I have ordered and used. They are meant for illustration. They are not affiliate links. It seems AliExpress is going to require you to be registered and logged in to see the detail of the product. I discovered that when putting this together and I am sorry for that but it’s out of my control.
-
There was a design issue where the cutout for the encoder is big enough only for the base of the encoder but not for its legs. That is perfectly ok when you build the board with MX switches since the plate sits above the legs. But for low profile Kailh Choc switches there’s no longer any gap between plates. If you have unfixed plate (the problem was fixed in v1.1.) and wish to use an encoder, you’ll need to file off a bit of PCB material to get the legs of encdor through (see the guide above). ↩ ↩2 ↩3
-
I used Zilents V2, silent tactile switches by ZealPC (and made by Gateron) which are very expensive. ↩
-
Serial is the default behaviour. If serial is used, you don’t need TRRS cable (4 contacts, used for headphones with a microphone) but just TRS (stereo audio jack). ↩ ↩2
-
This can be changed, look for setting handednesss in QMK documentation. ↩
This article is Part 3 in a 7-Part Series.
- Part 1 -In search of the best custom keyboard layout
- Part 2 -Let me introduce you SofleKeyboard - a split keyboard based on Lily58 and Crkbd
- Part 3 -SofleKeyboard build log/guide
- Part 4 -Sofle Keyboard evolution: slow and not really steady
- Part 5 -Another year of Sofle keyboard
- Part 6 -Stáňa AKA Sofle Unsplit - a monoblock split keyboard
- Part 7 -Stáňa - a monoblock split keyboard, part 2