When you have a custom keyboard with some nice keycaps and case, you might start to think, what should I customize next? Let’s start with the cable which connects my keyboard to my computer!
Honestly, I am far from being original with this idea. There are services where you can order such cable, other people have been building them for ages. If you scroll Reddit topic for mechanical keyboards you’ll see them all over the place. I have also already made one simple custom USB cable you can find at the end the post about my custom keyboard.
But since I like to make things I wanted to make another one. I took some photos in the process in order to create a short build log. As usual in my case, this is not meant to be a step-by-step guide, but a little insight into making and inspiration for the dear reader.
Material
I have included links to Aliexpress. Most of them are the items I actually bought. Those are not affiliate links. They are an example of what you could buy if you wanted to make the same cable.
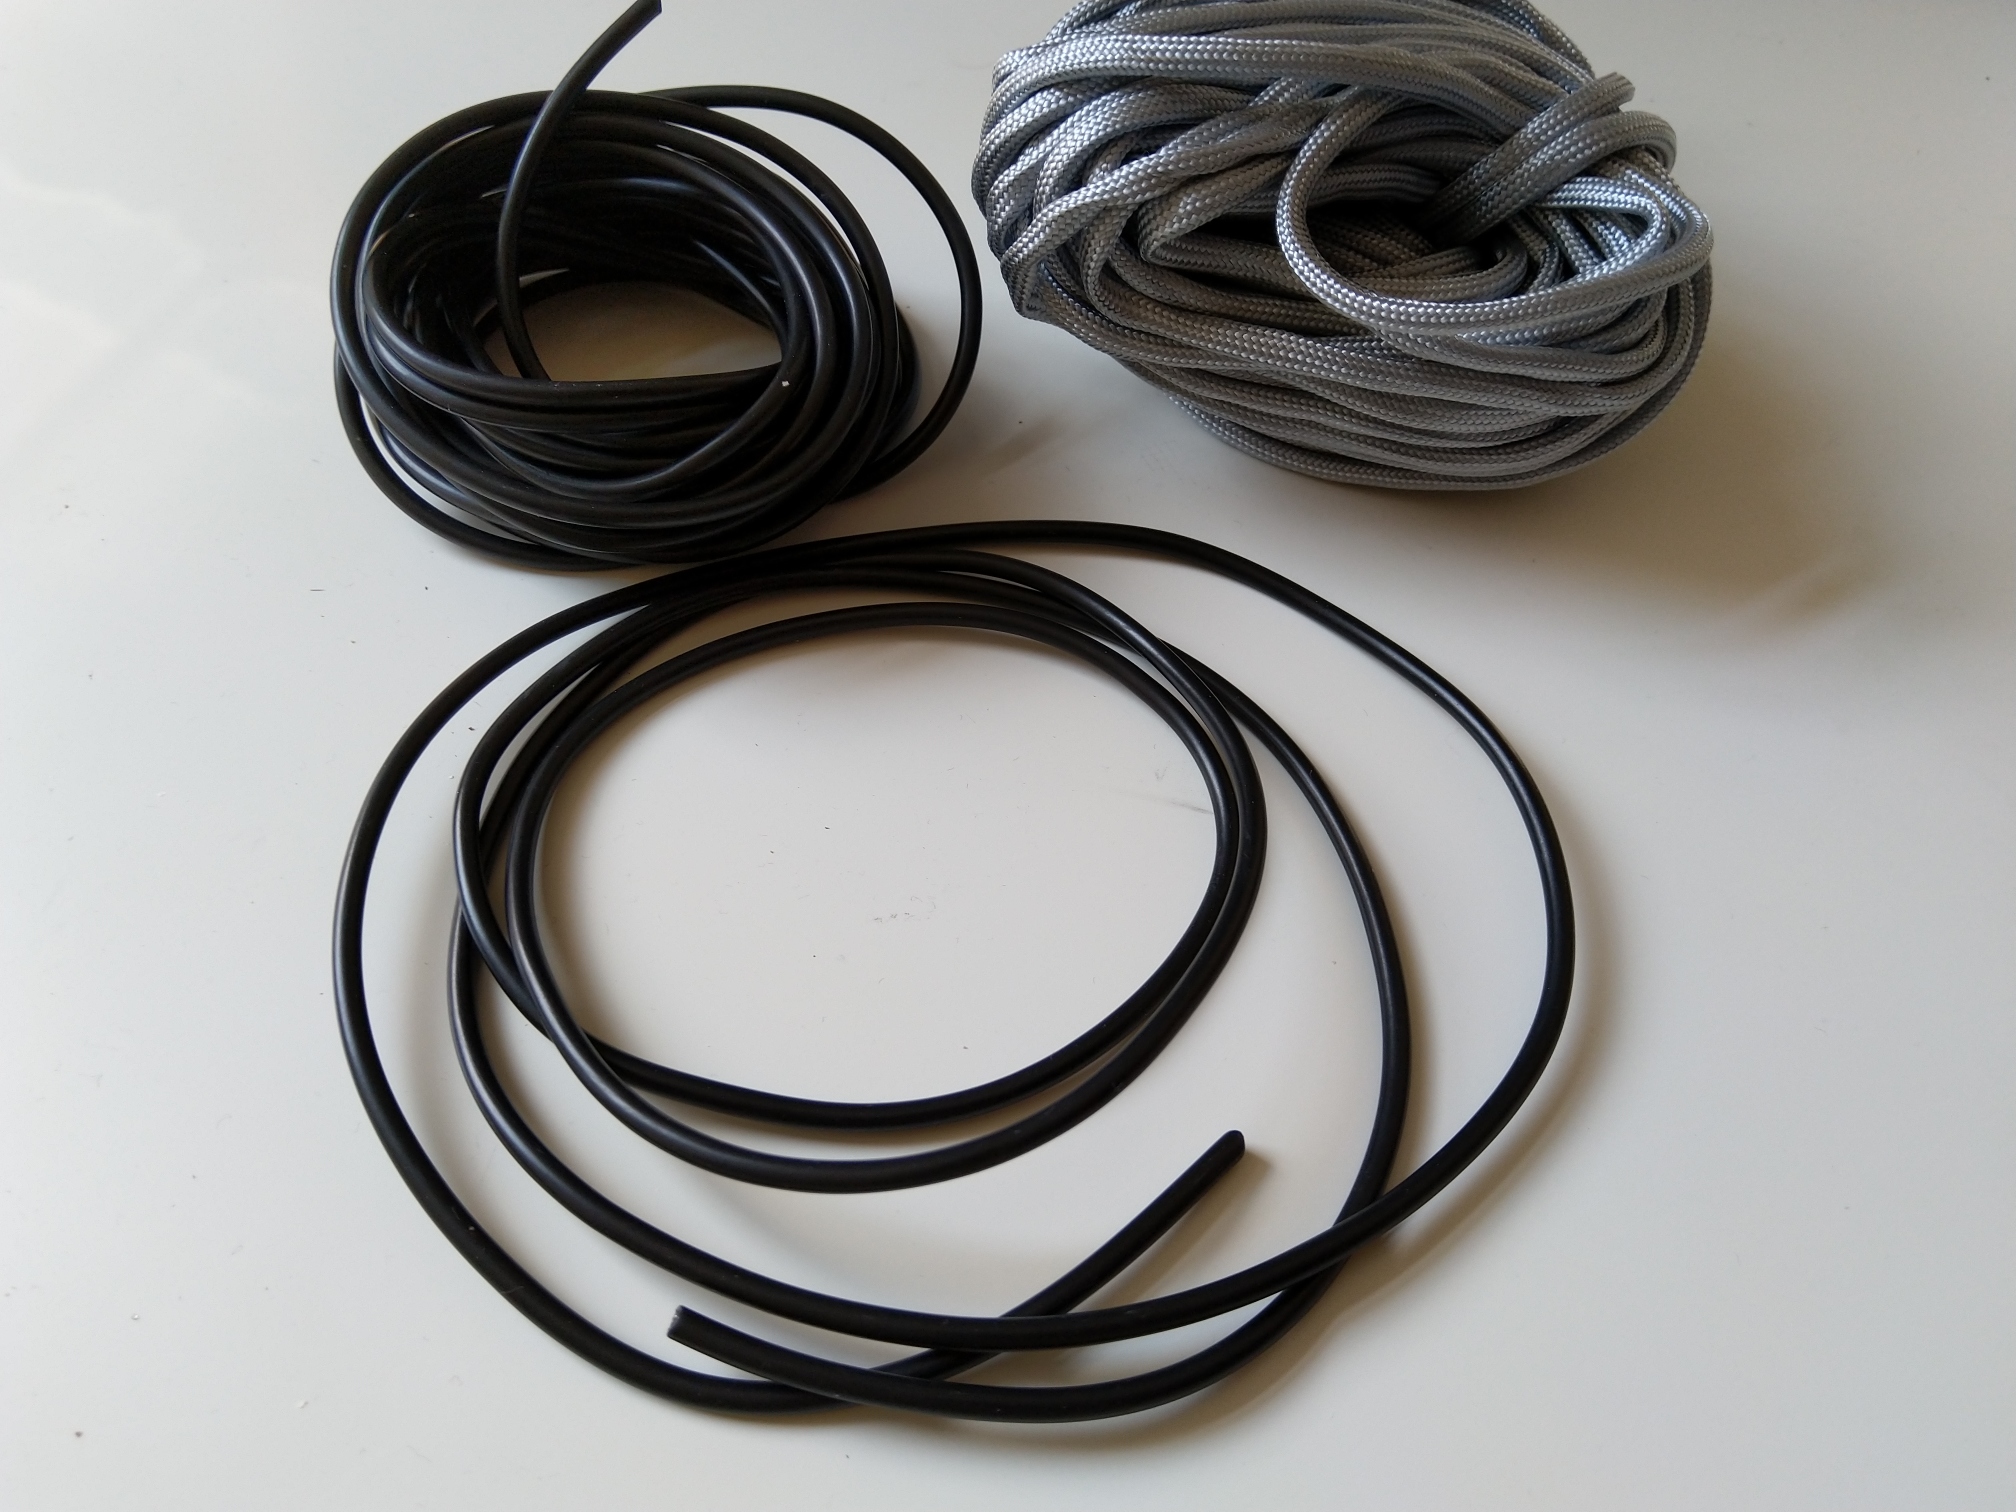
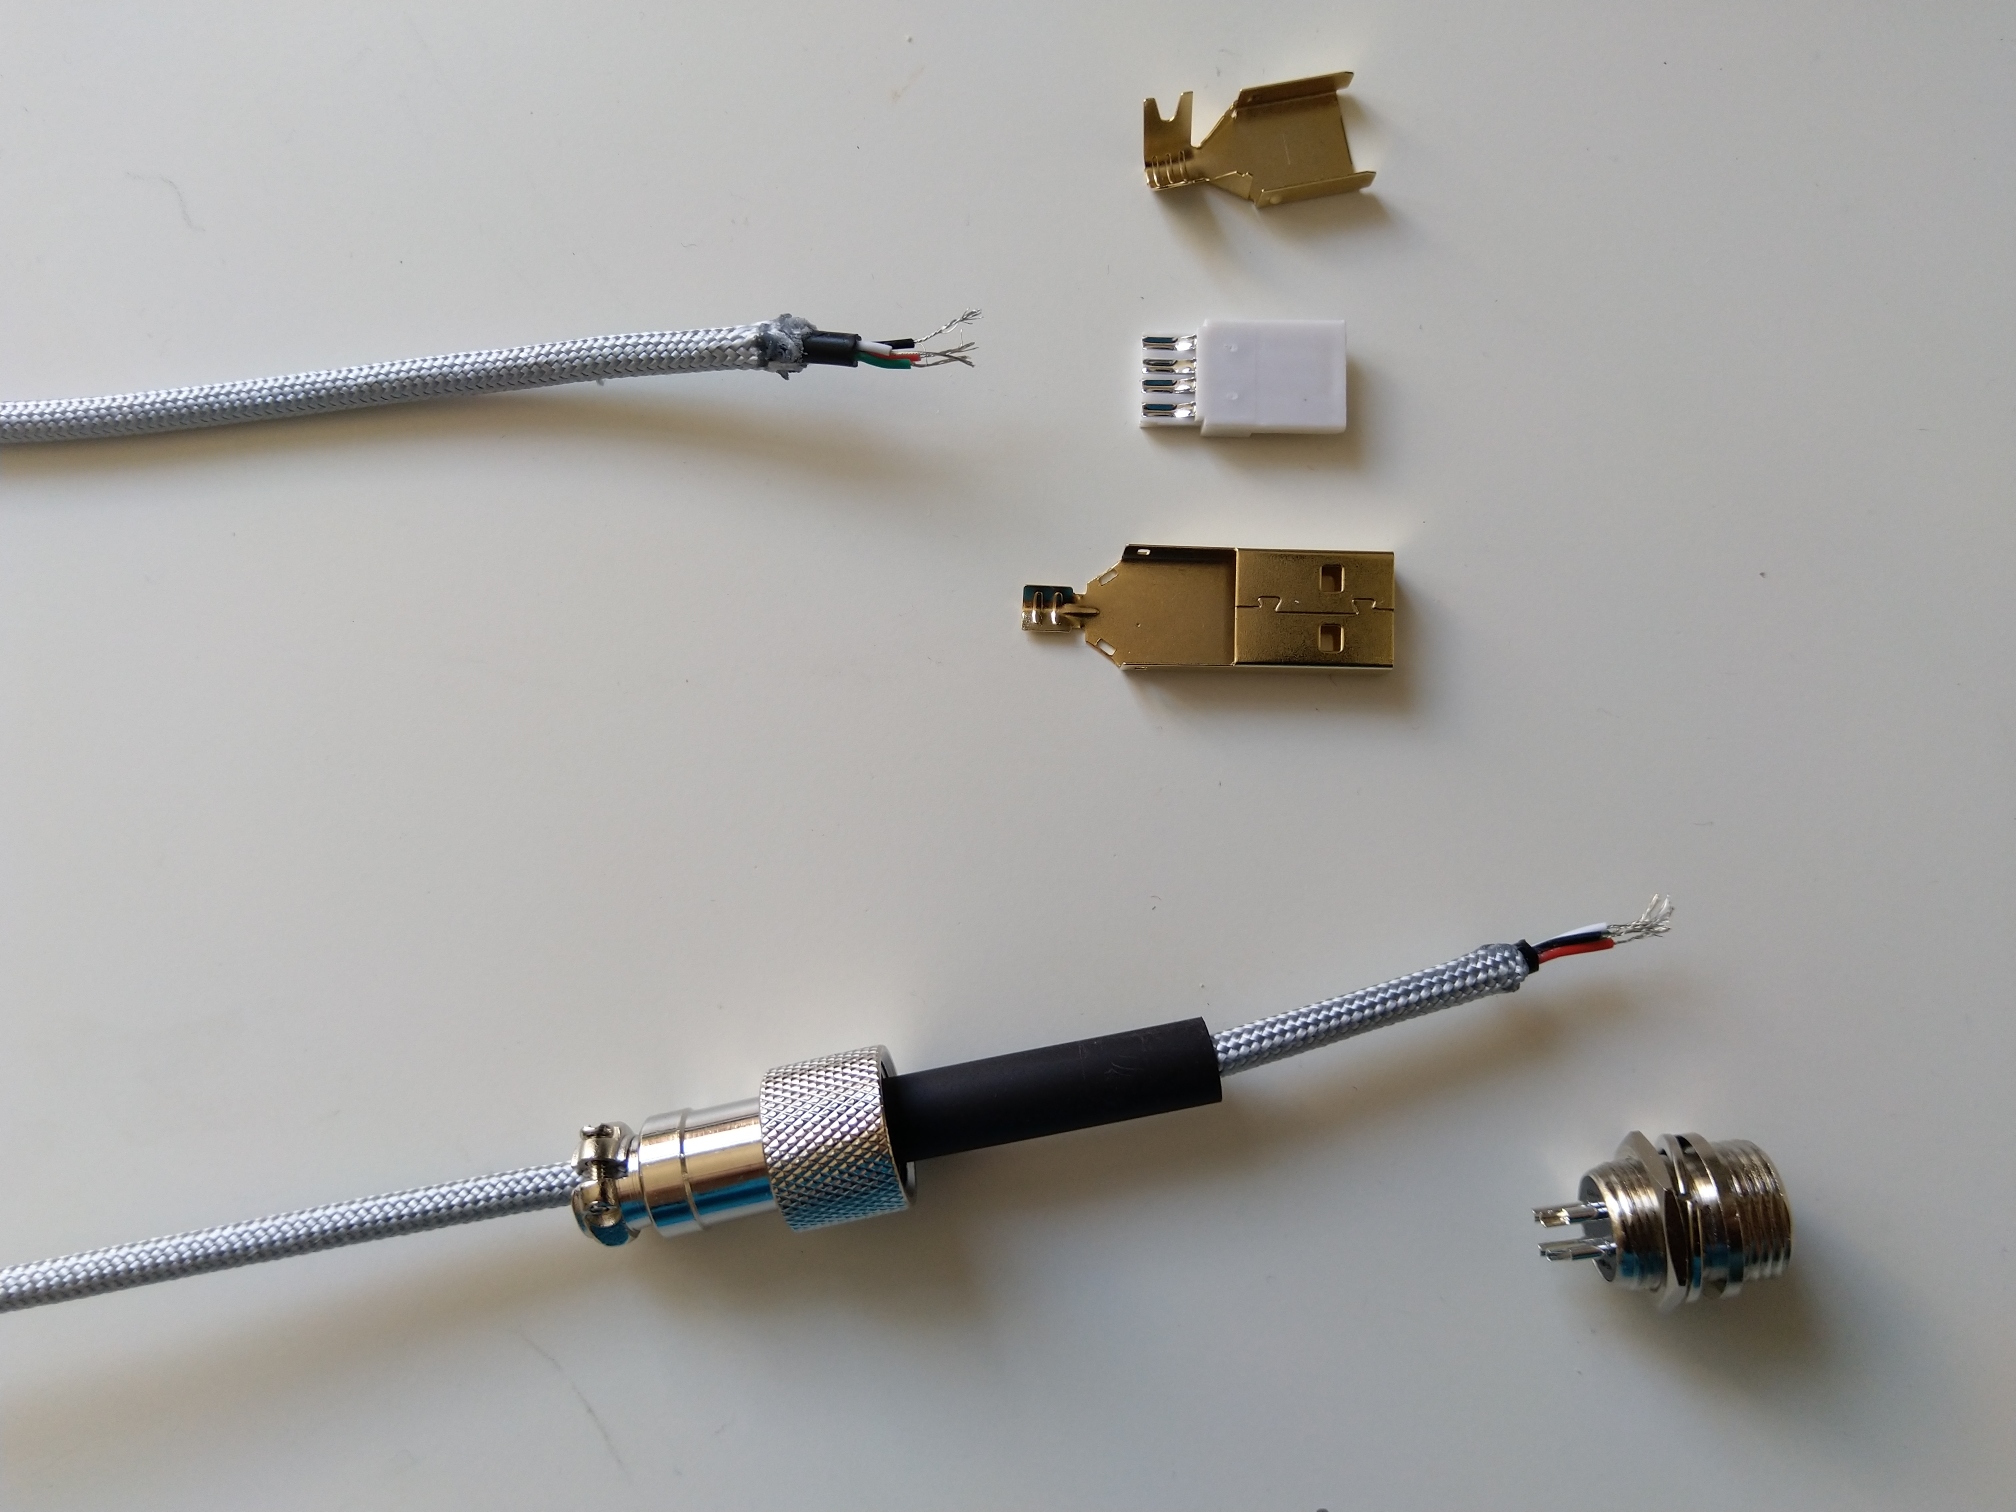
4 wire cable (Aliexpress). You can also buy shielded if you want. Keep eye on insulation if you want to coil the cable later - it will most likely not work for silicon (since it is heat resistant), so go for good-old PVC. You can also recycle old USB cables.
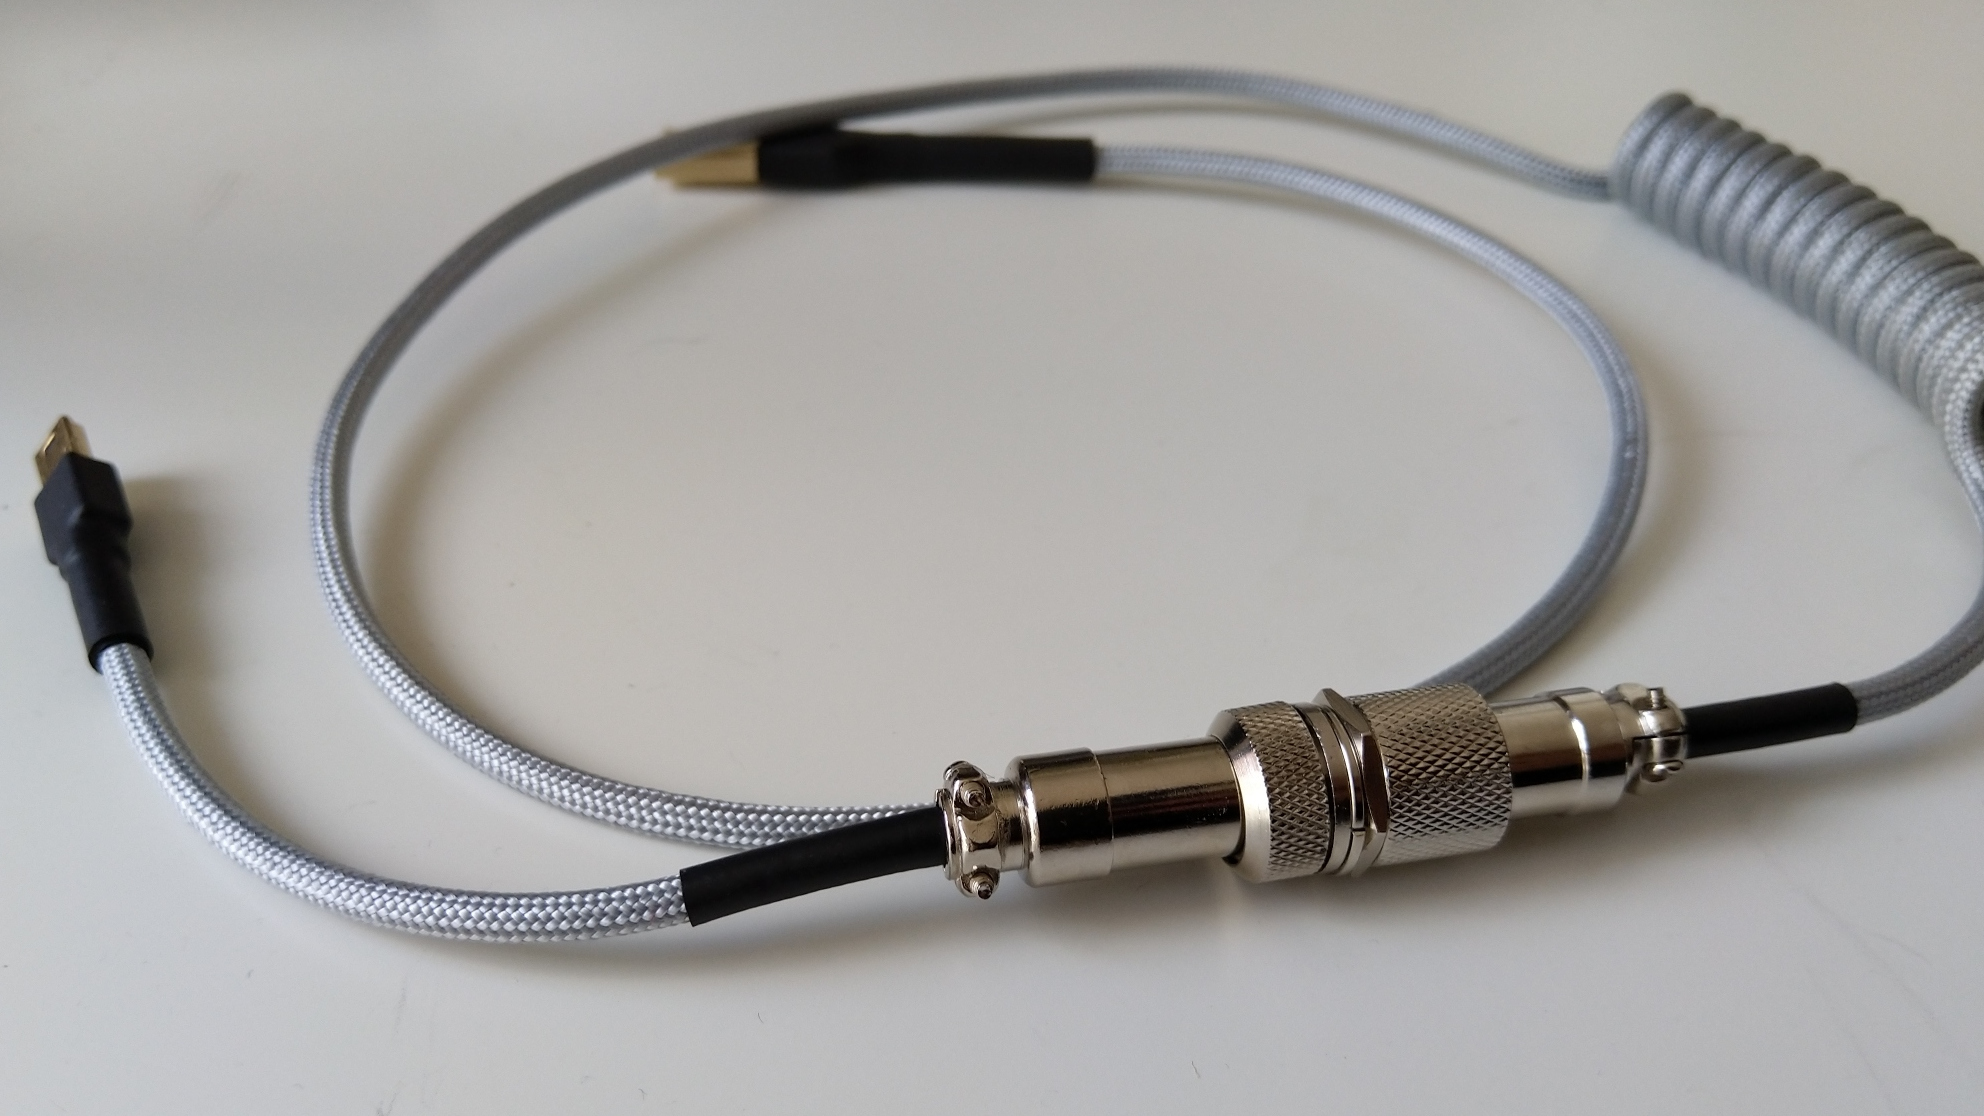
GX12 or GX16 4-pin aviation connector (Aliexpress) for decoration.
Tools
Soldering iron and some solder.
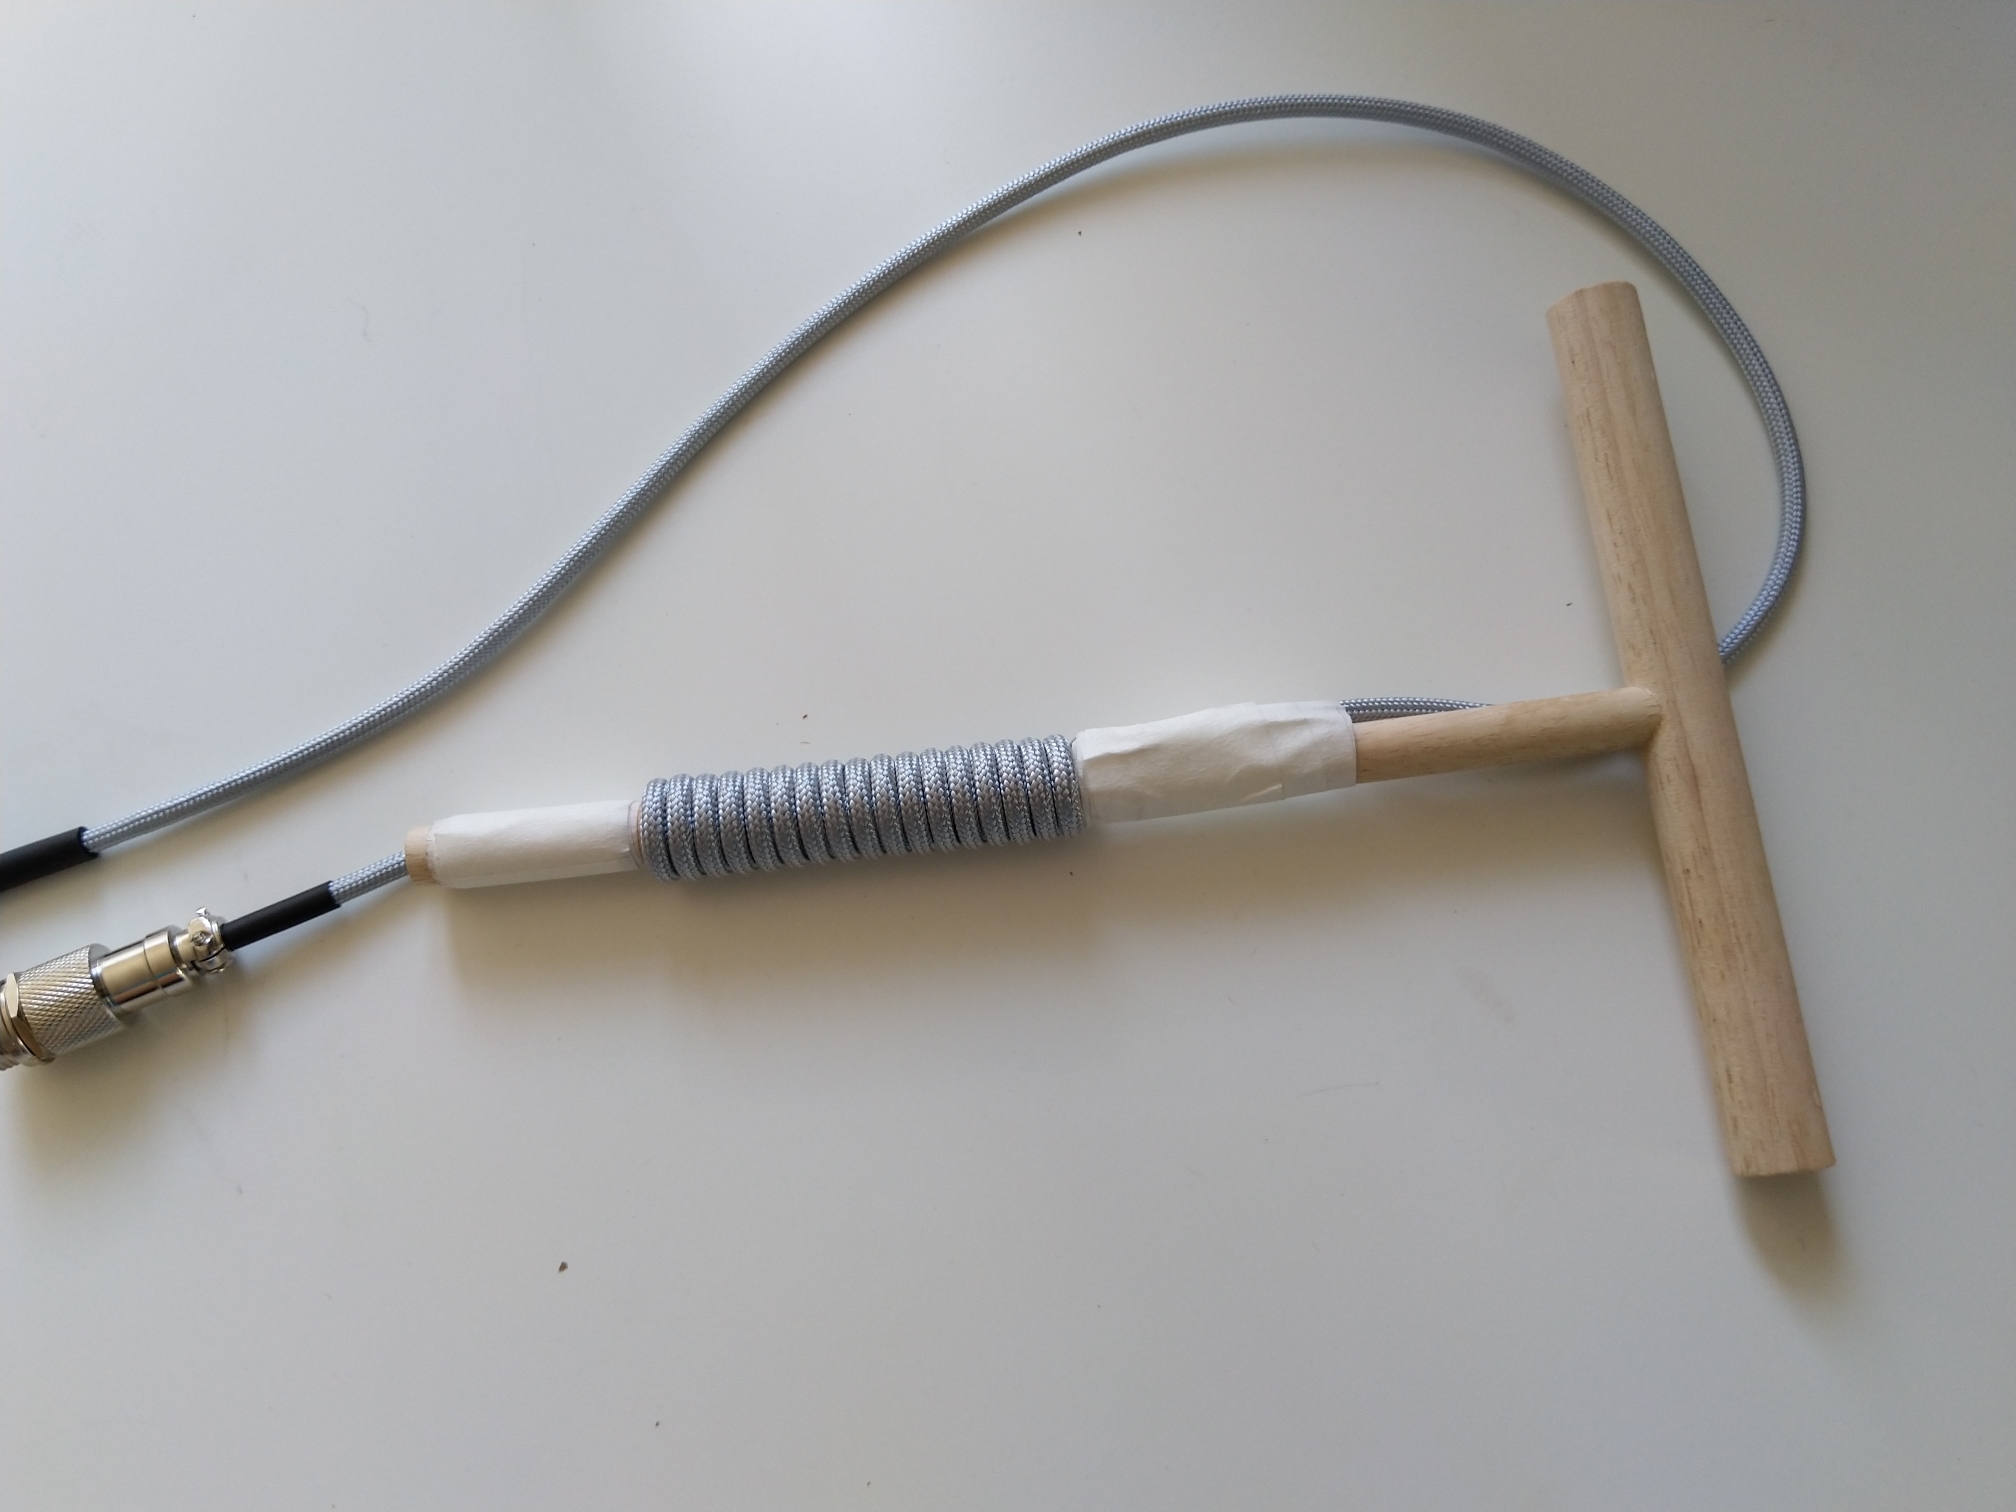
A wood rod for coiling (mine has diameter 10 mm)
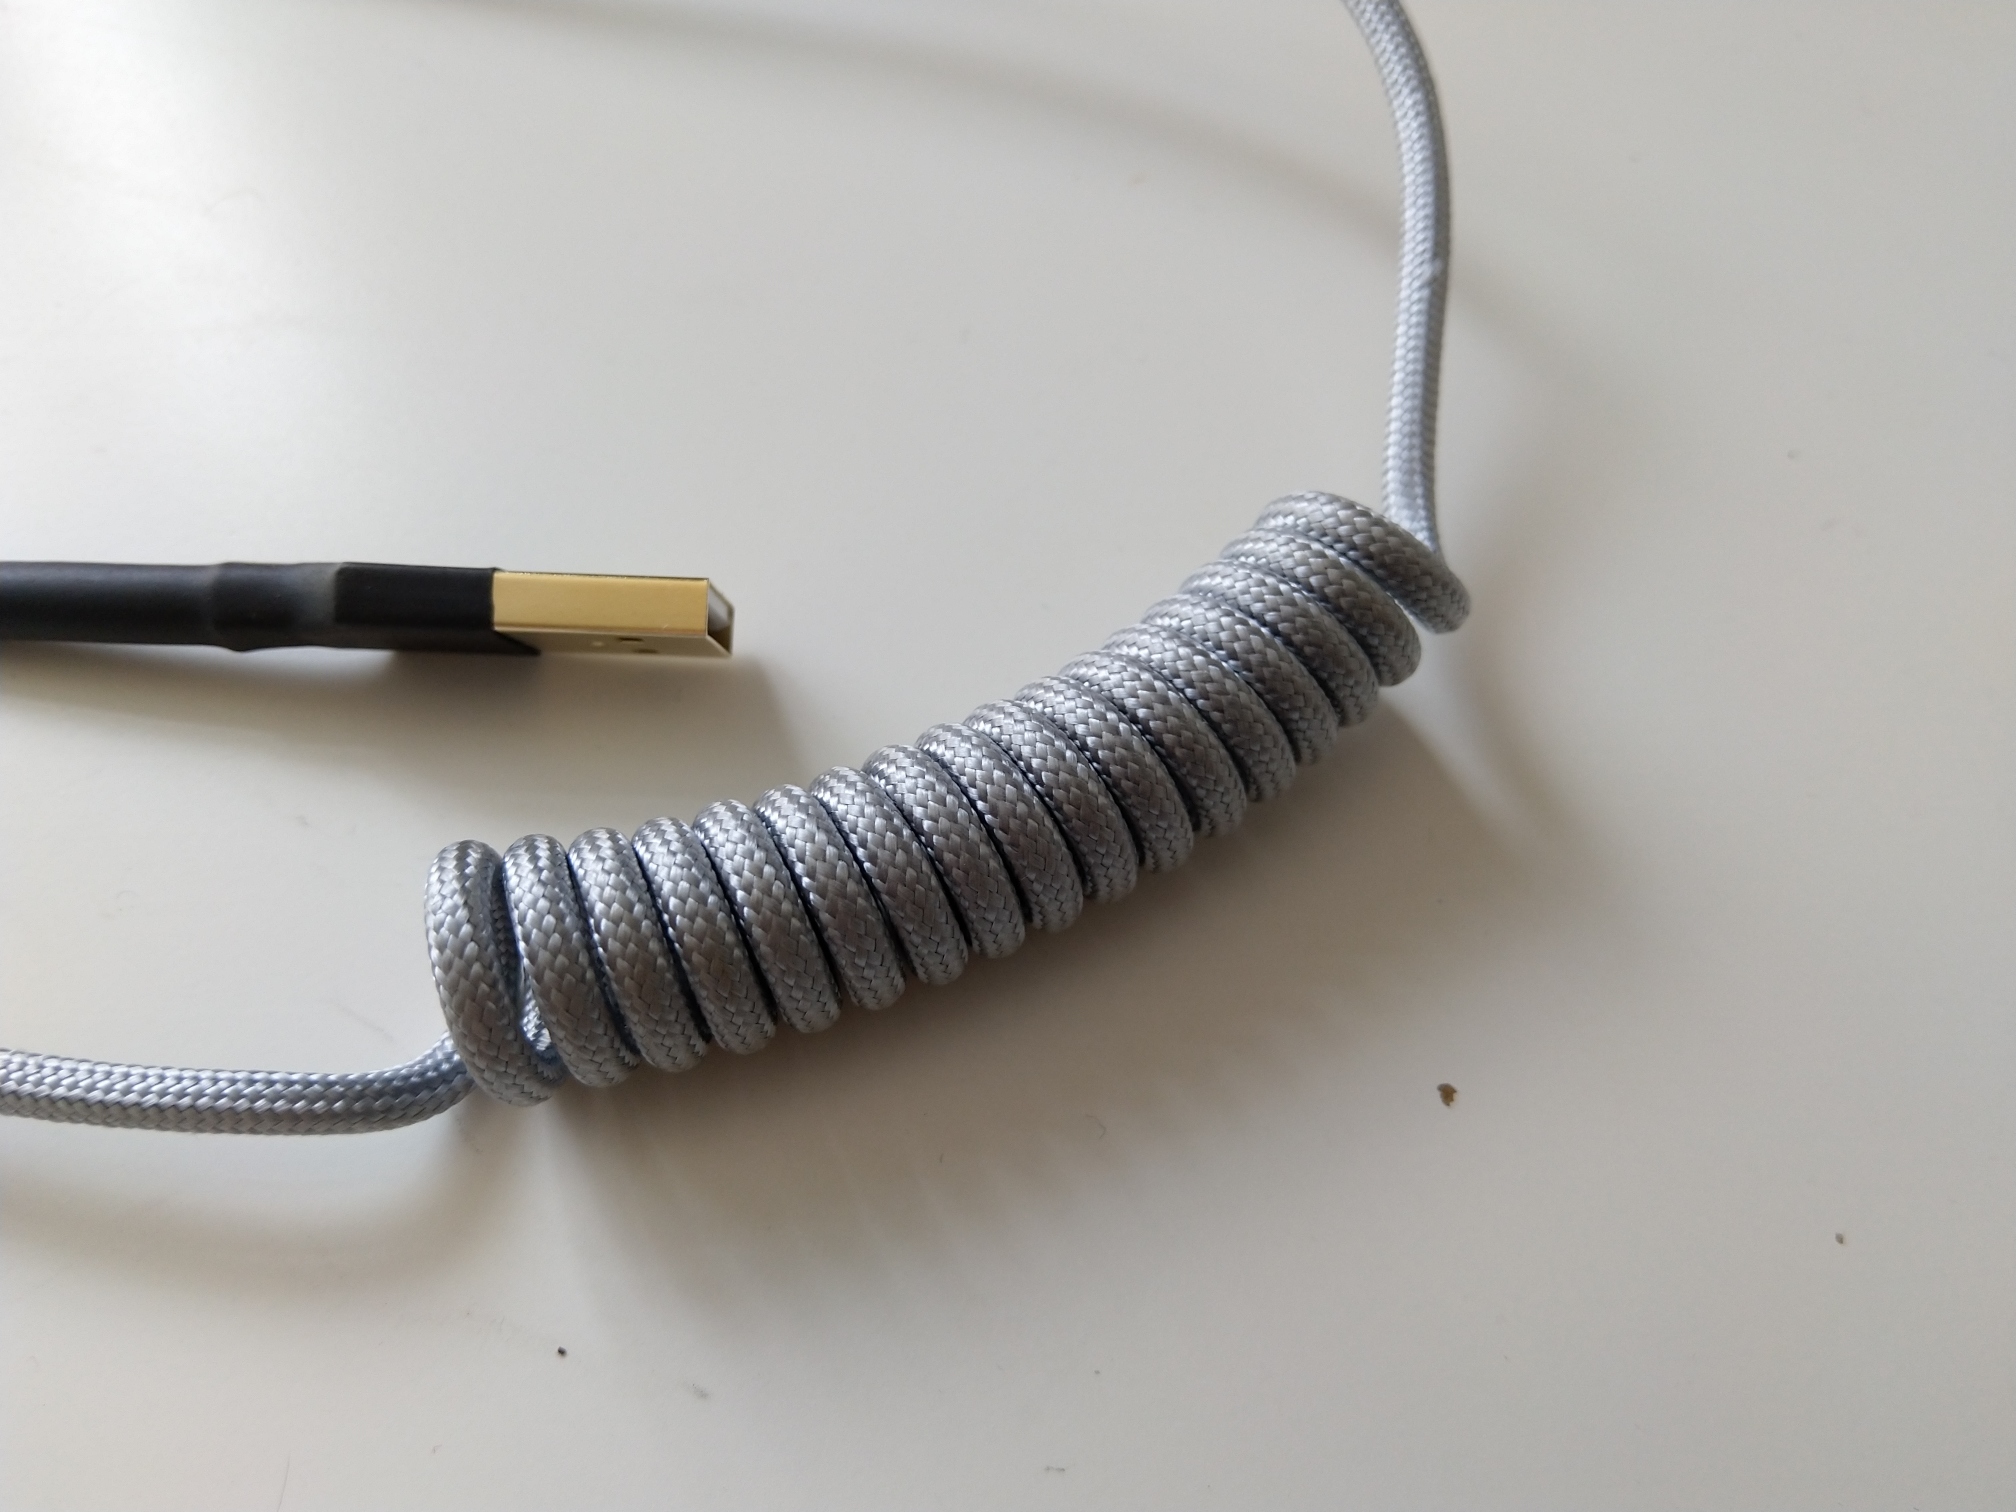
A heat gun ( I have only a cheap DIY-craft one), some people use a hair dryer instead.
Update: Quality and USB specification
Since the article was featured on hackaday.com and posted to hackernews I feel a need to clarify some things.
This cable is not a high quality USB cable. It is, as many people pointed out in comments on both hackaday.com and hackernews, quite bad USB cable.
The cable is not shielded.
The Aviation connector has no function and shouldn’t be on the cable. It will affect quality and can cause several kinds of problems.
I wouldn’t try to use such cable for high-speed USB communication nor for high-current charging of other devices. I use it for my USB 2 (Atmega32u4 based) keyboard on daily basis and it works well. If you really want a high quality cable, go buy one, don’t build it or at least not like I did - use shielded cable, skip Aviation connector and read the spec. You can also go and read discussions under the articles above, some people actually share some information and not just the snarky “I-am-the-only-one-smart-here-and-you-all-are-stupid” kind of remarks.
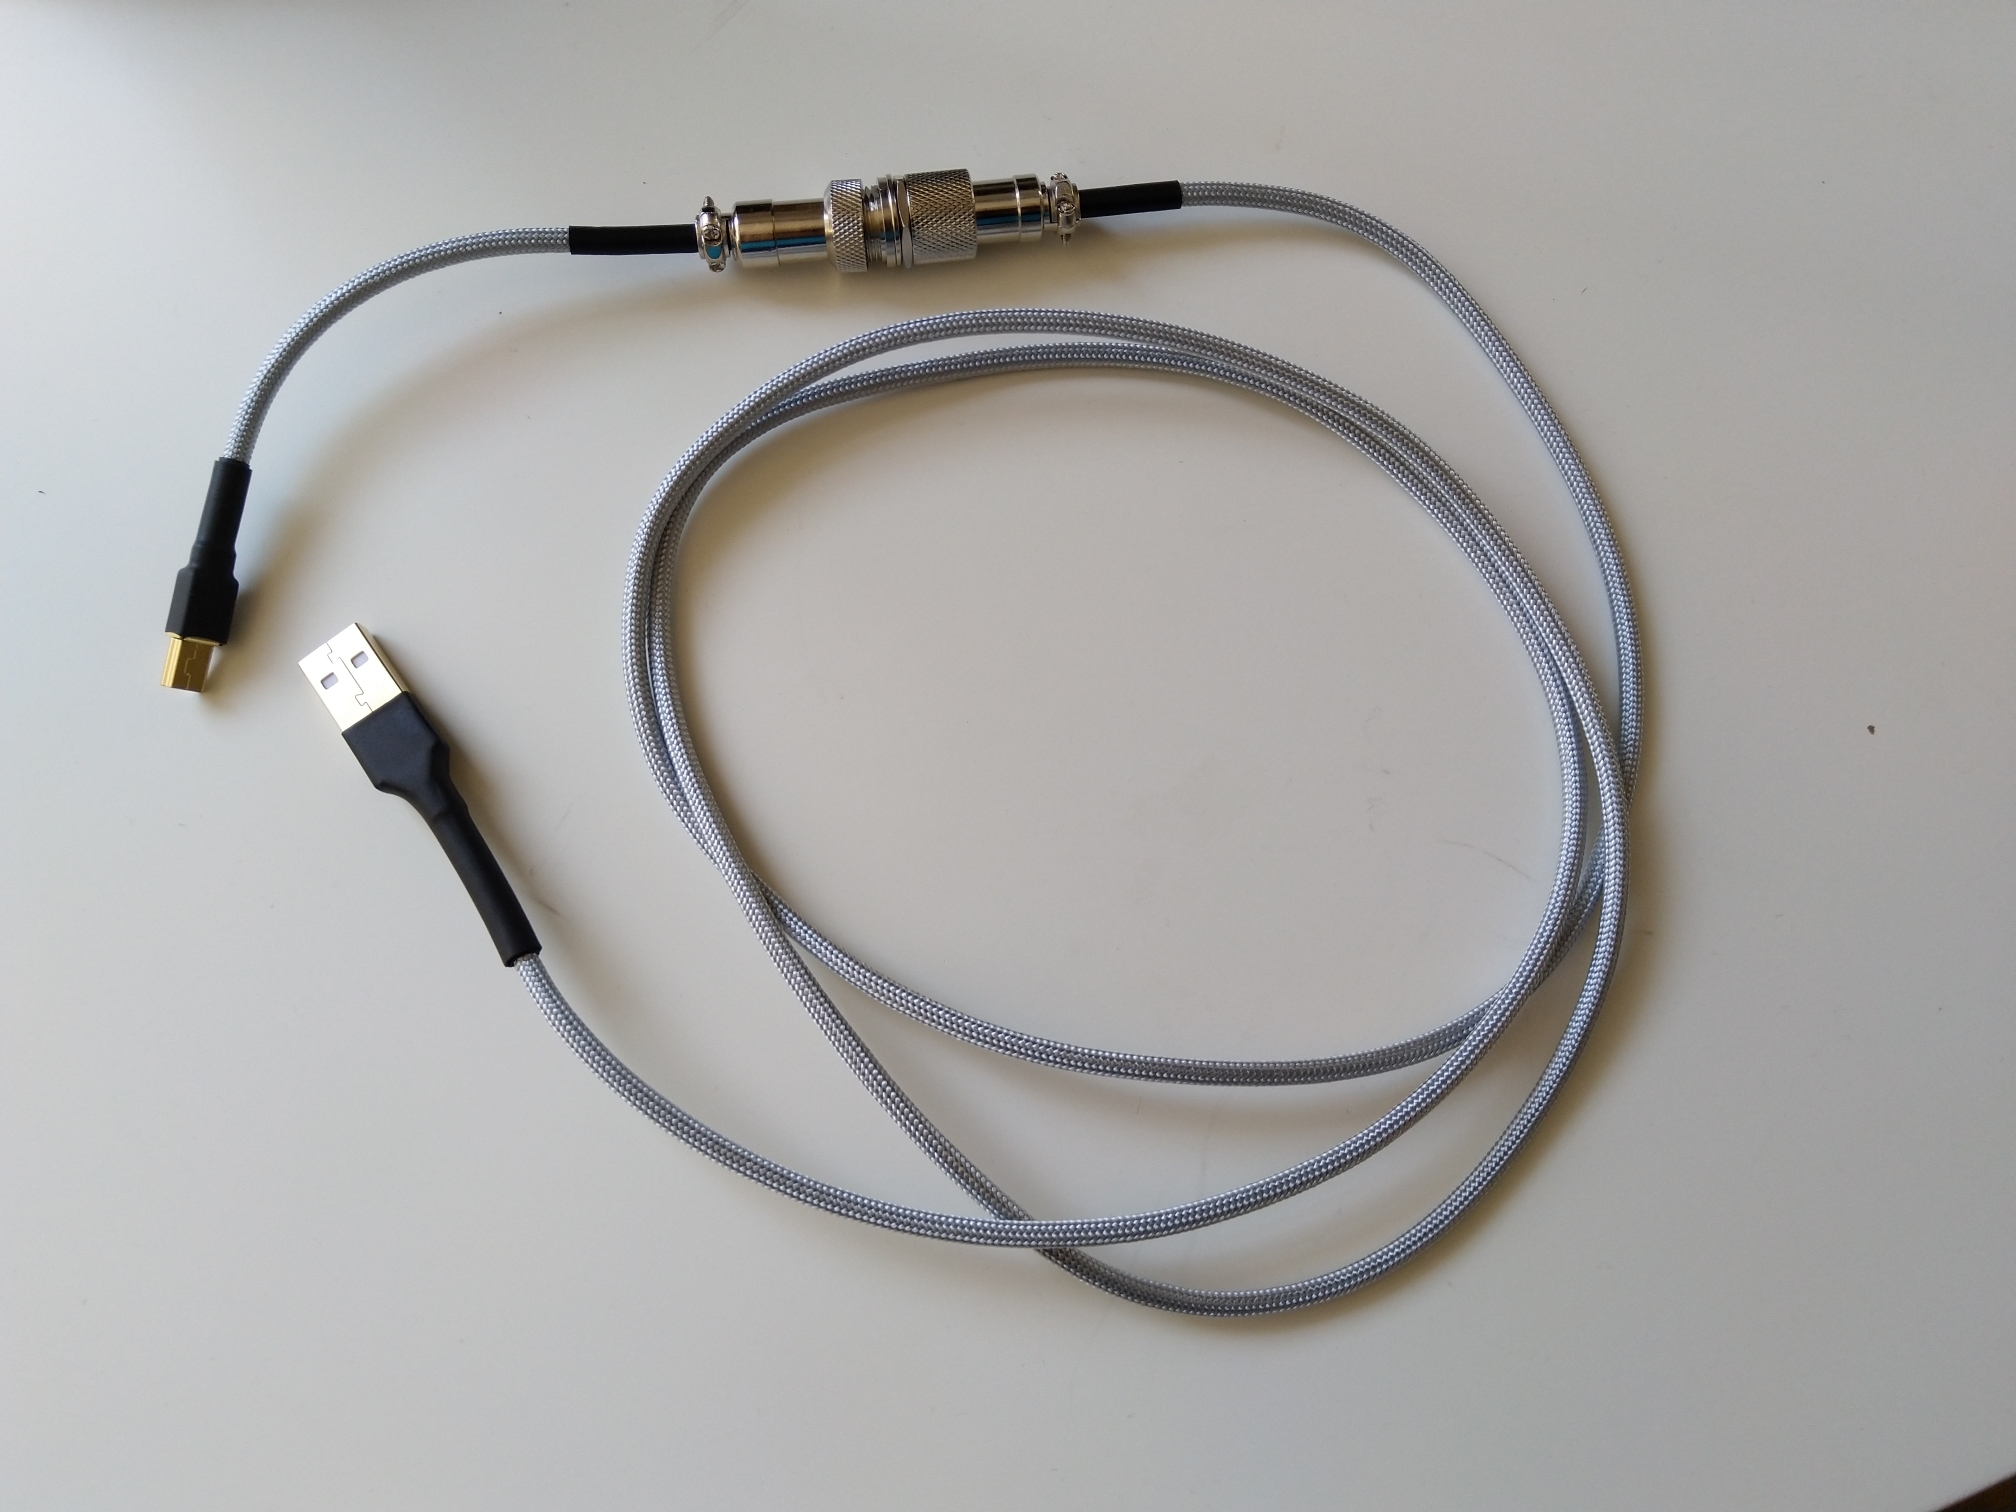
Build log
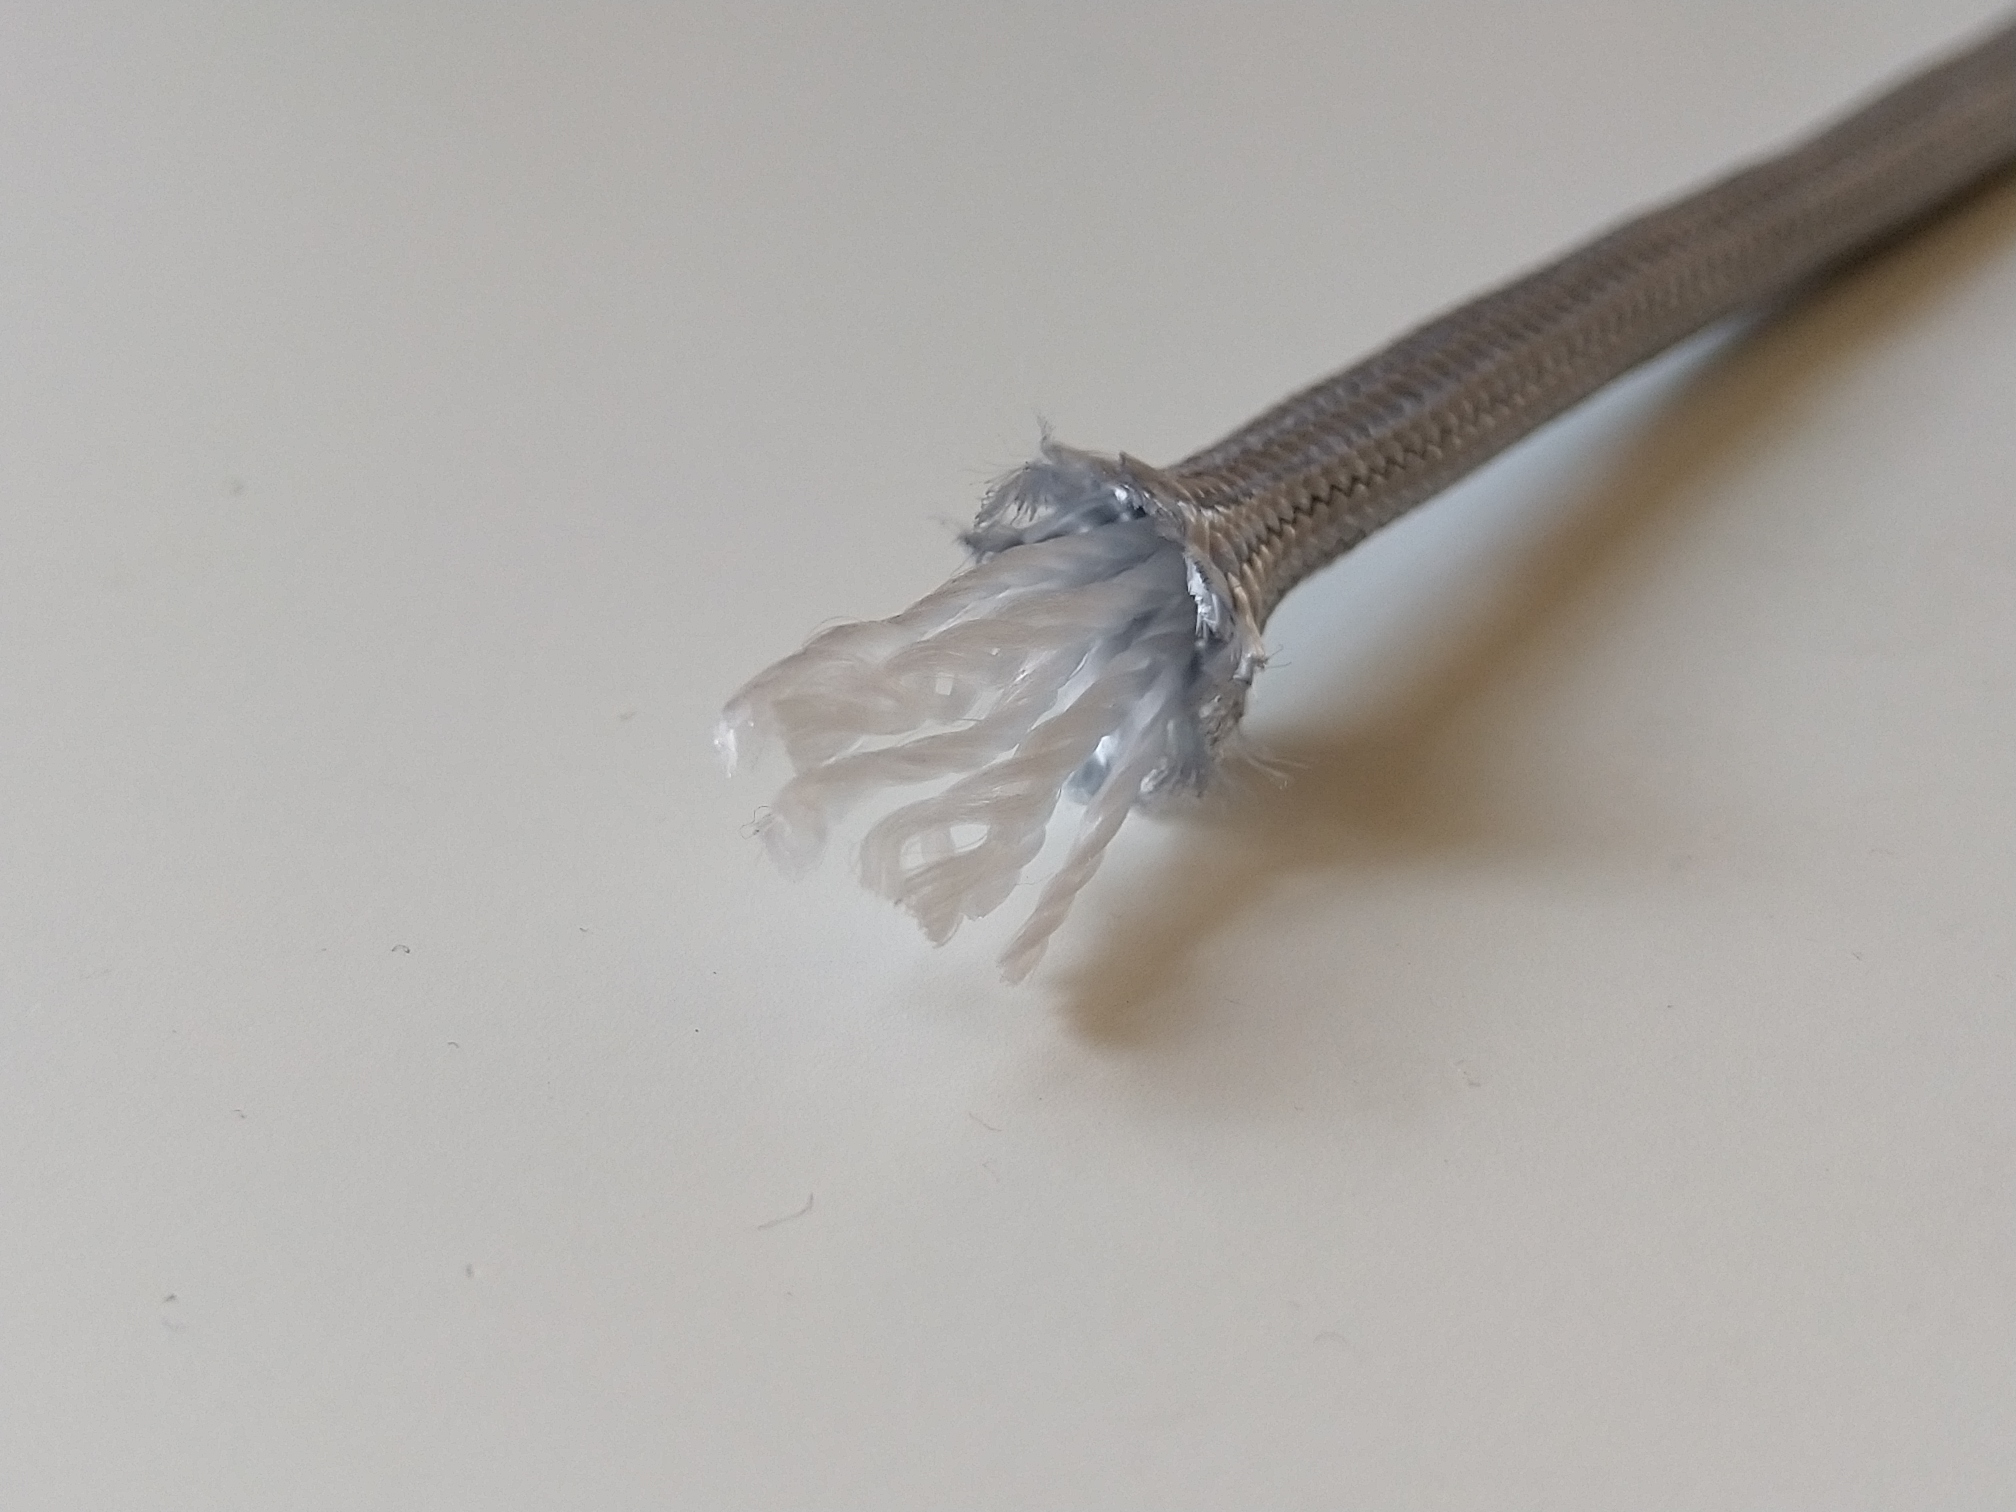
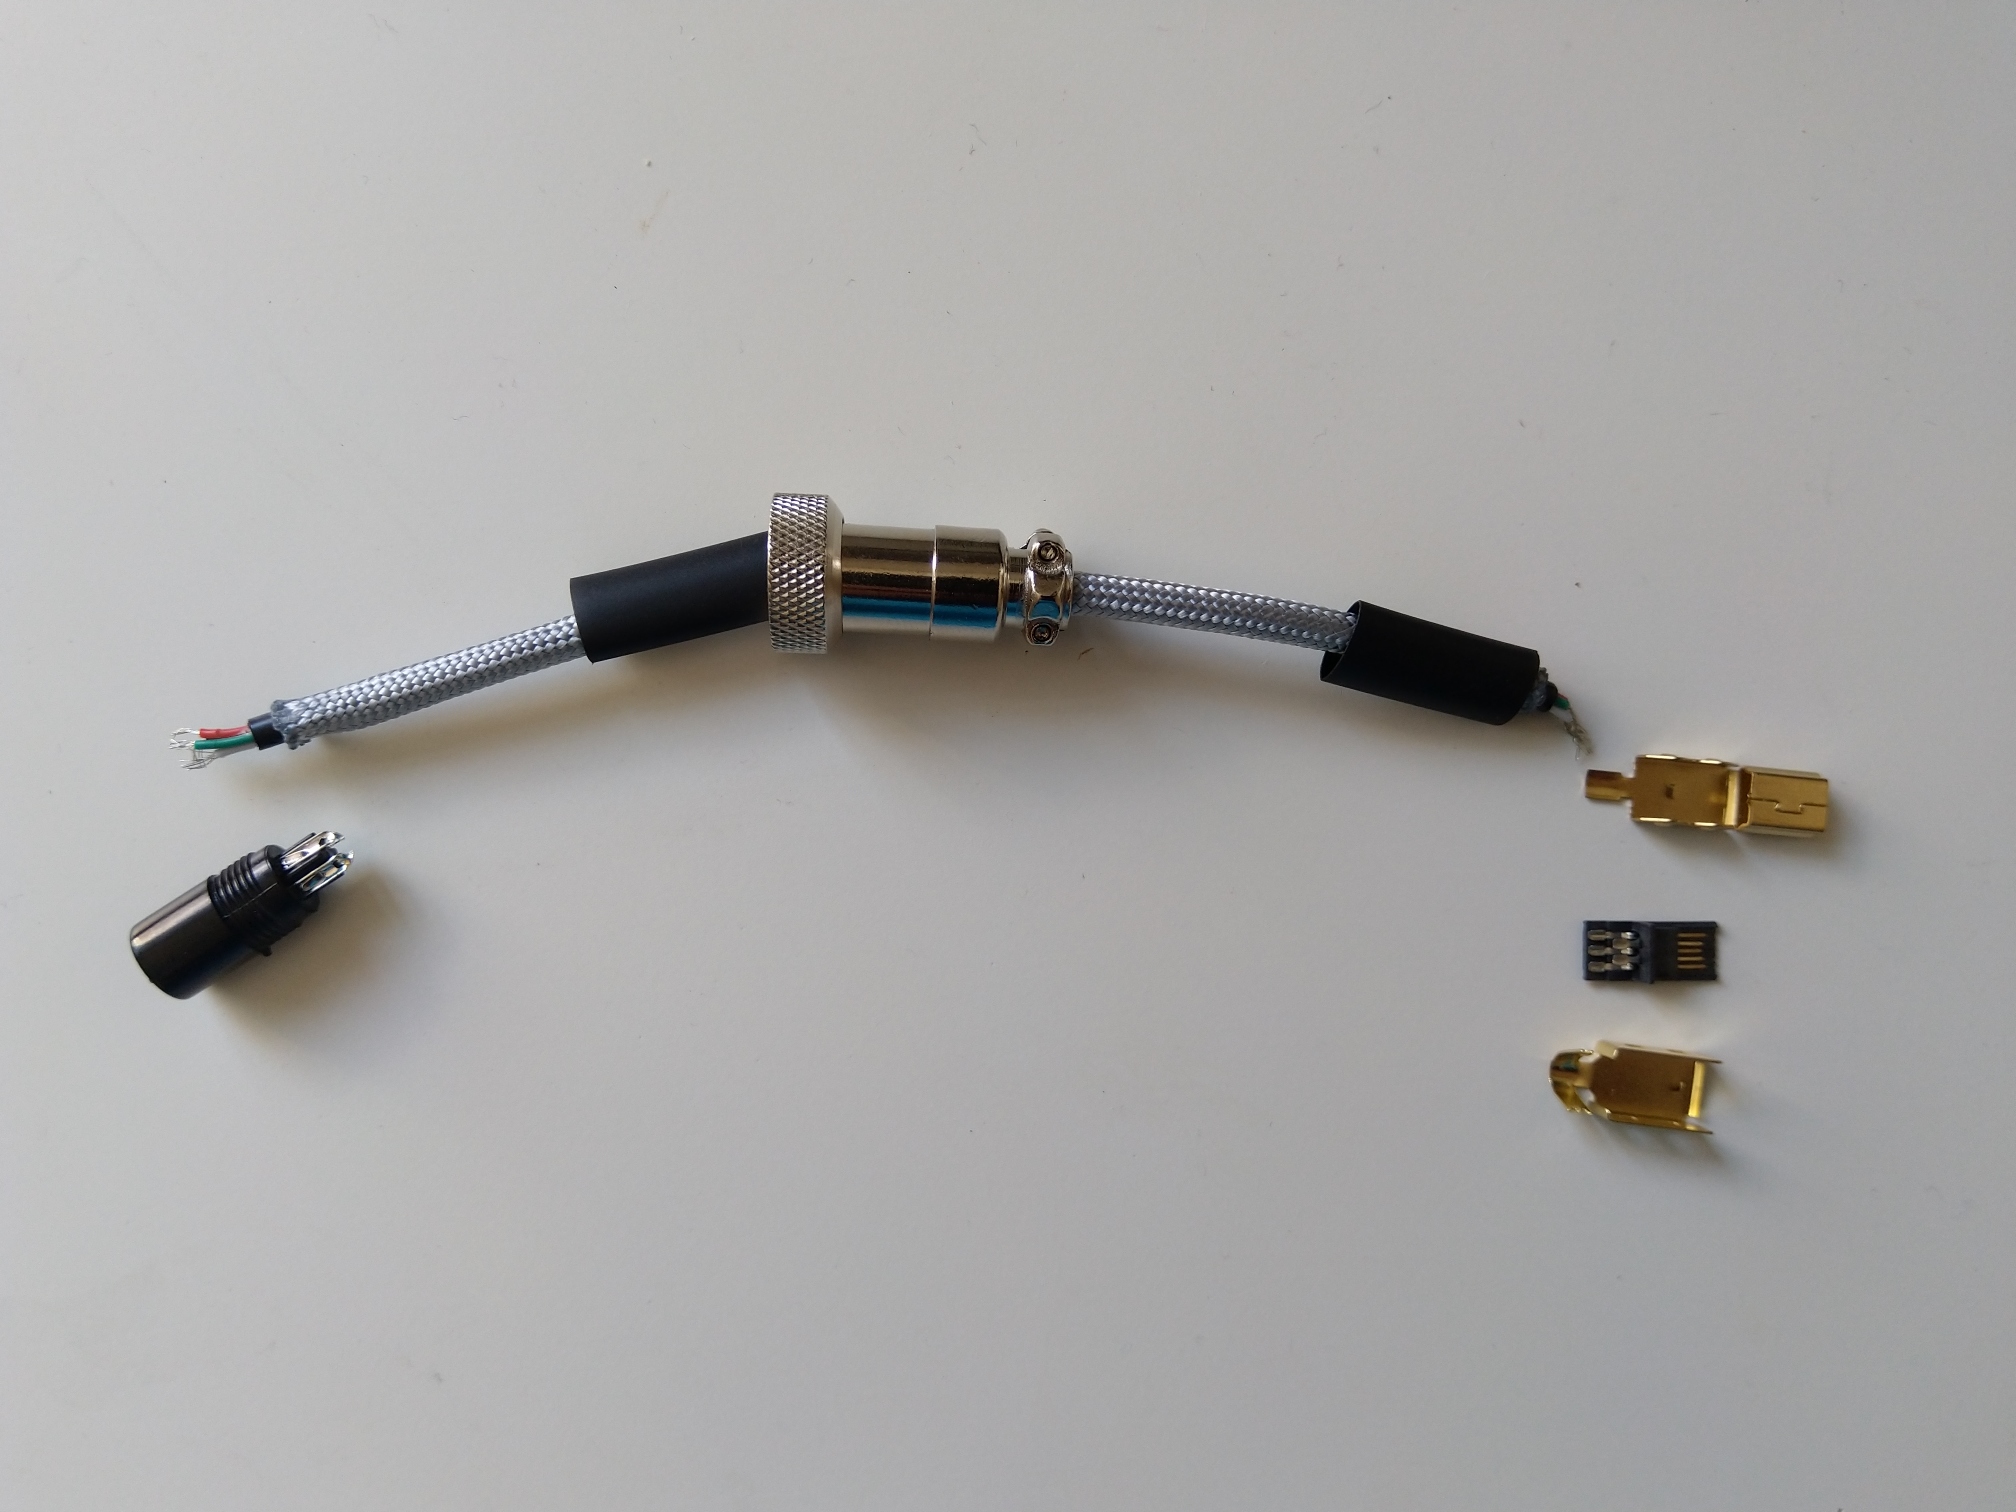
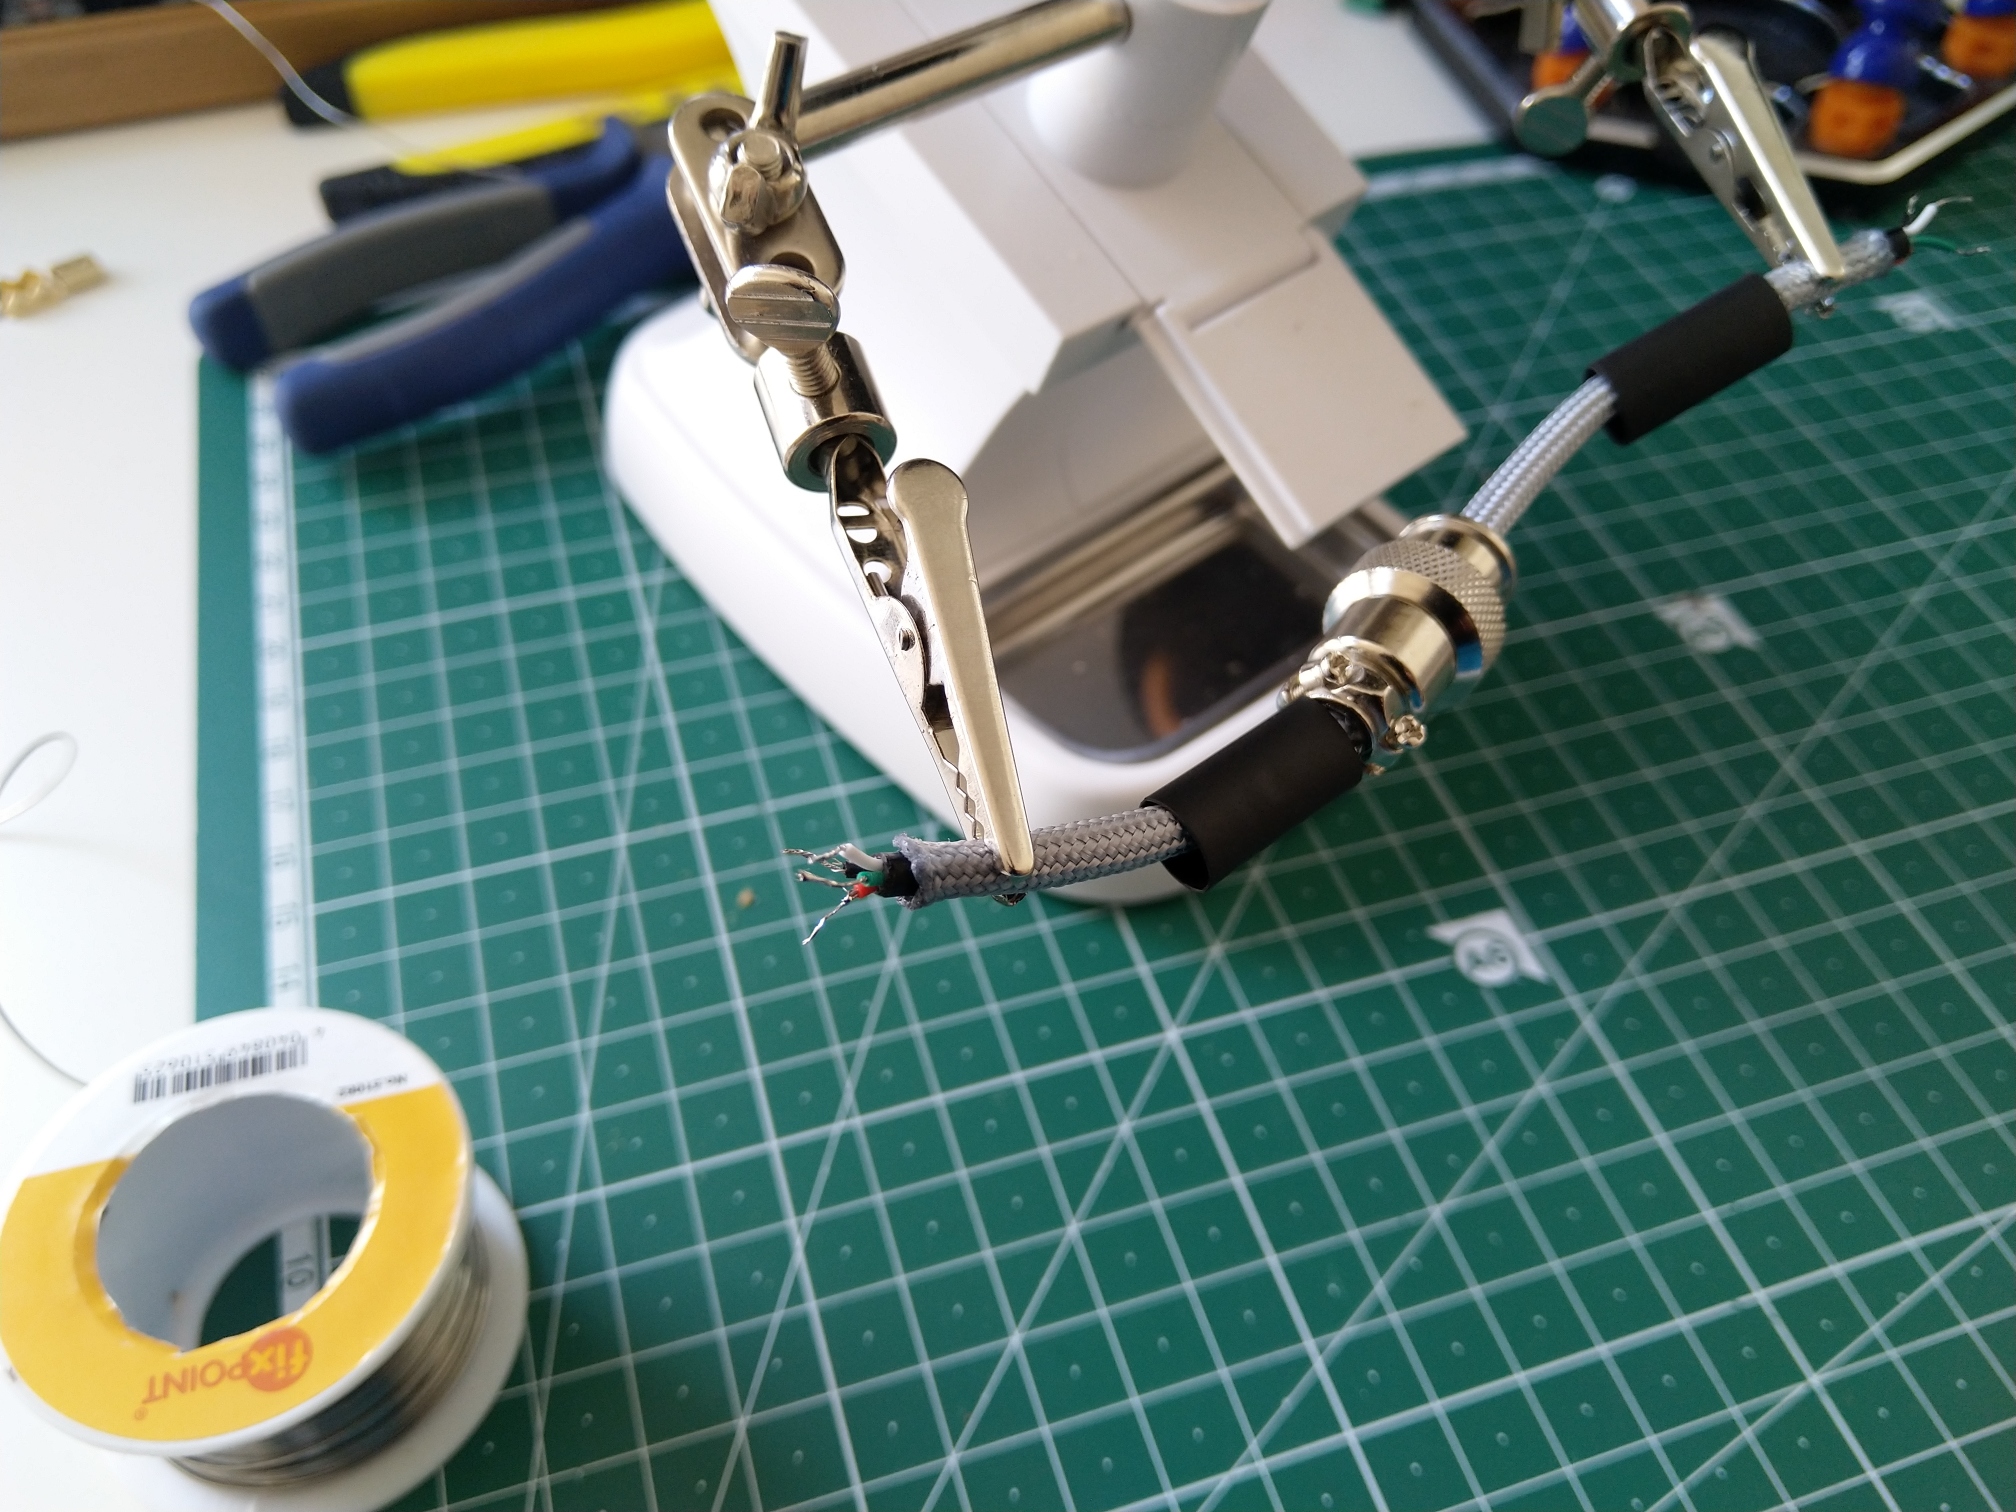
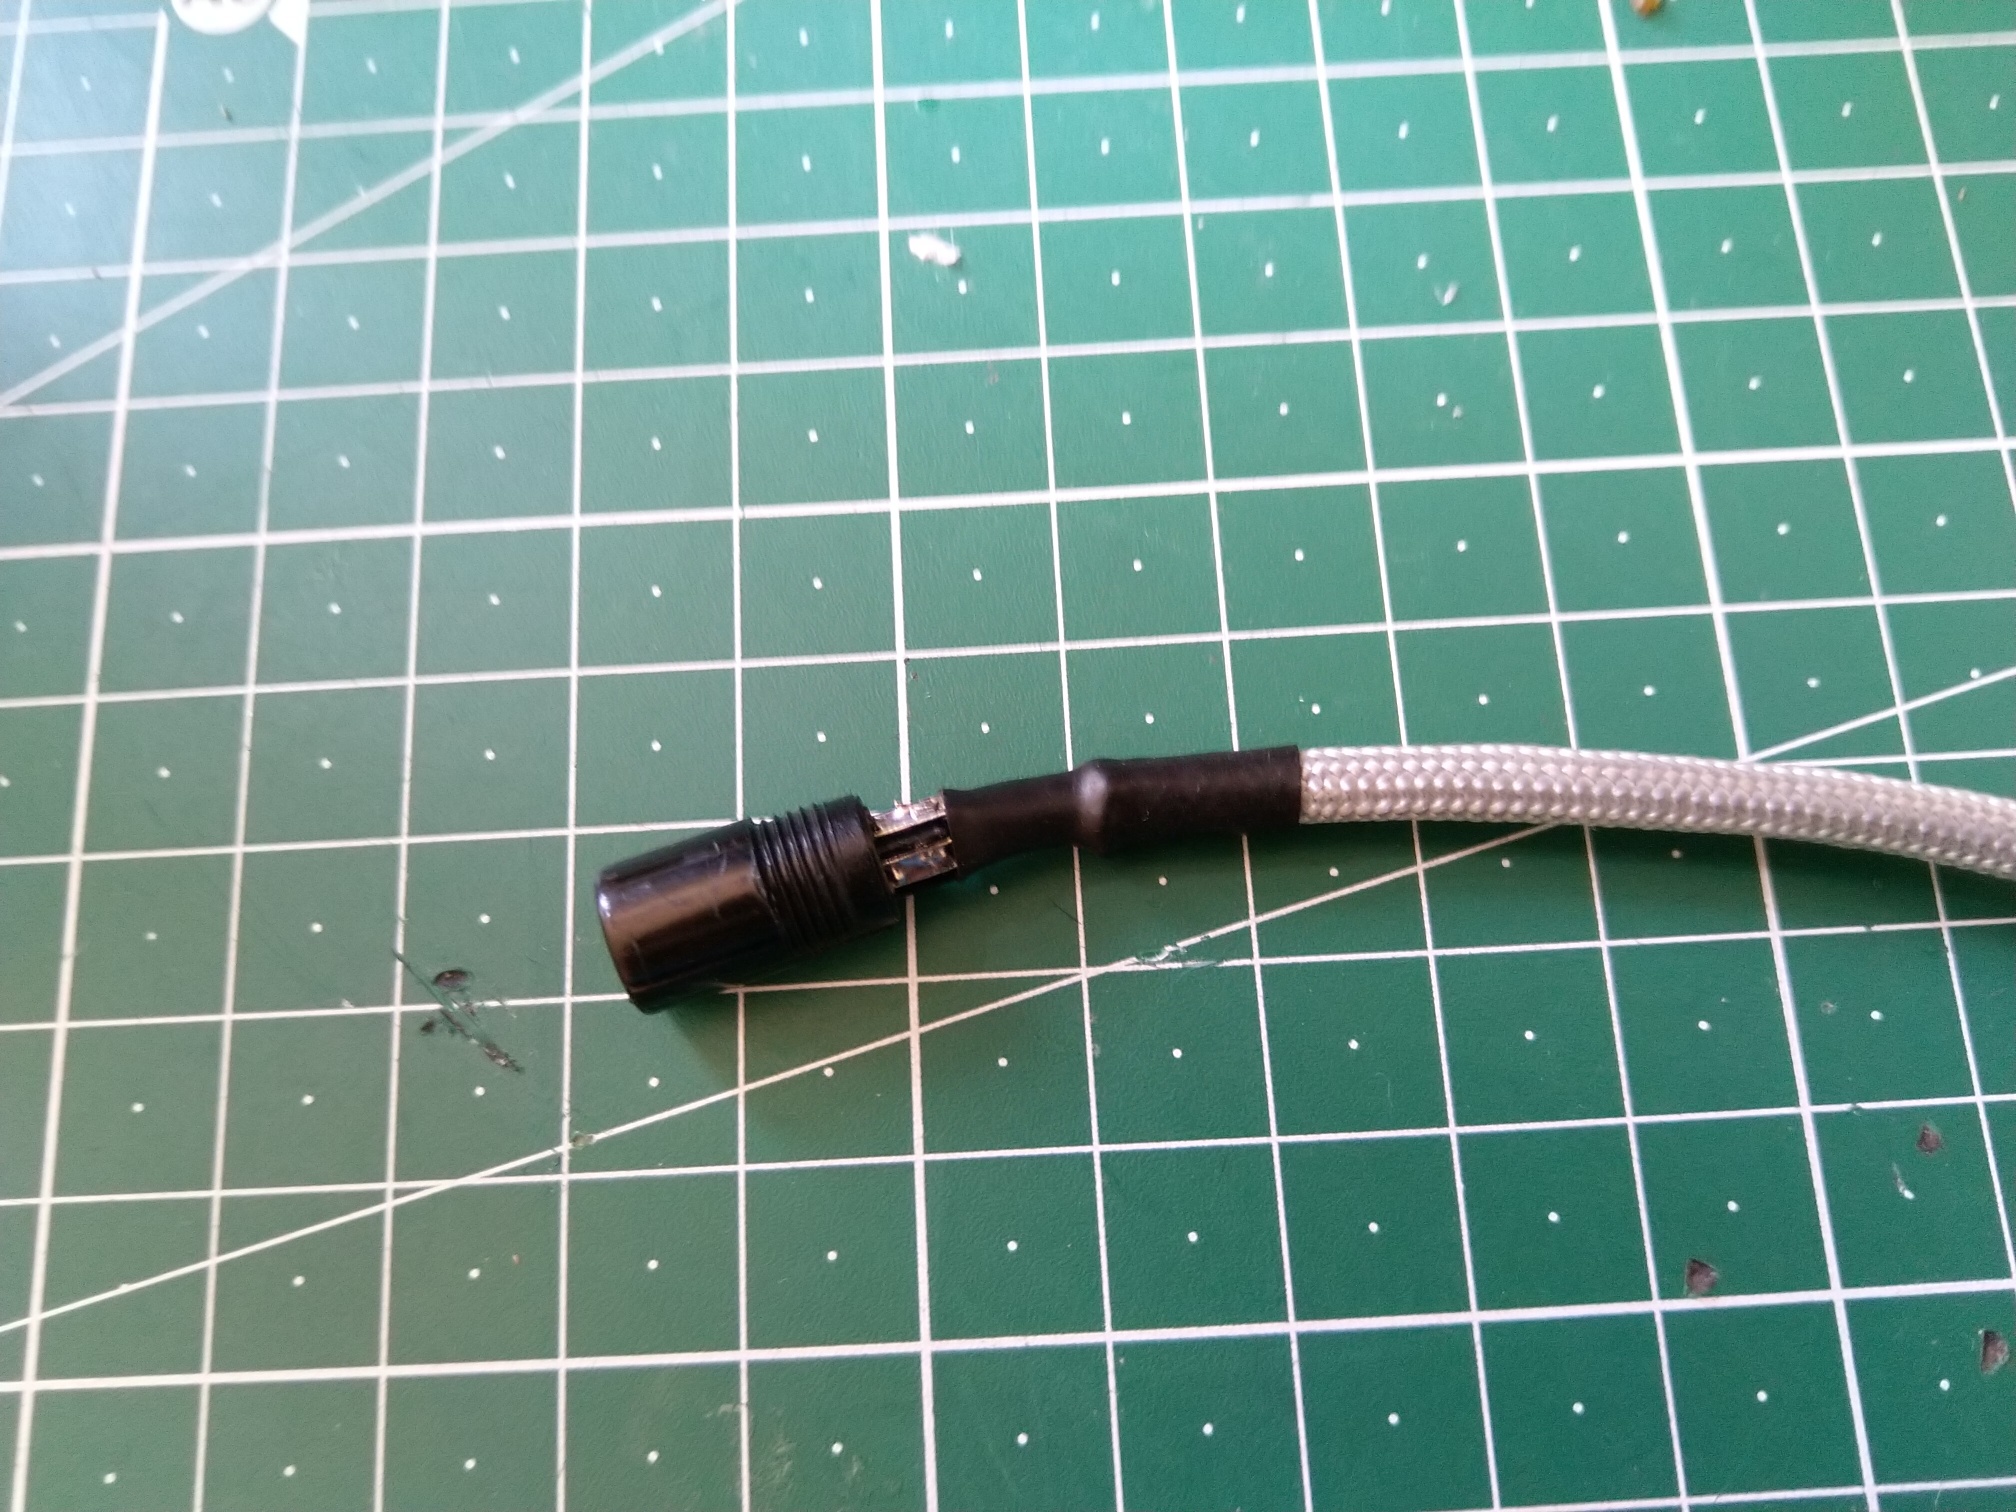
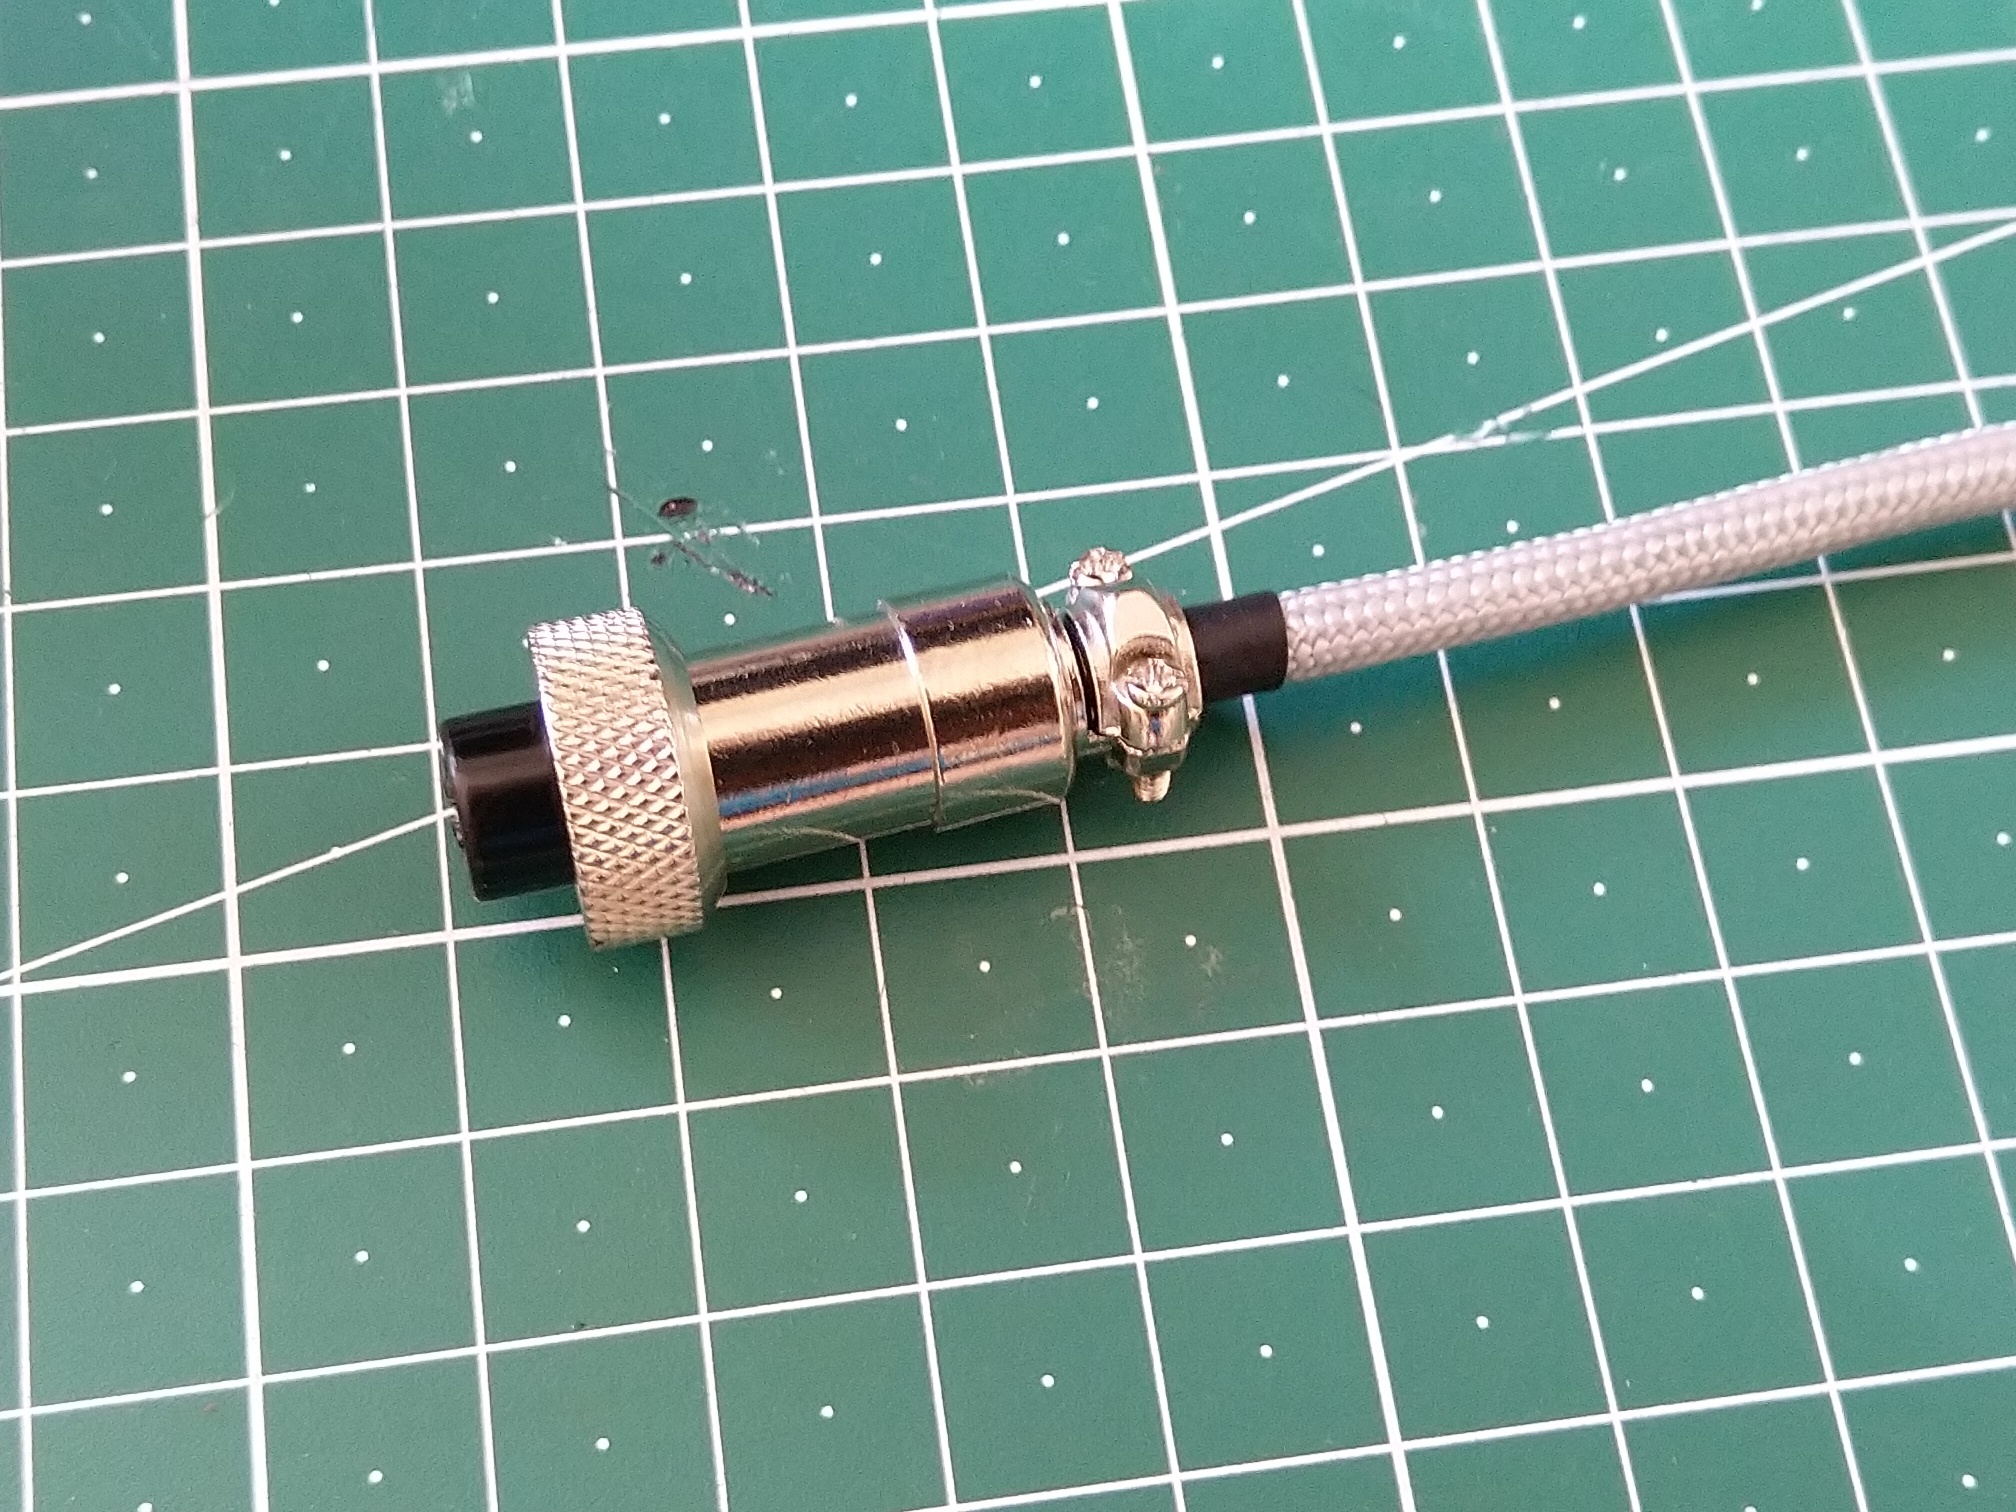
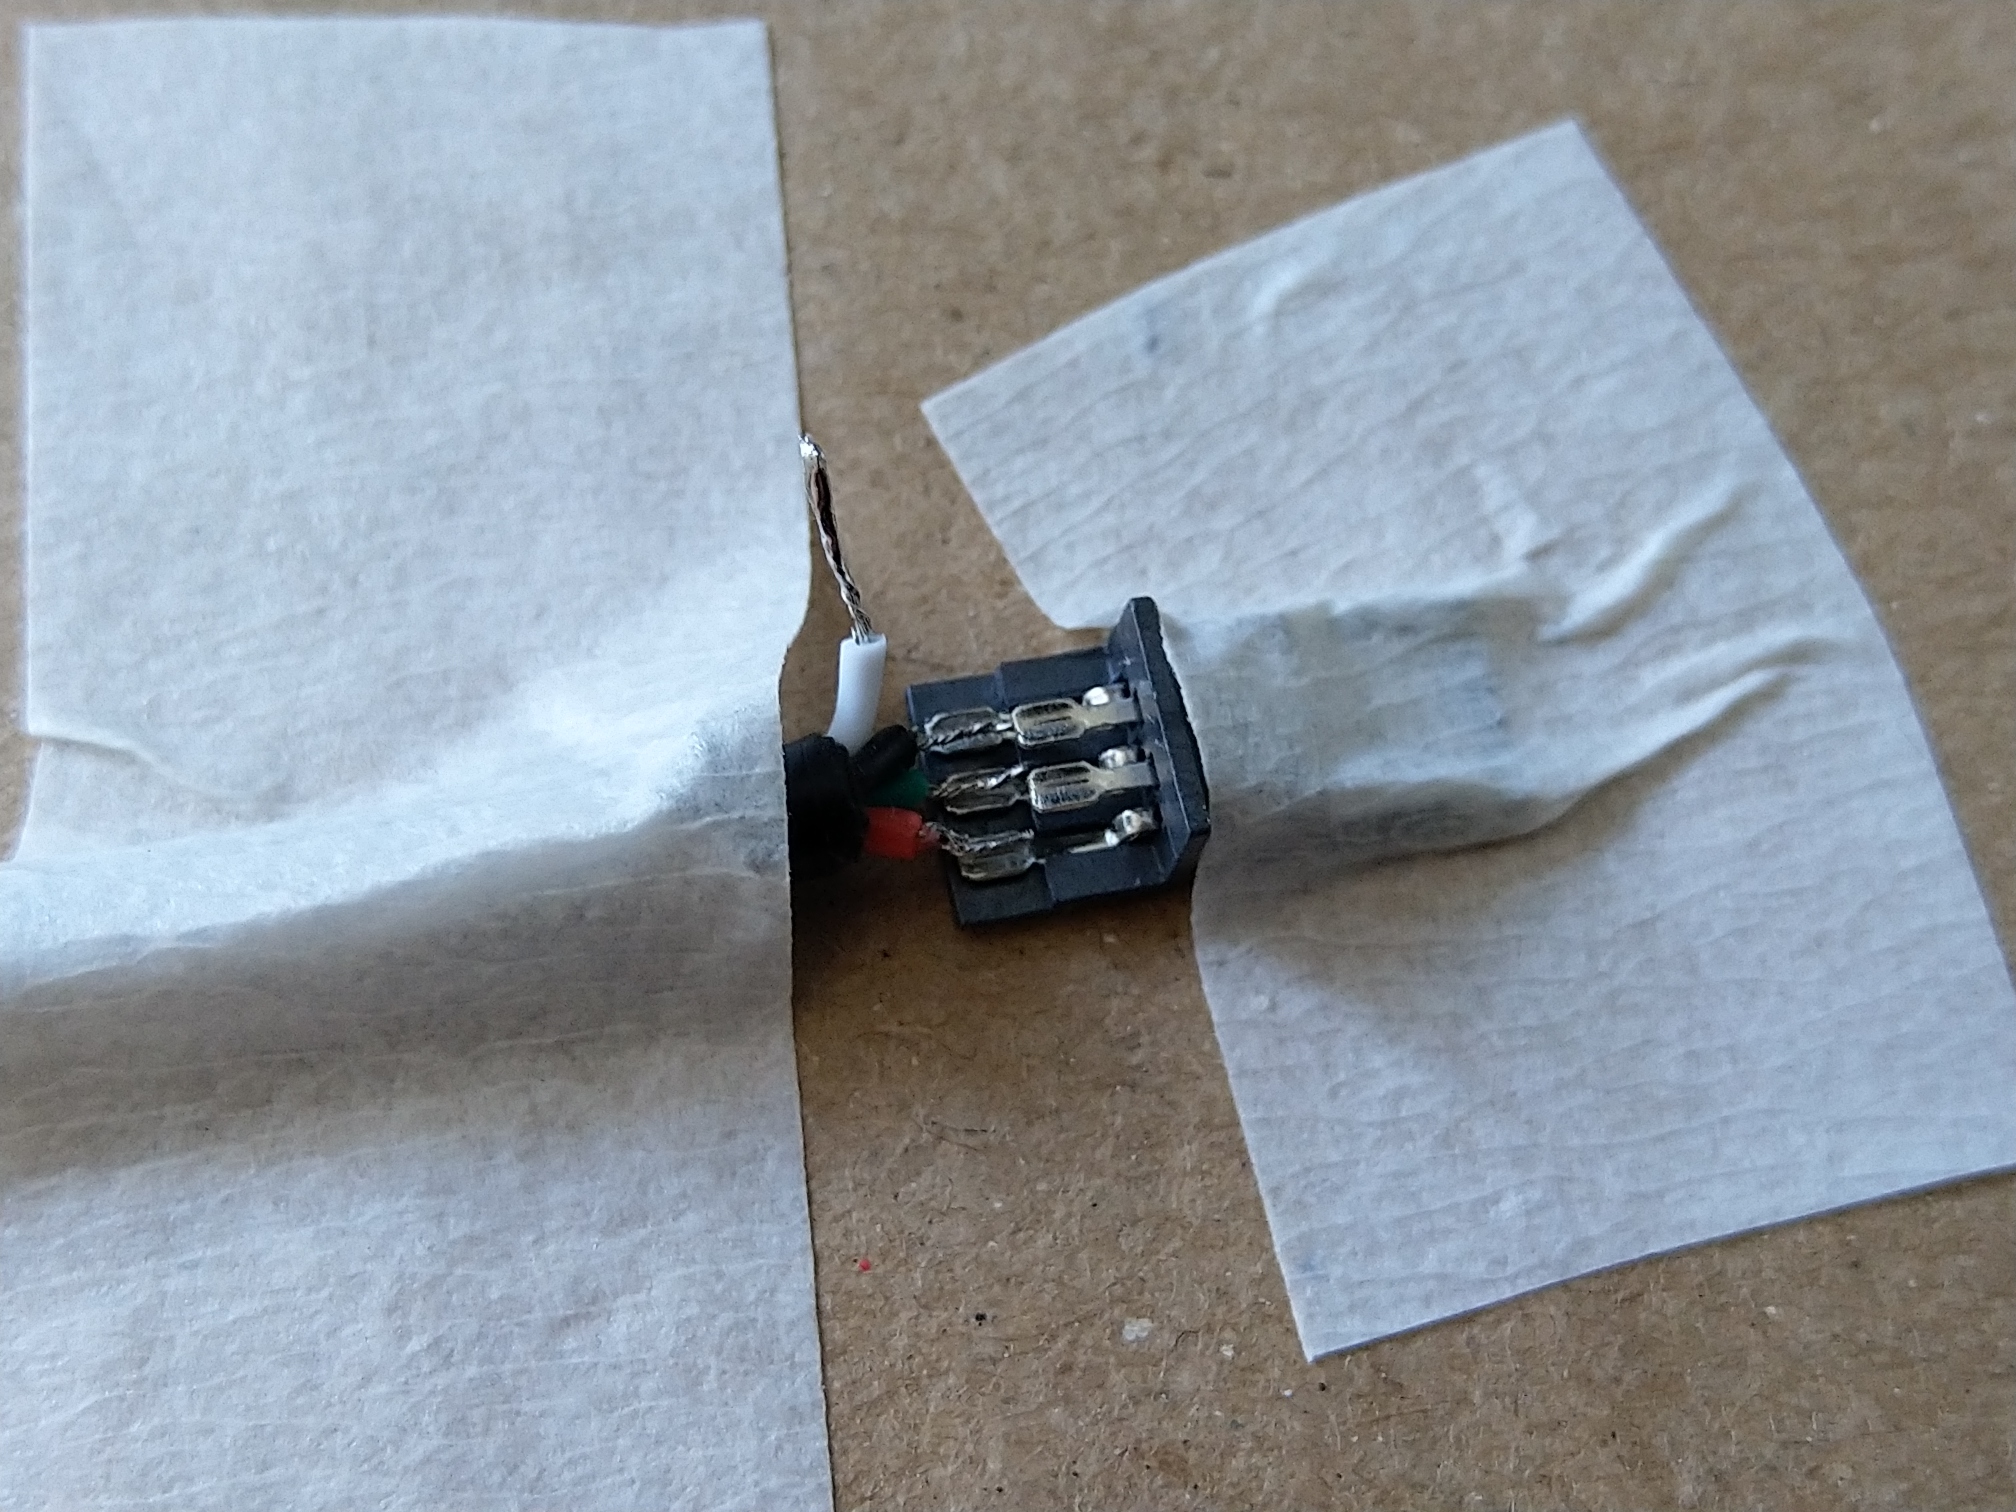
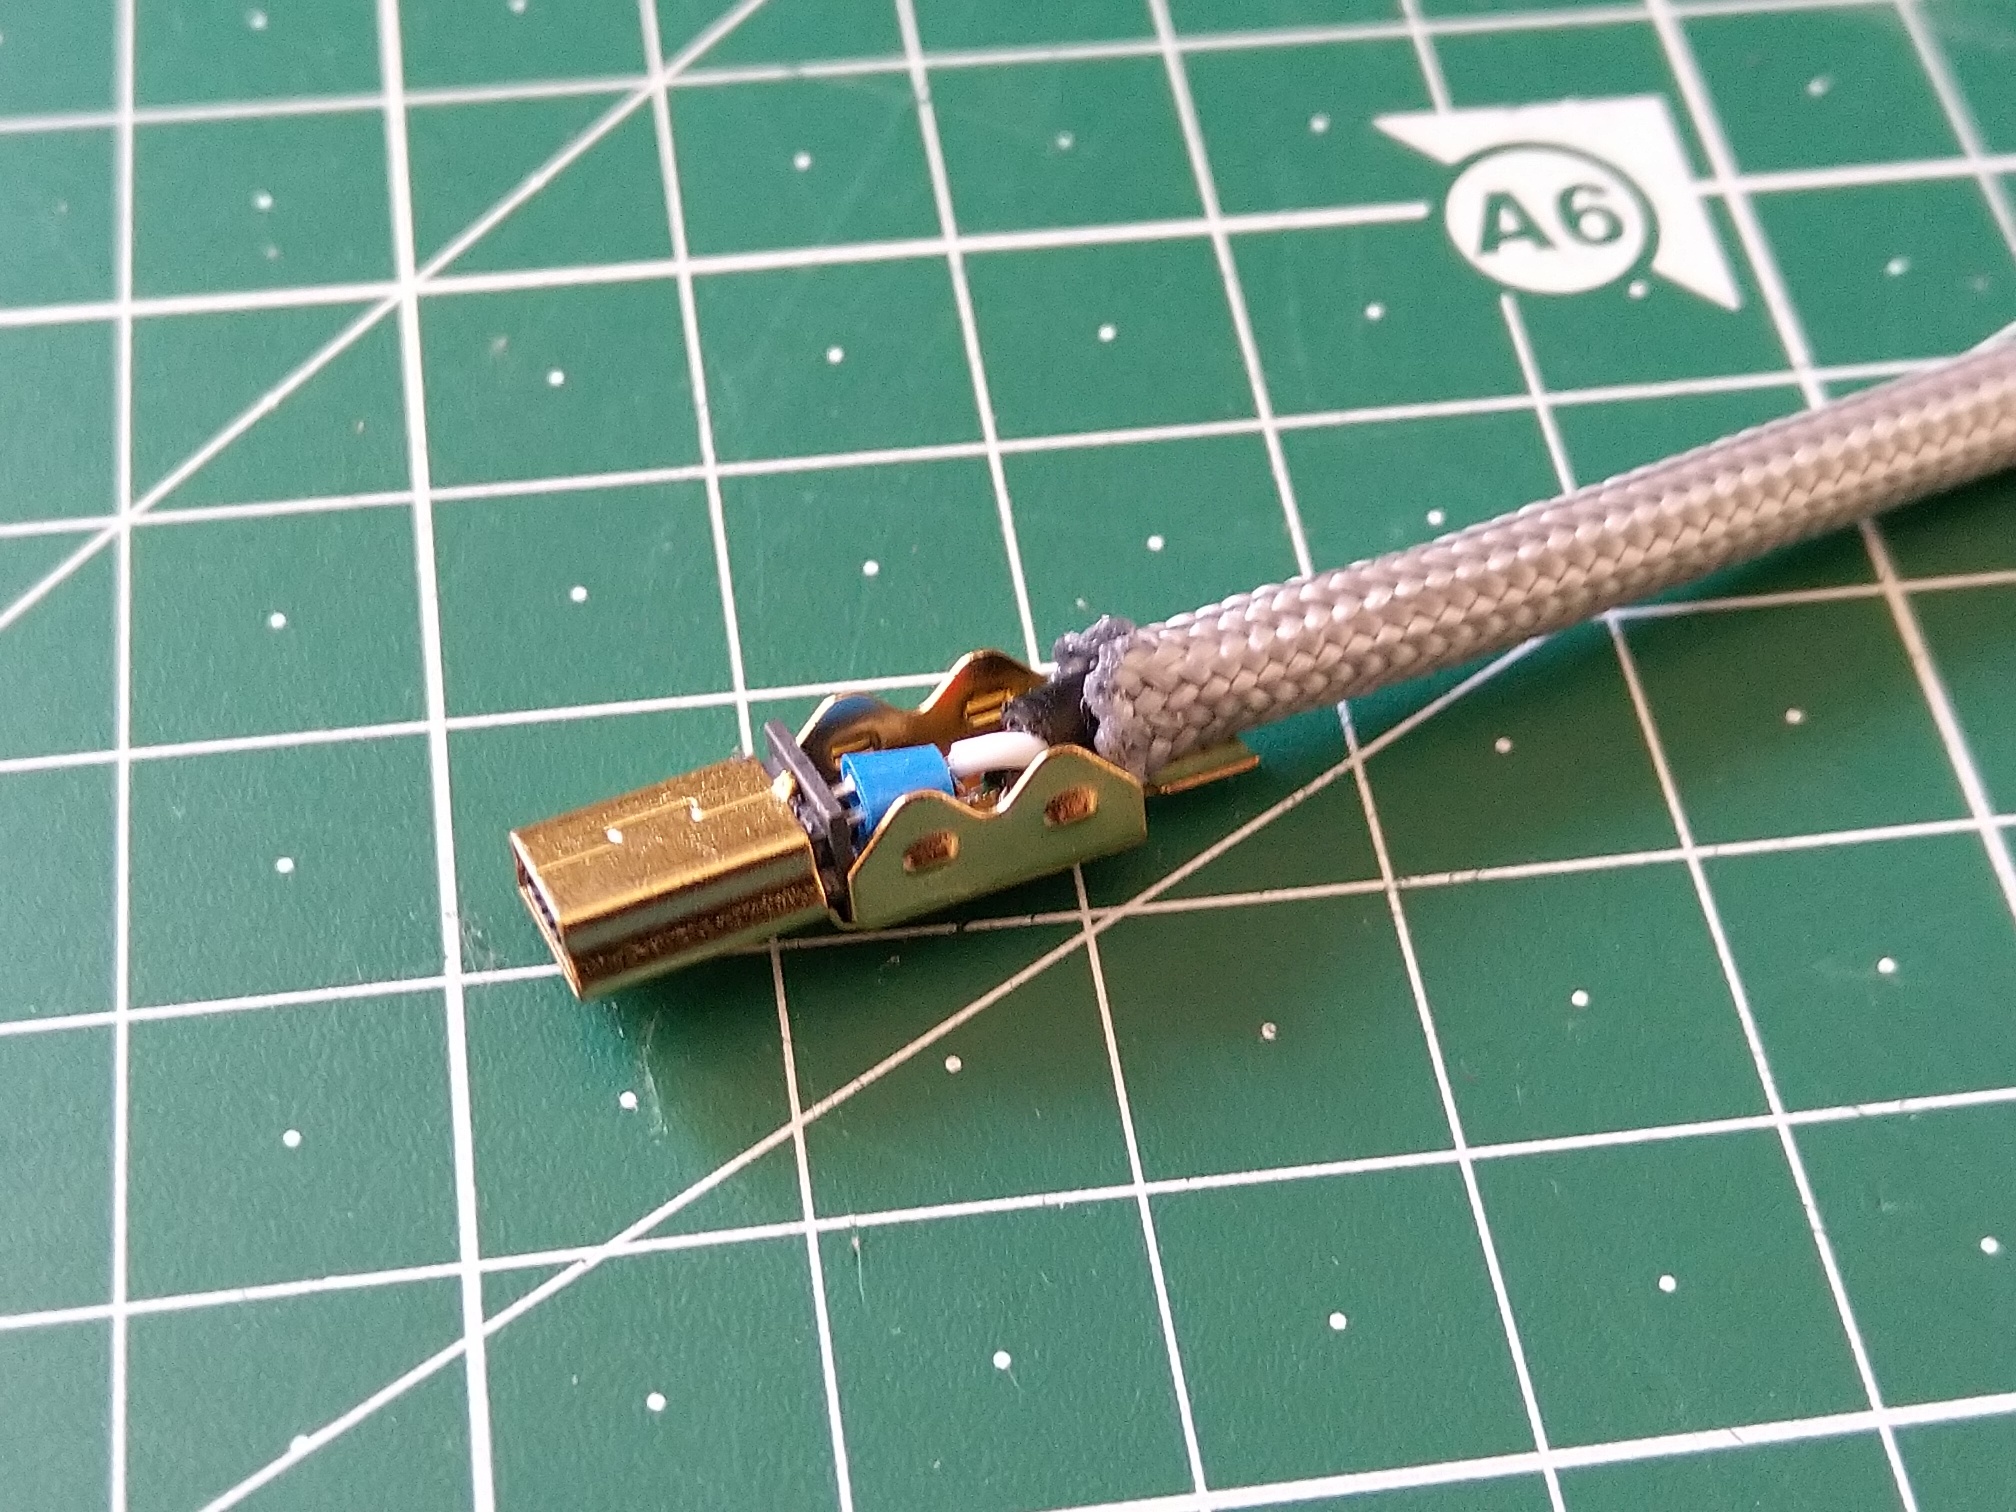
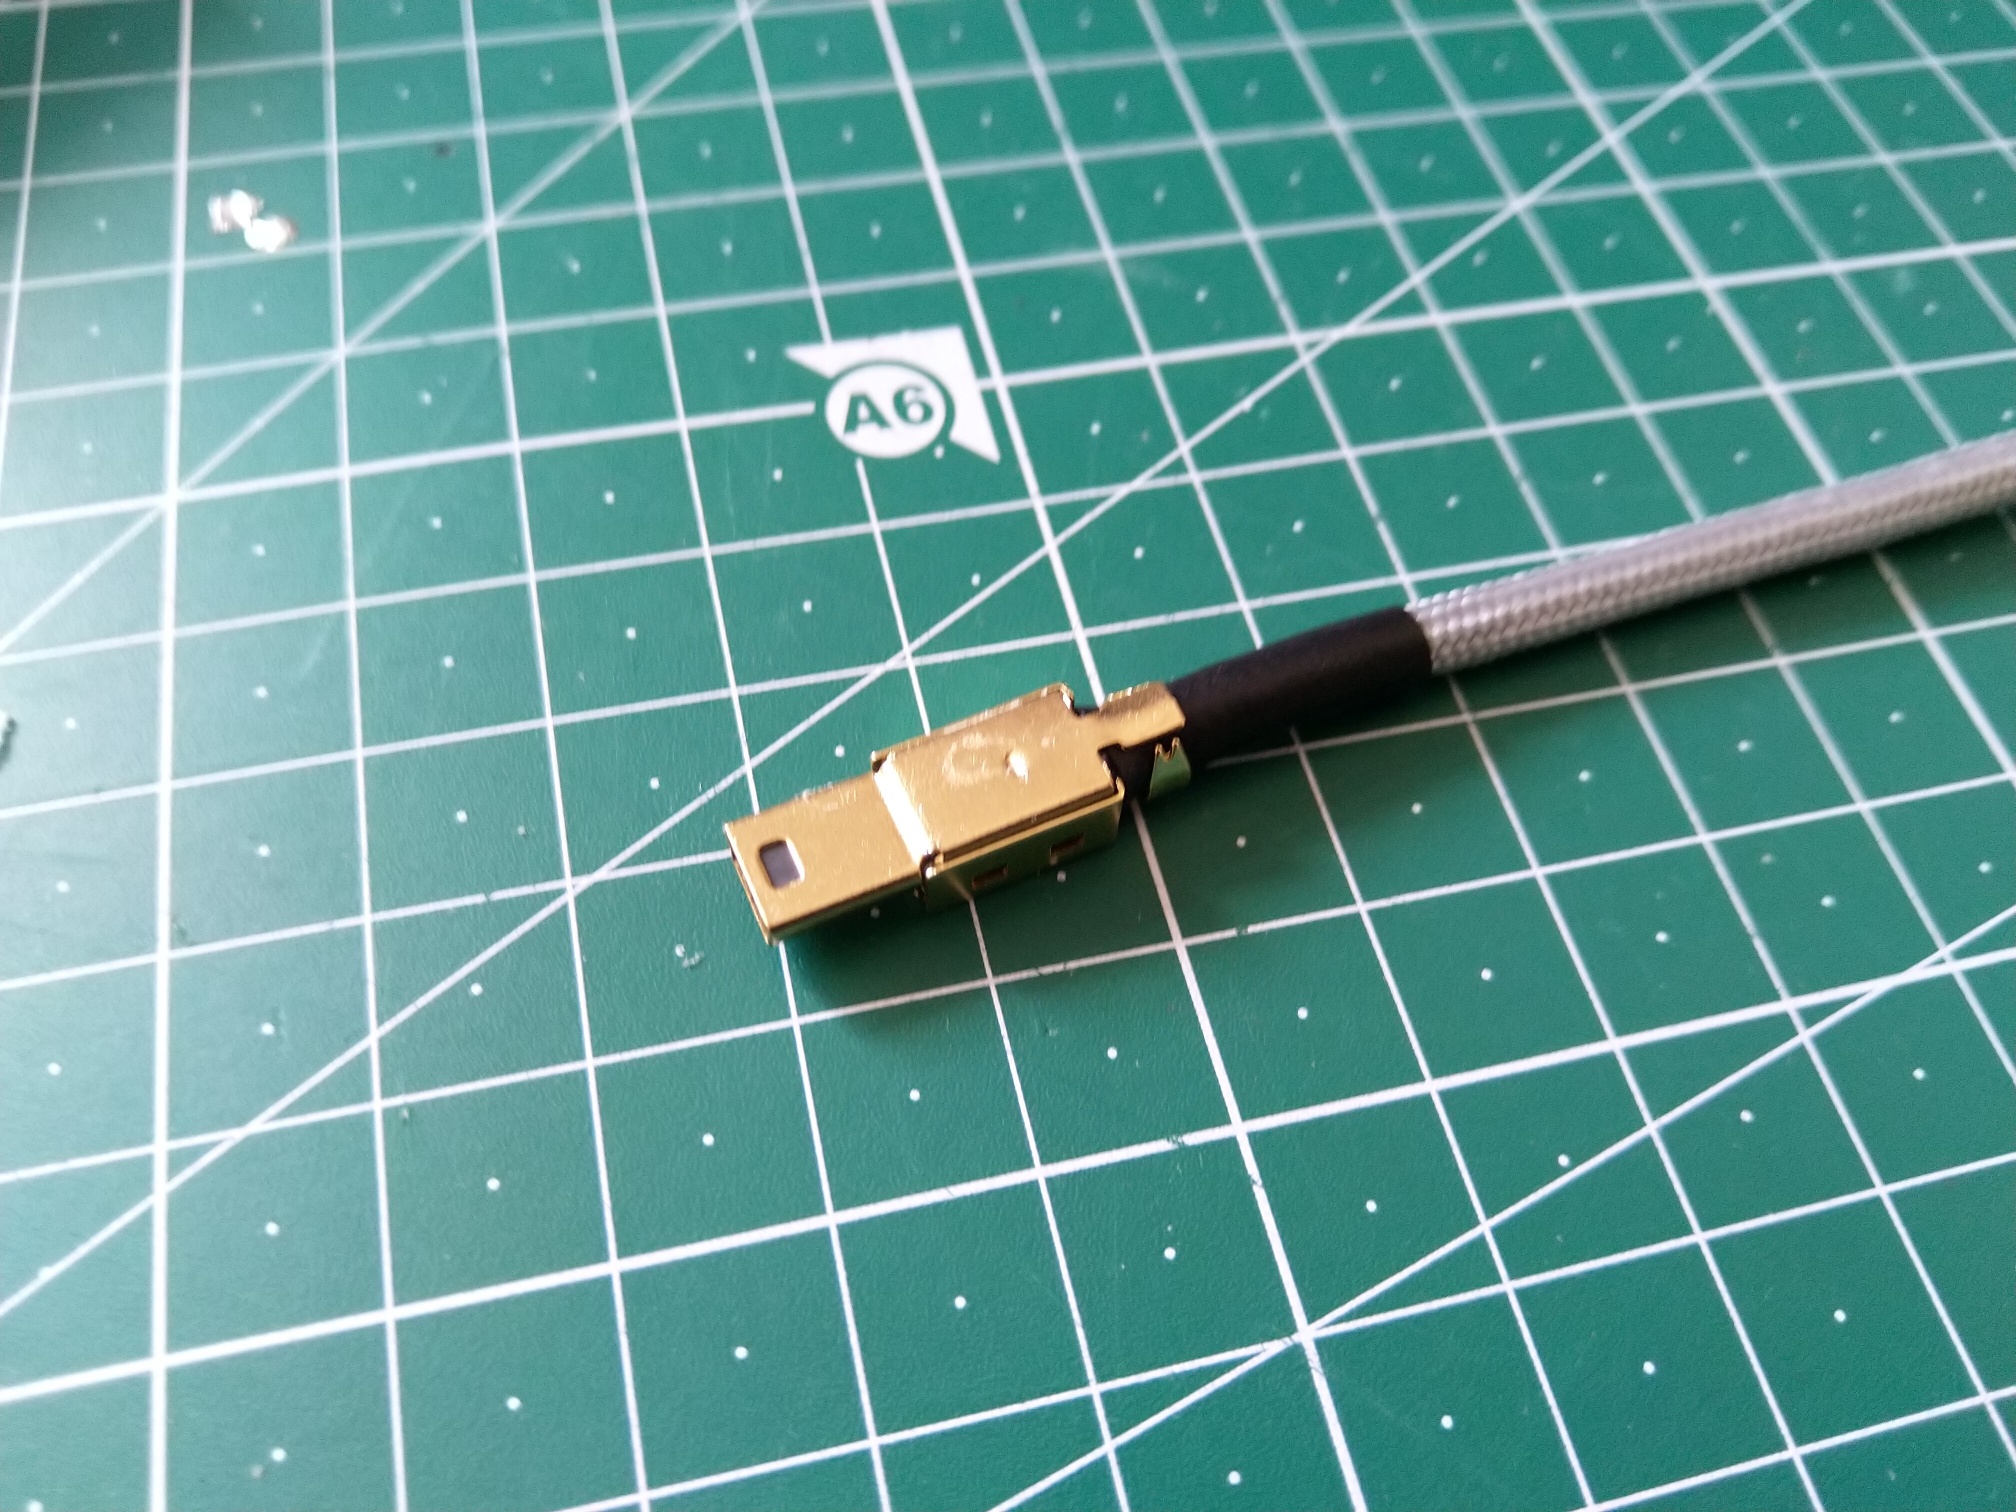
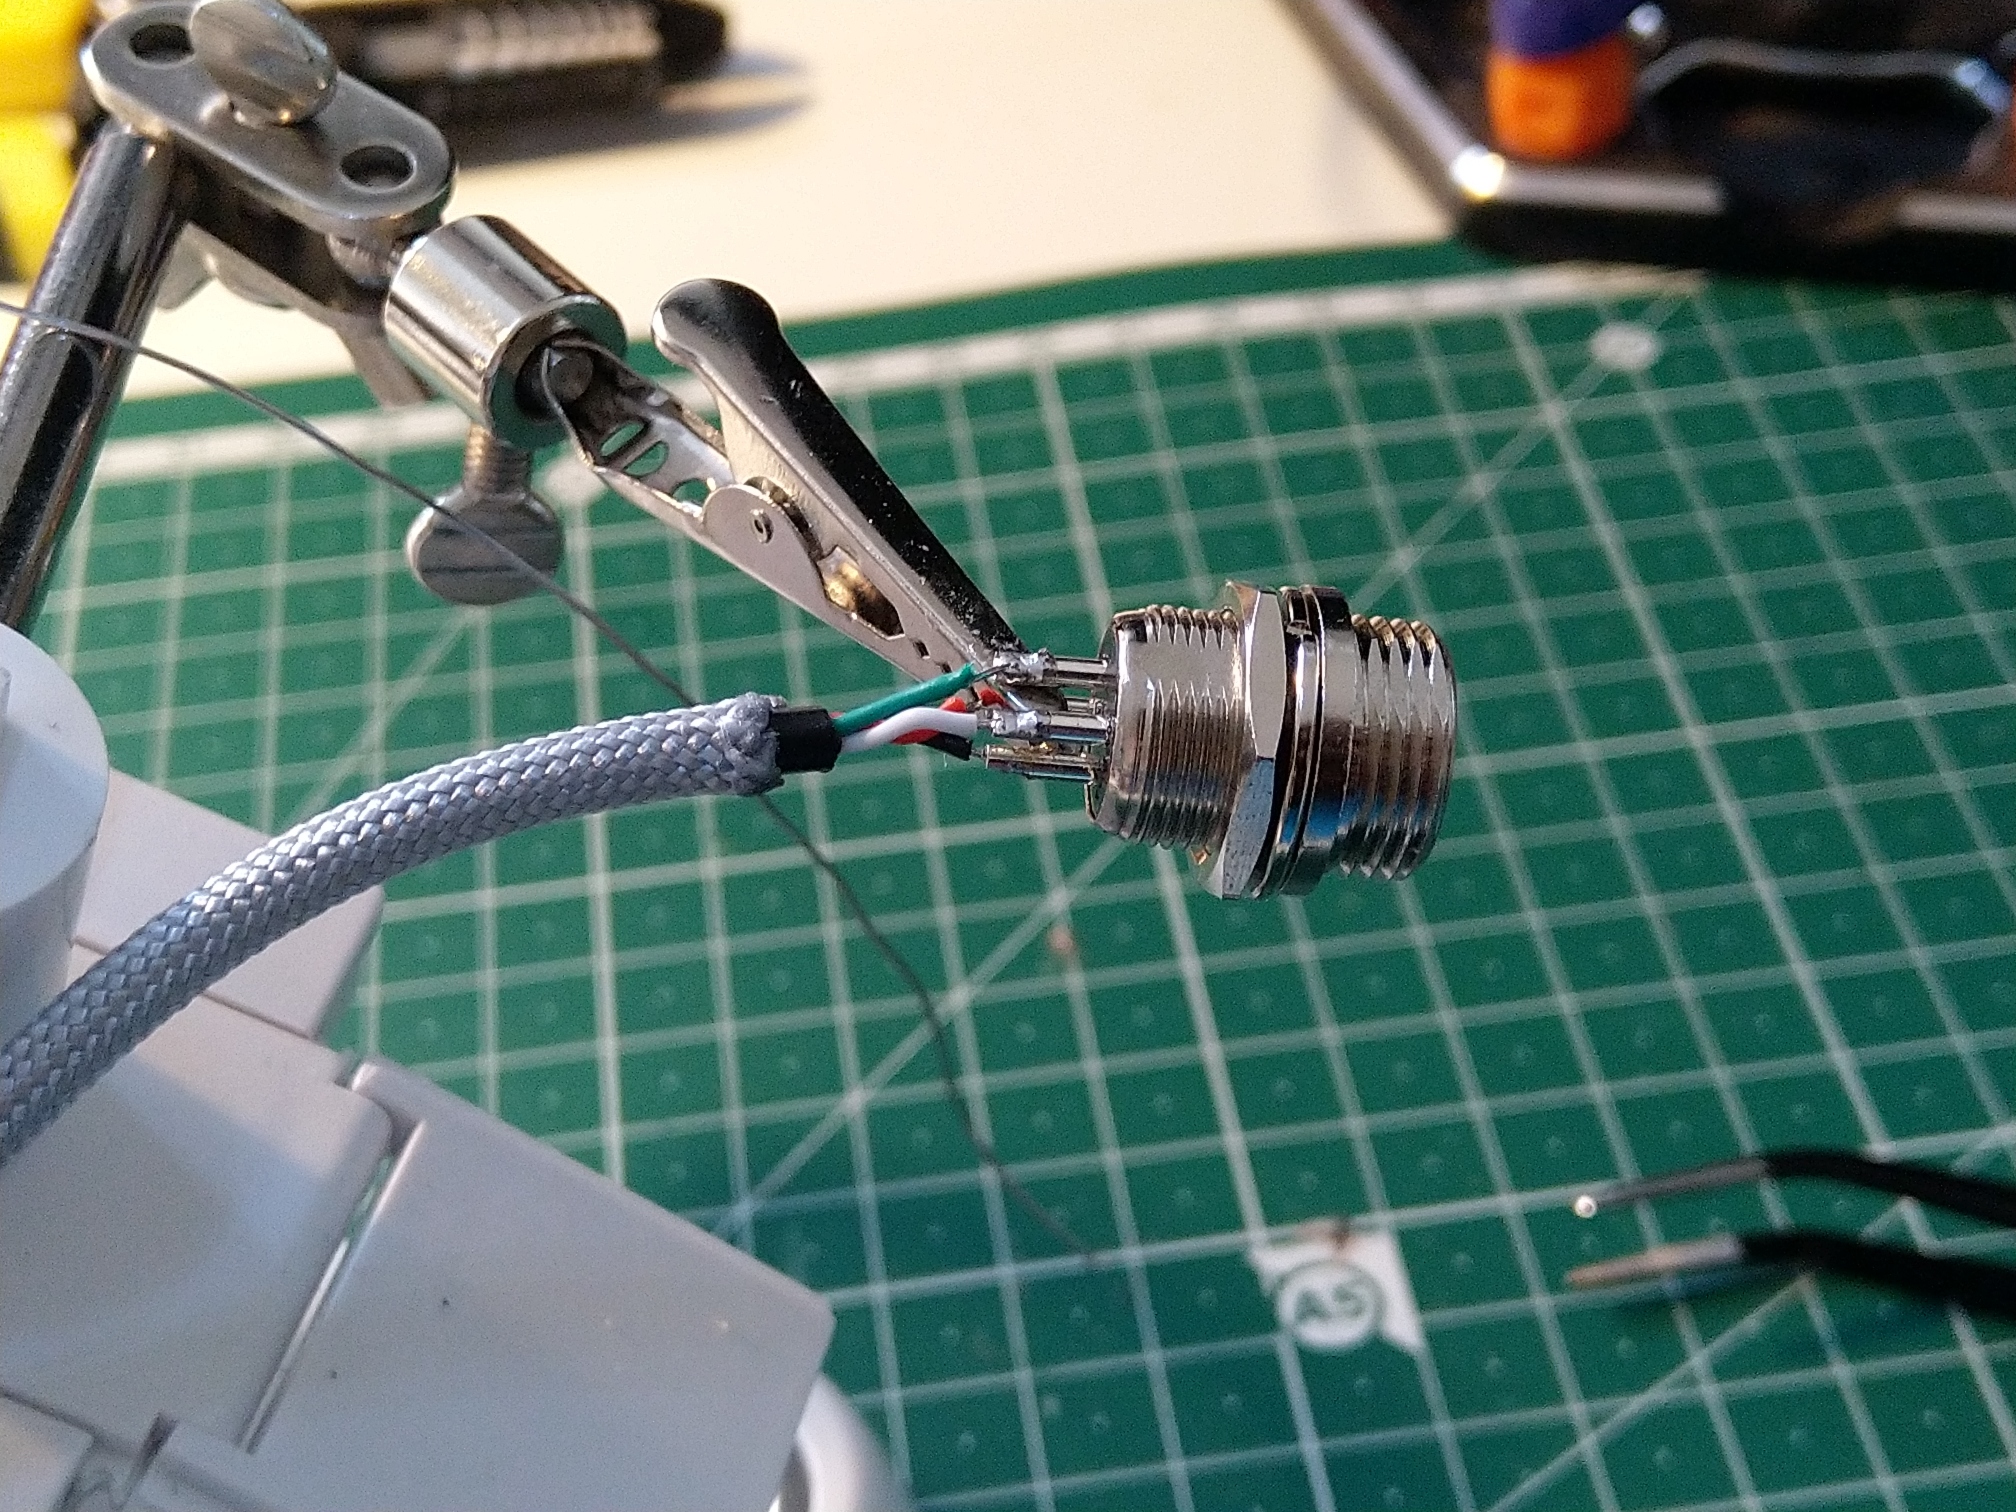
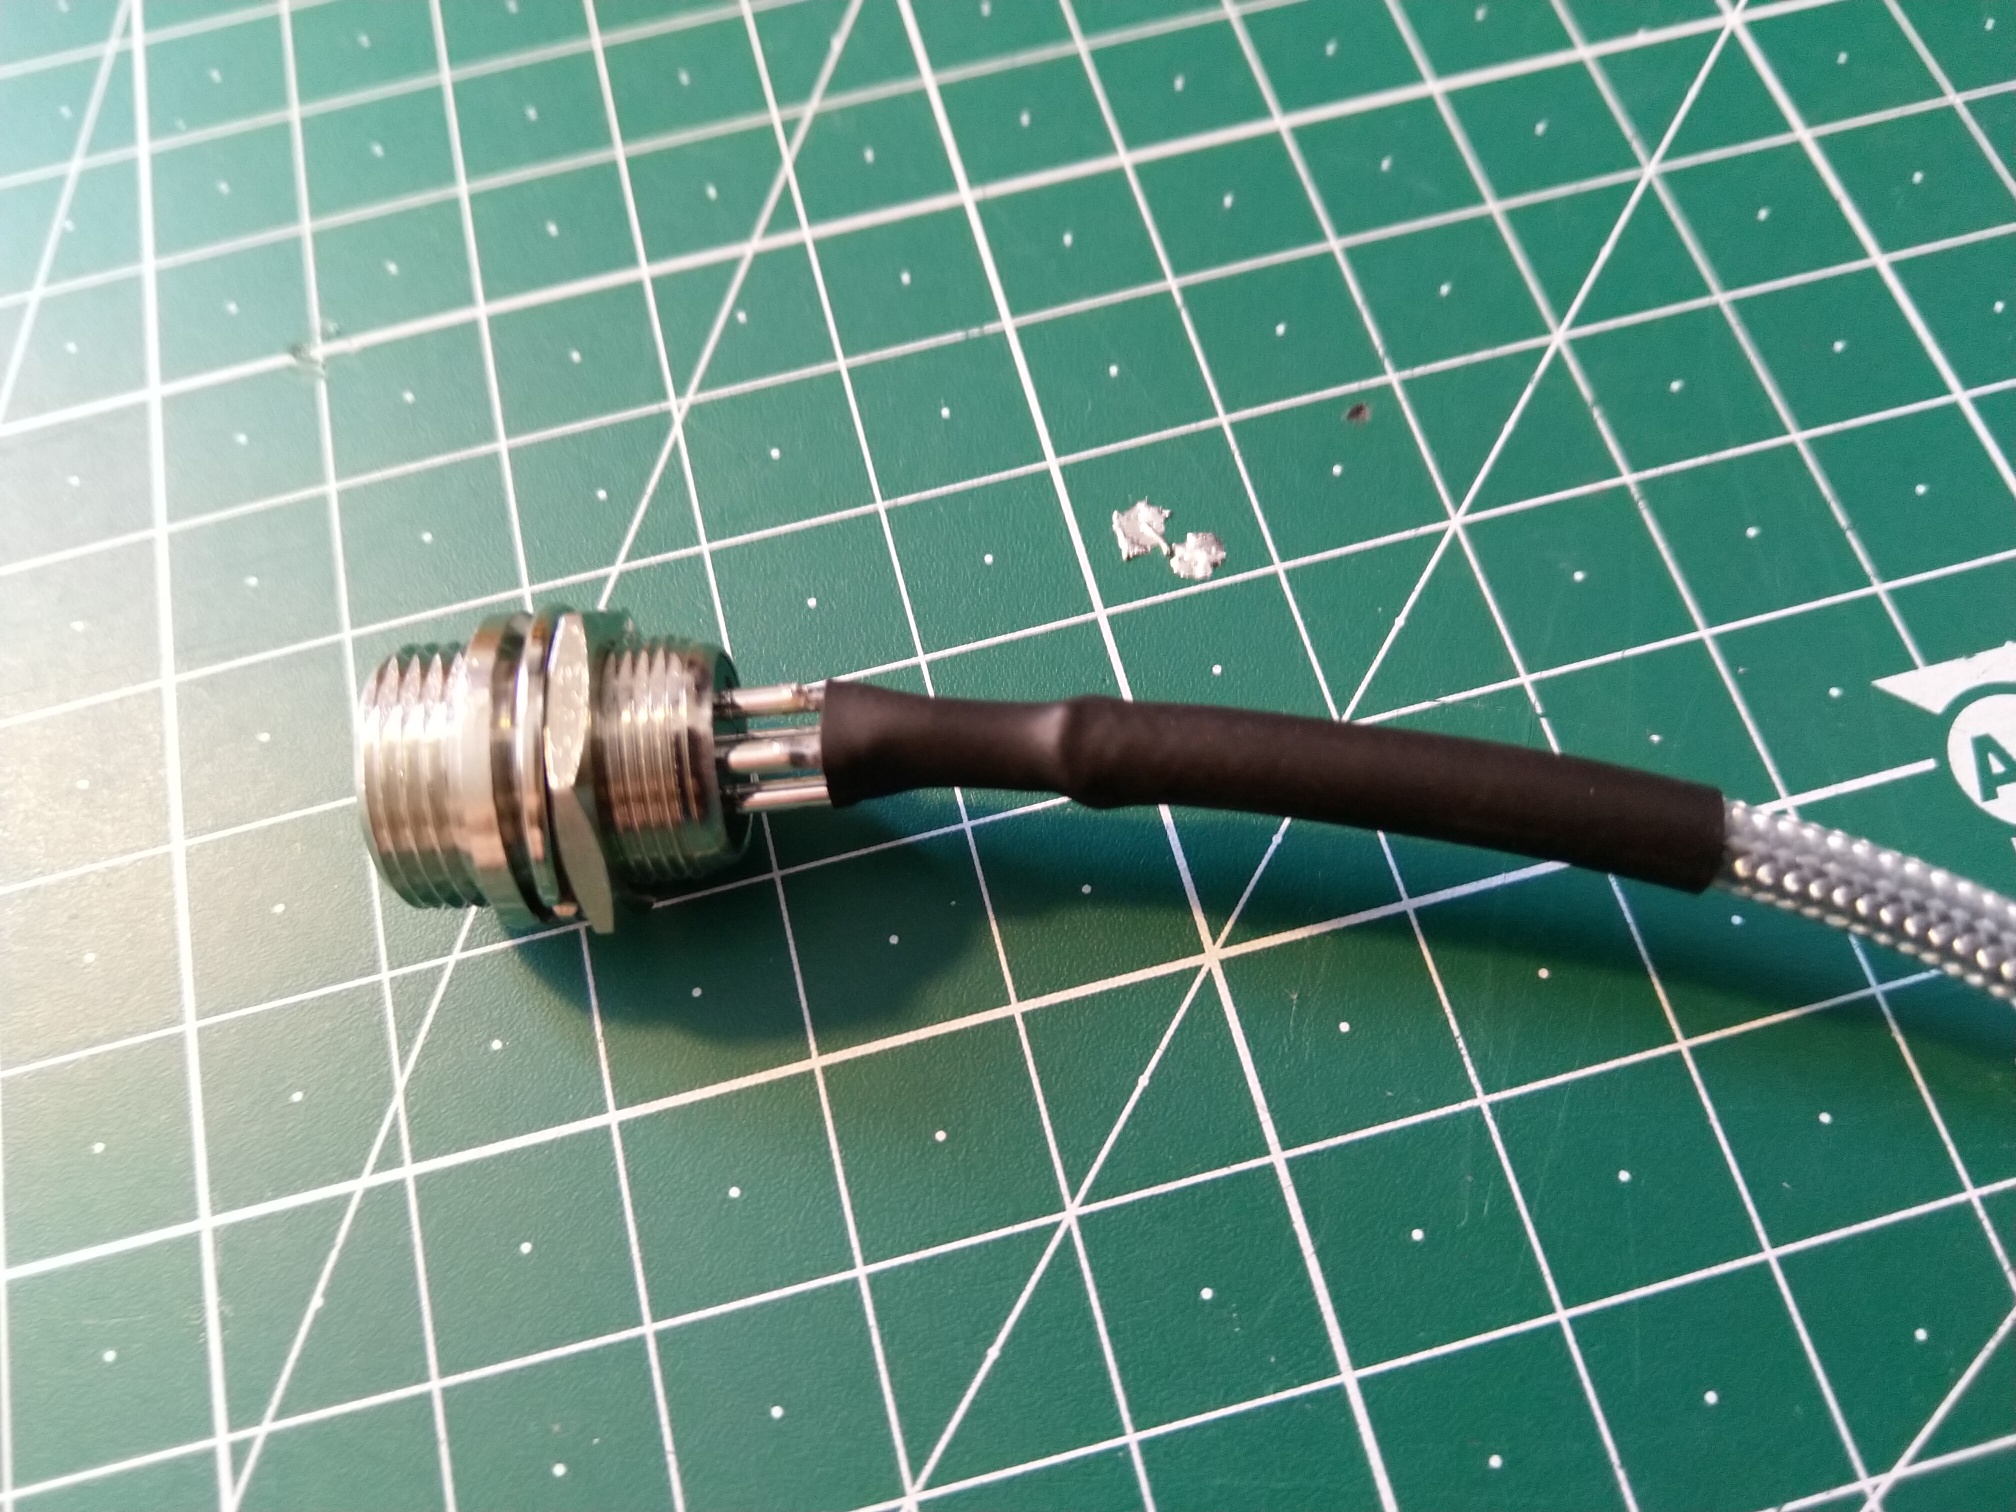
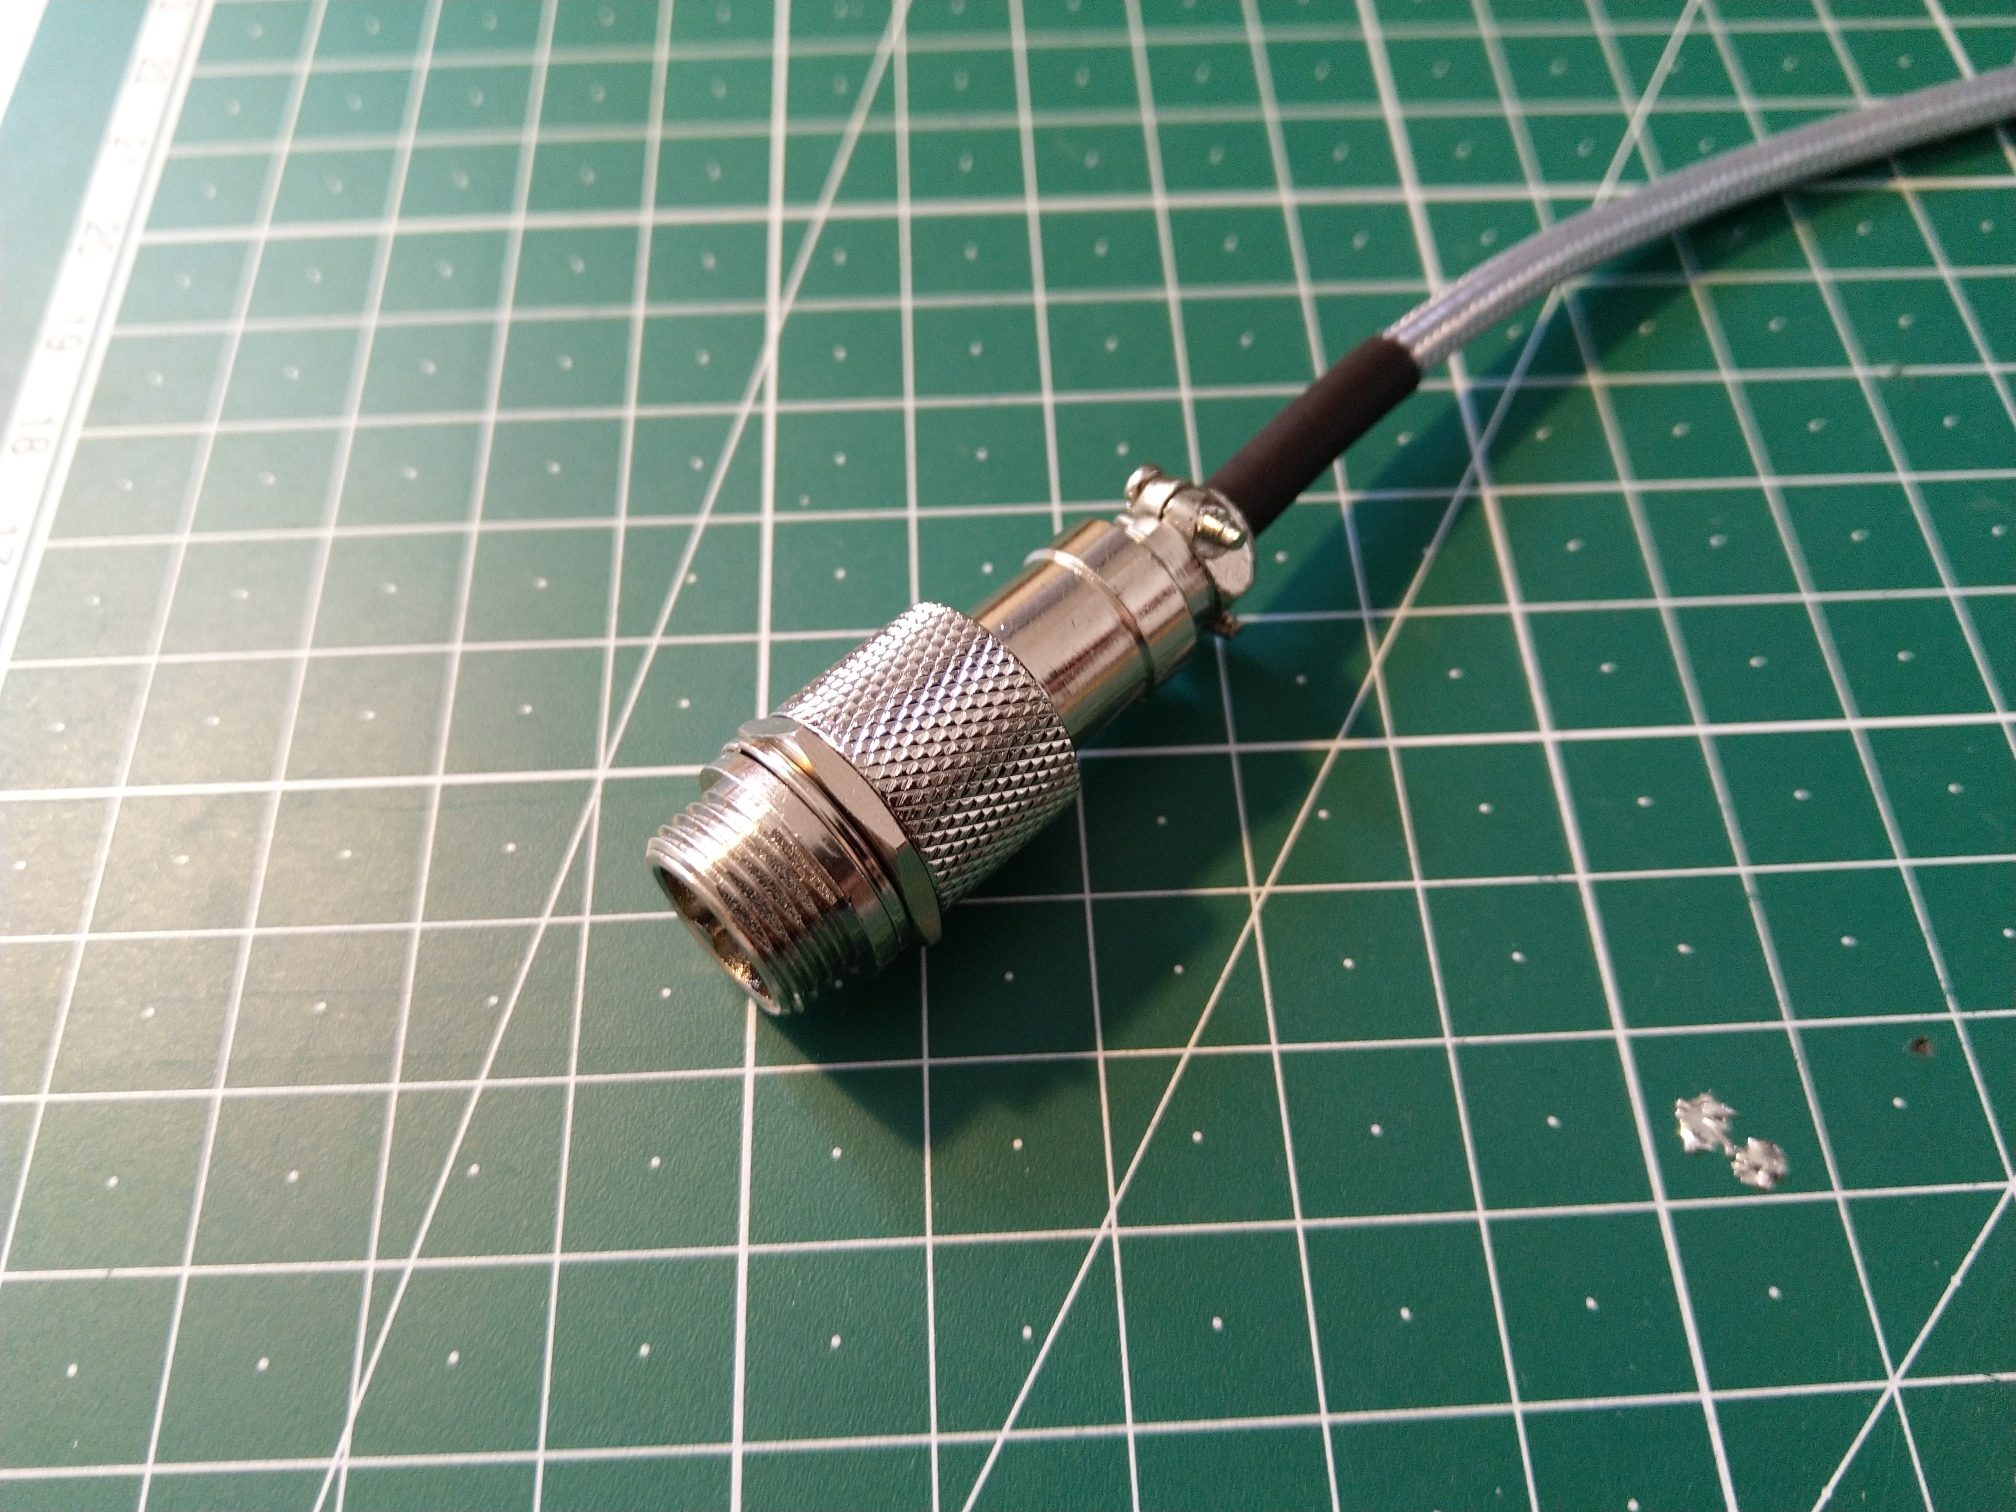
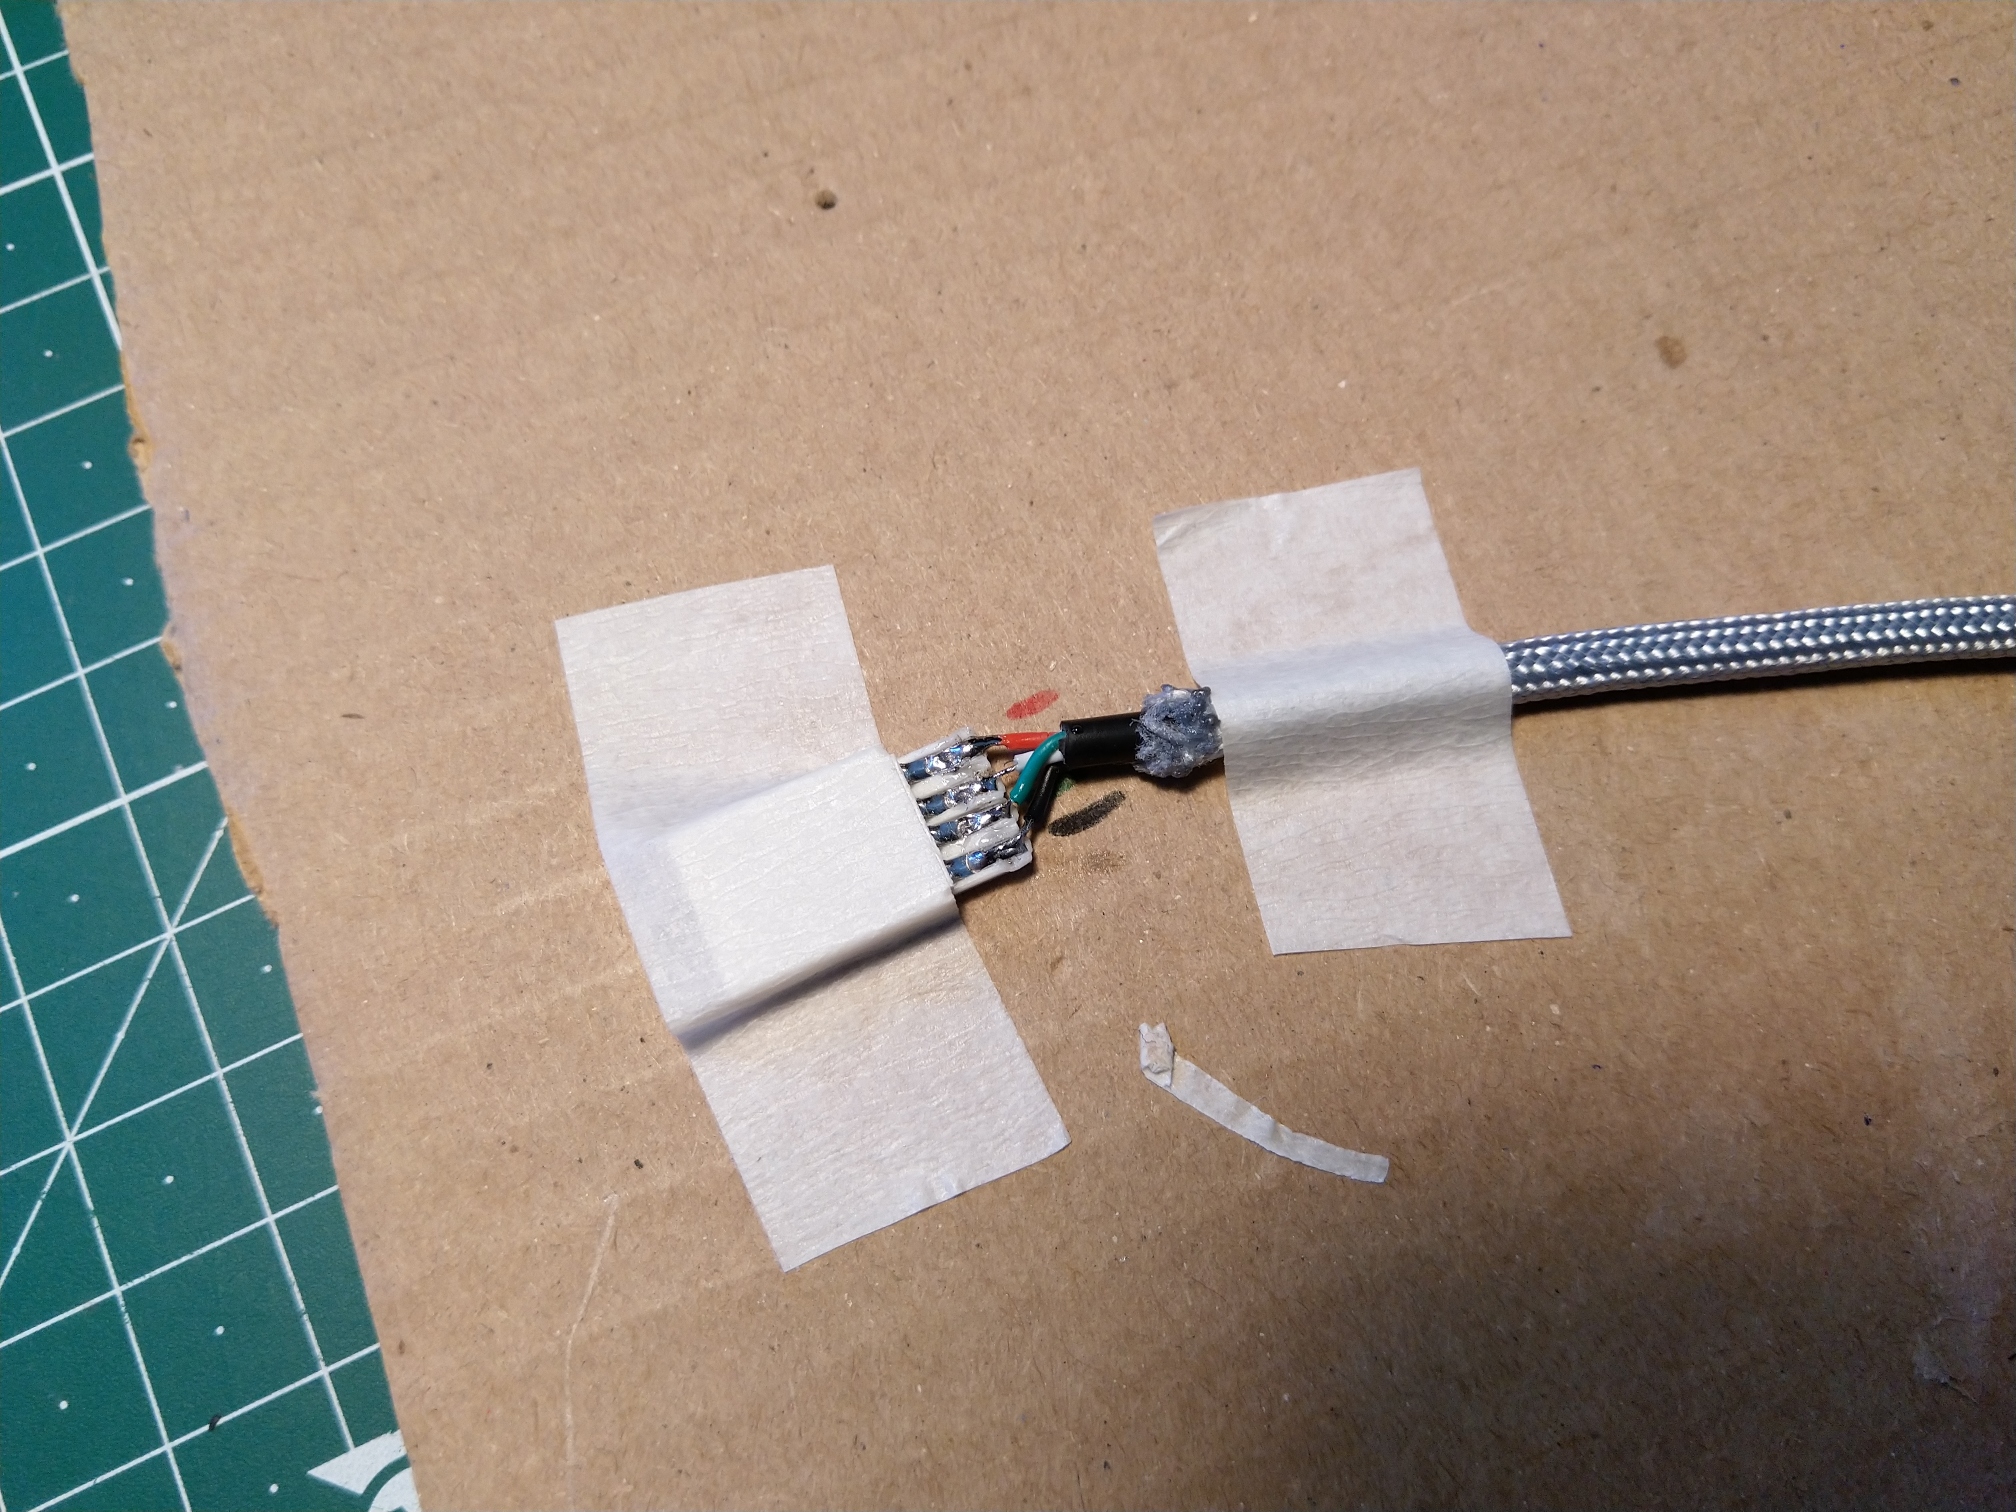
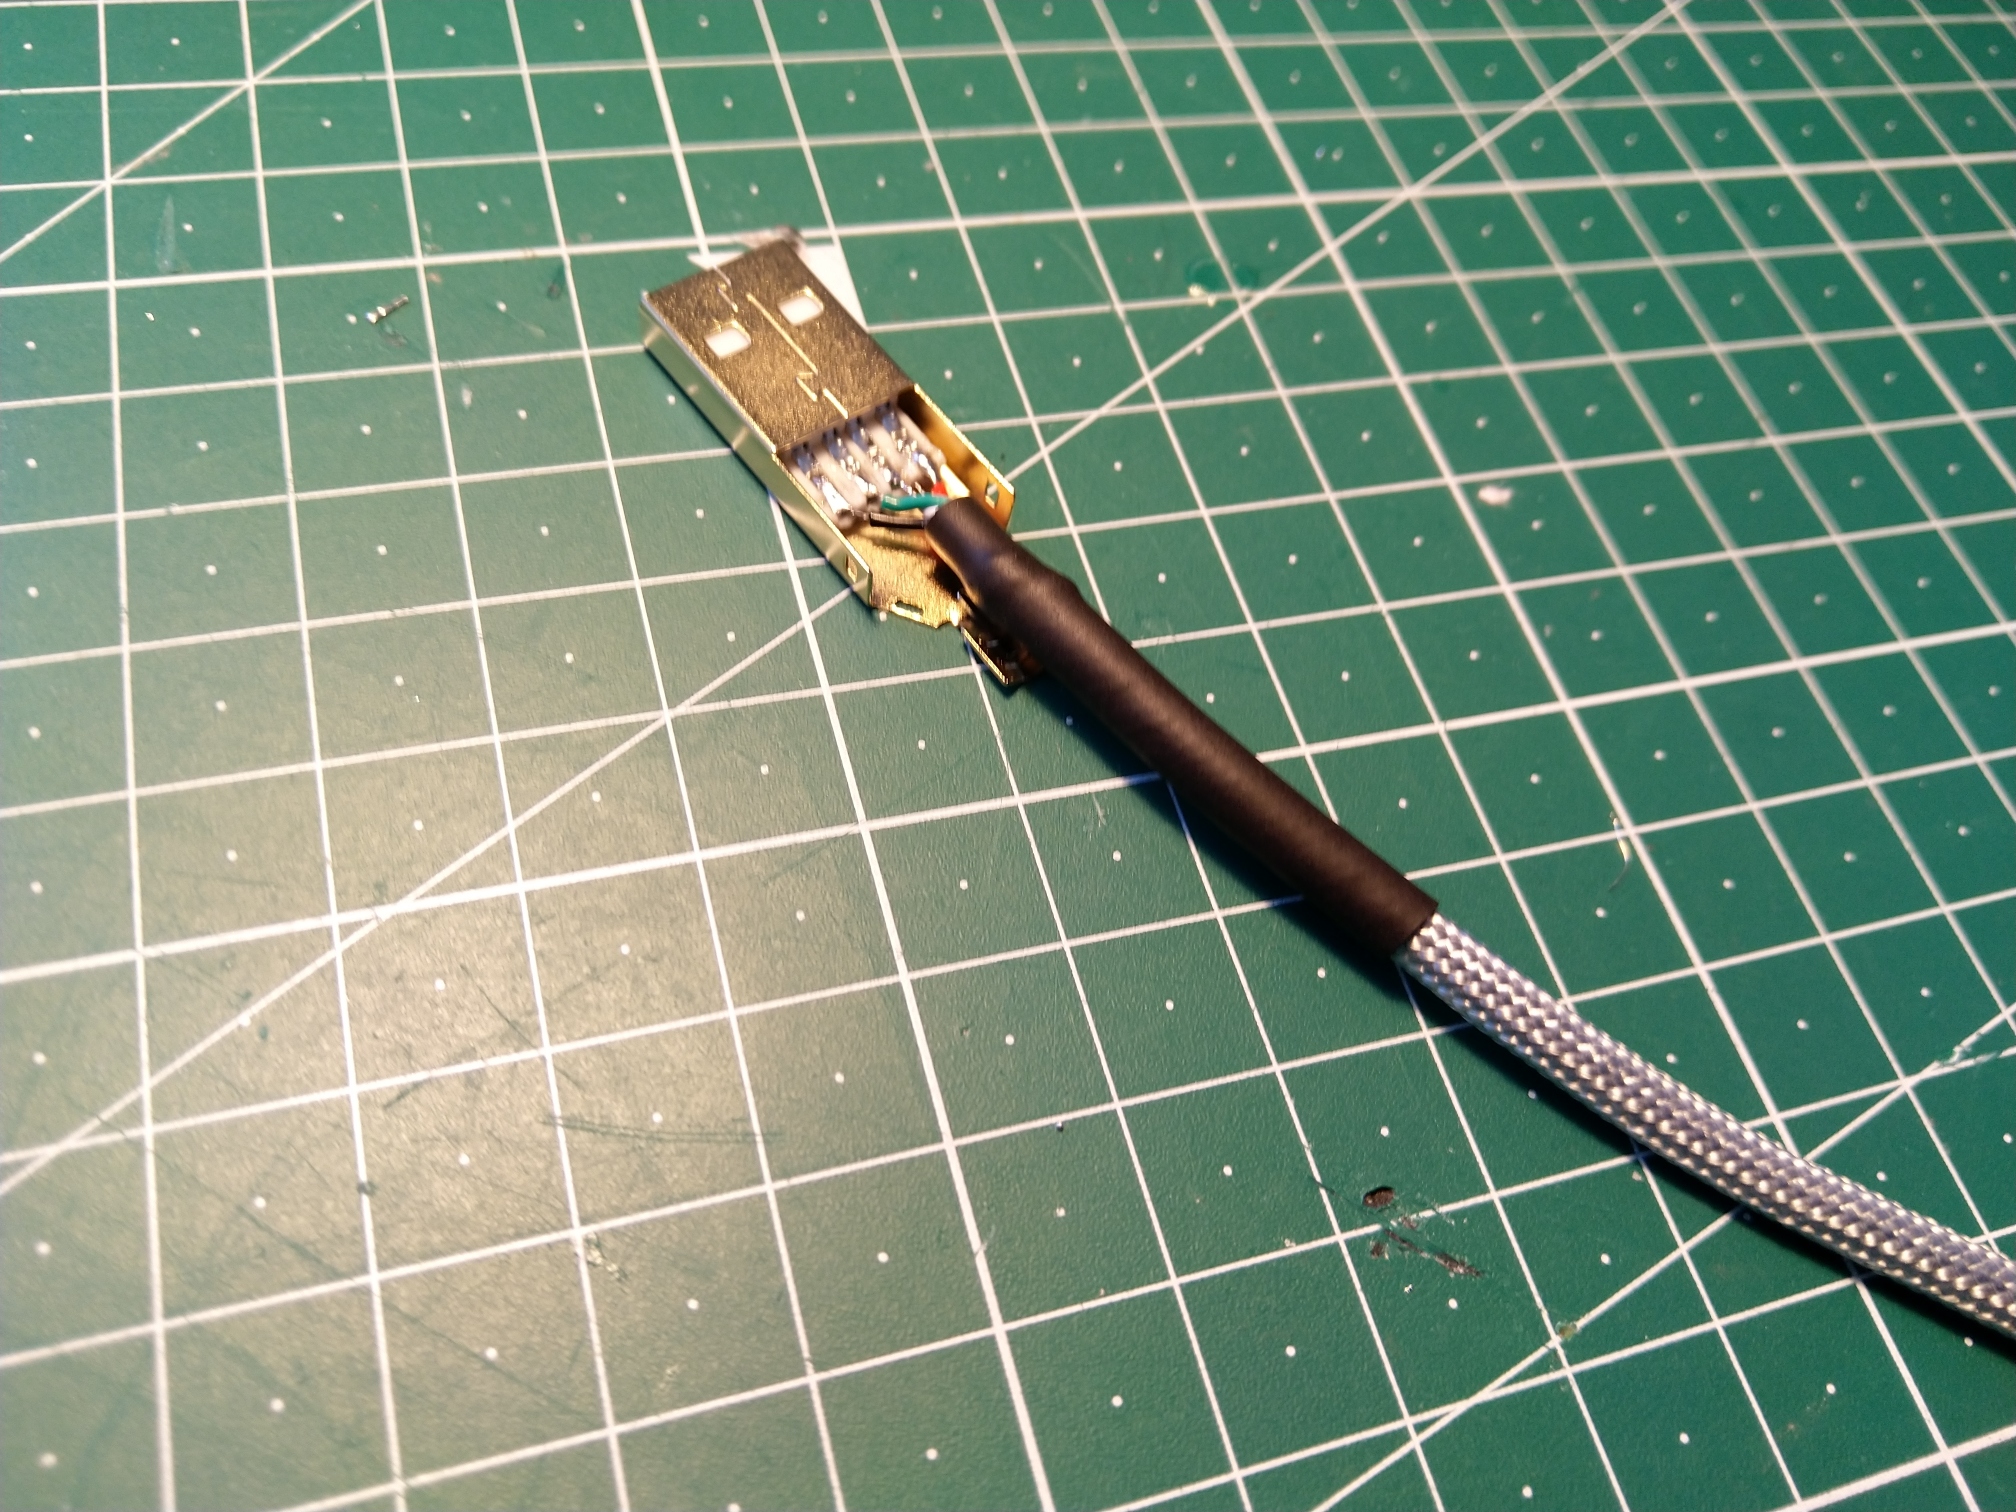
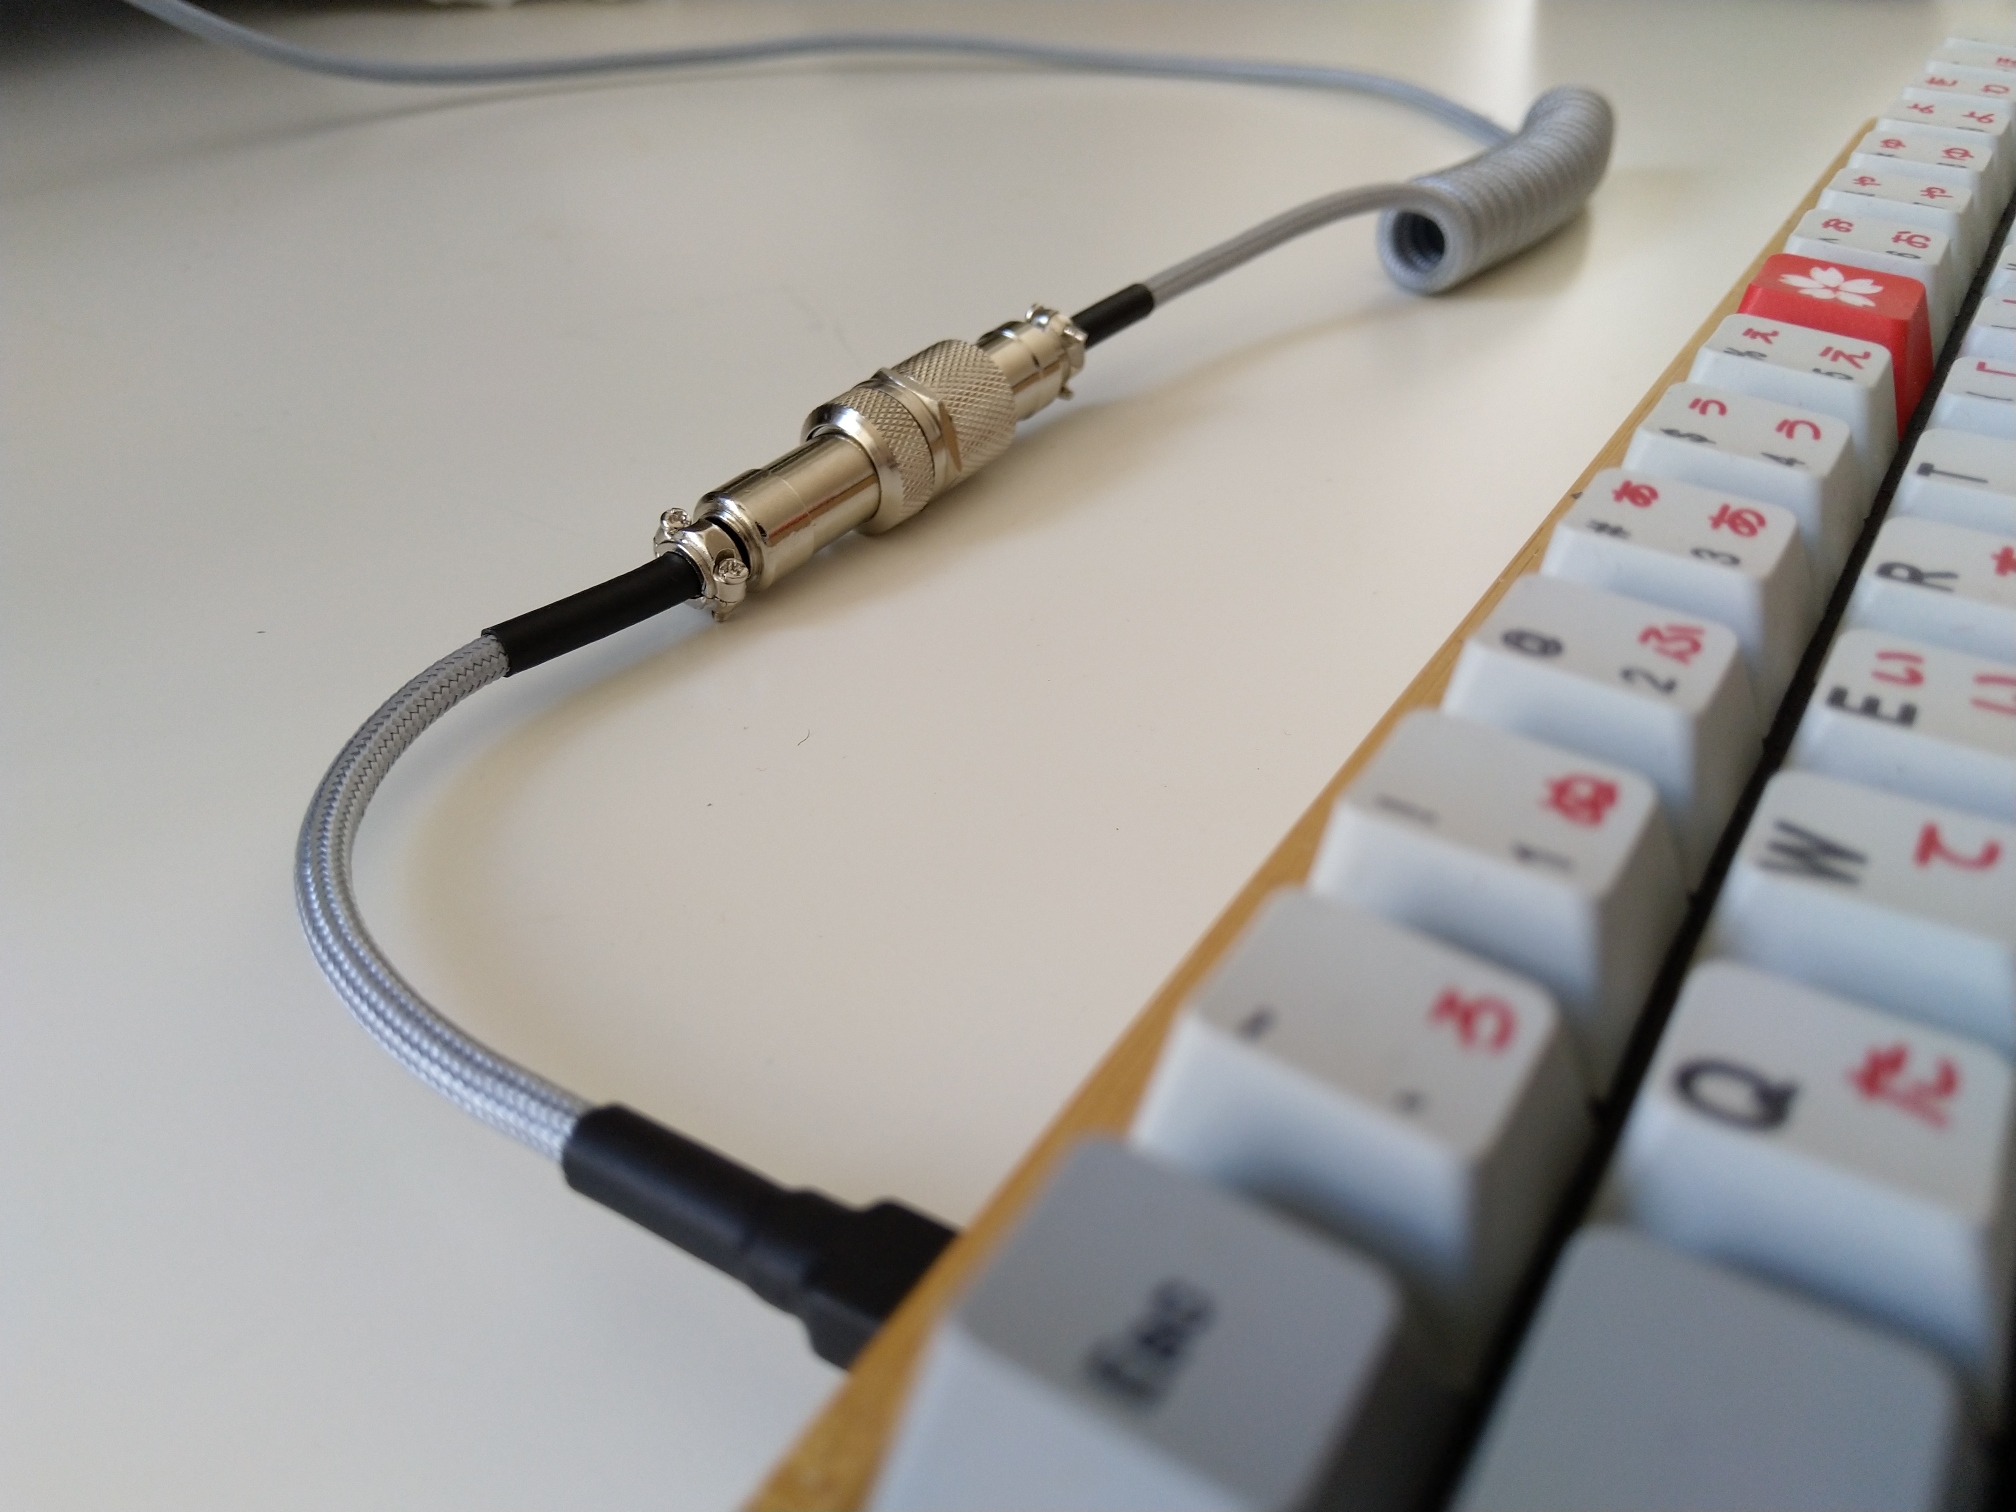
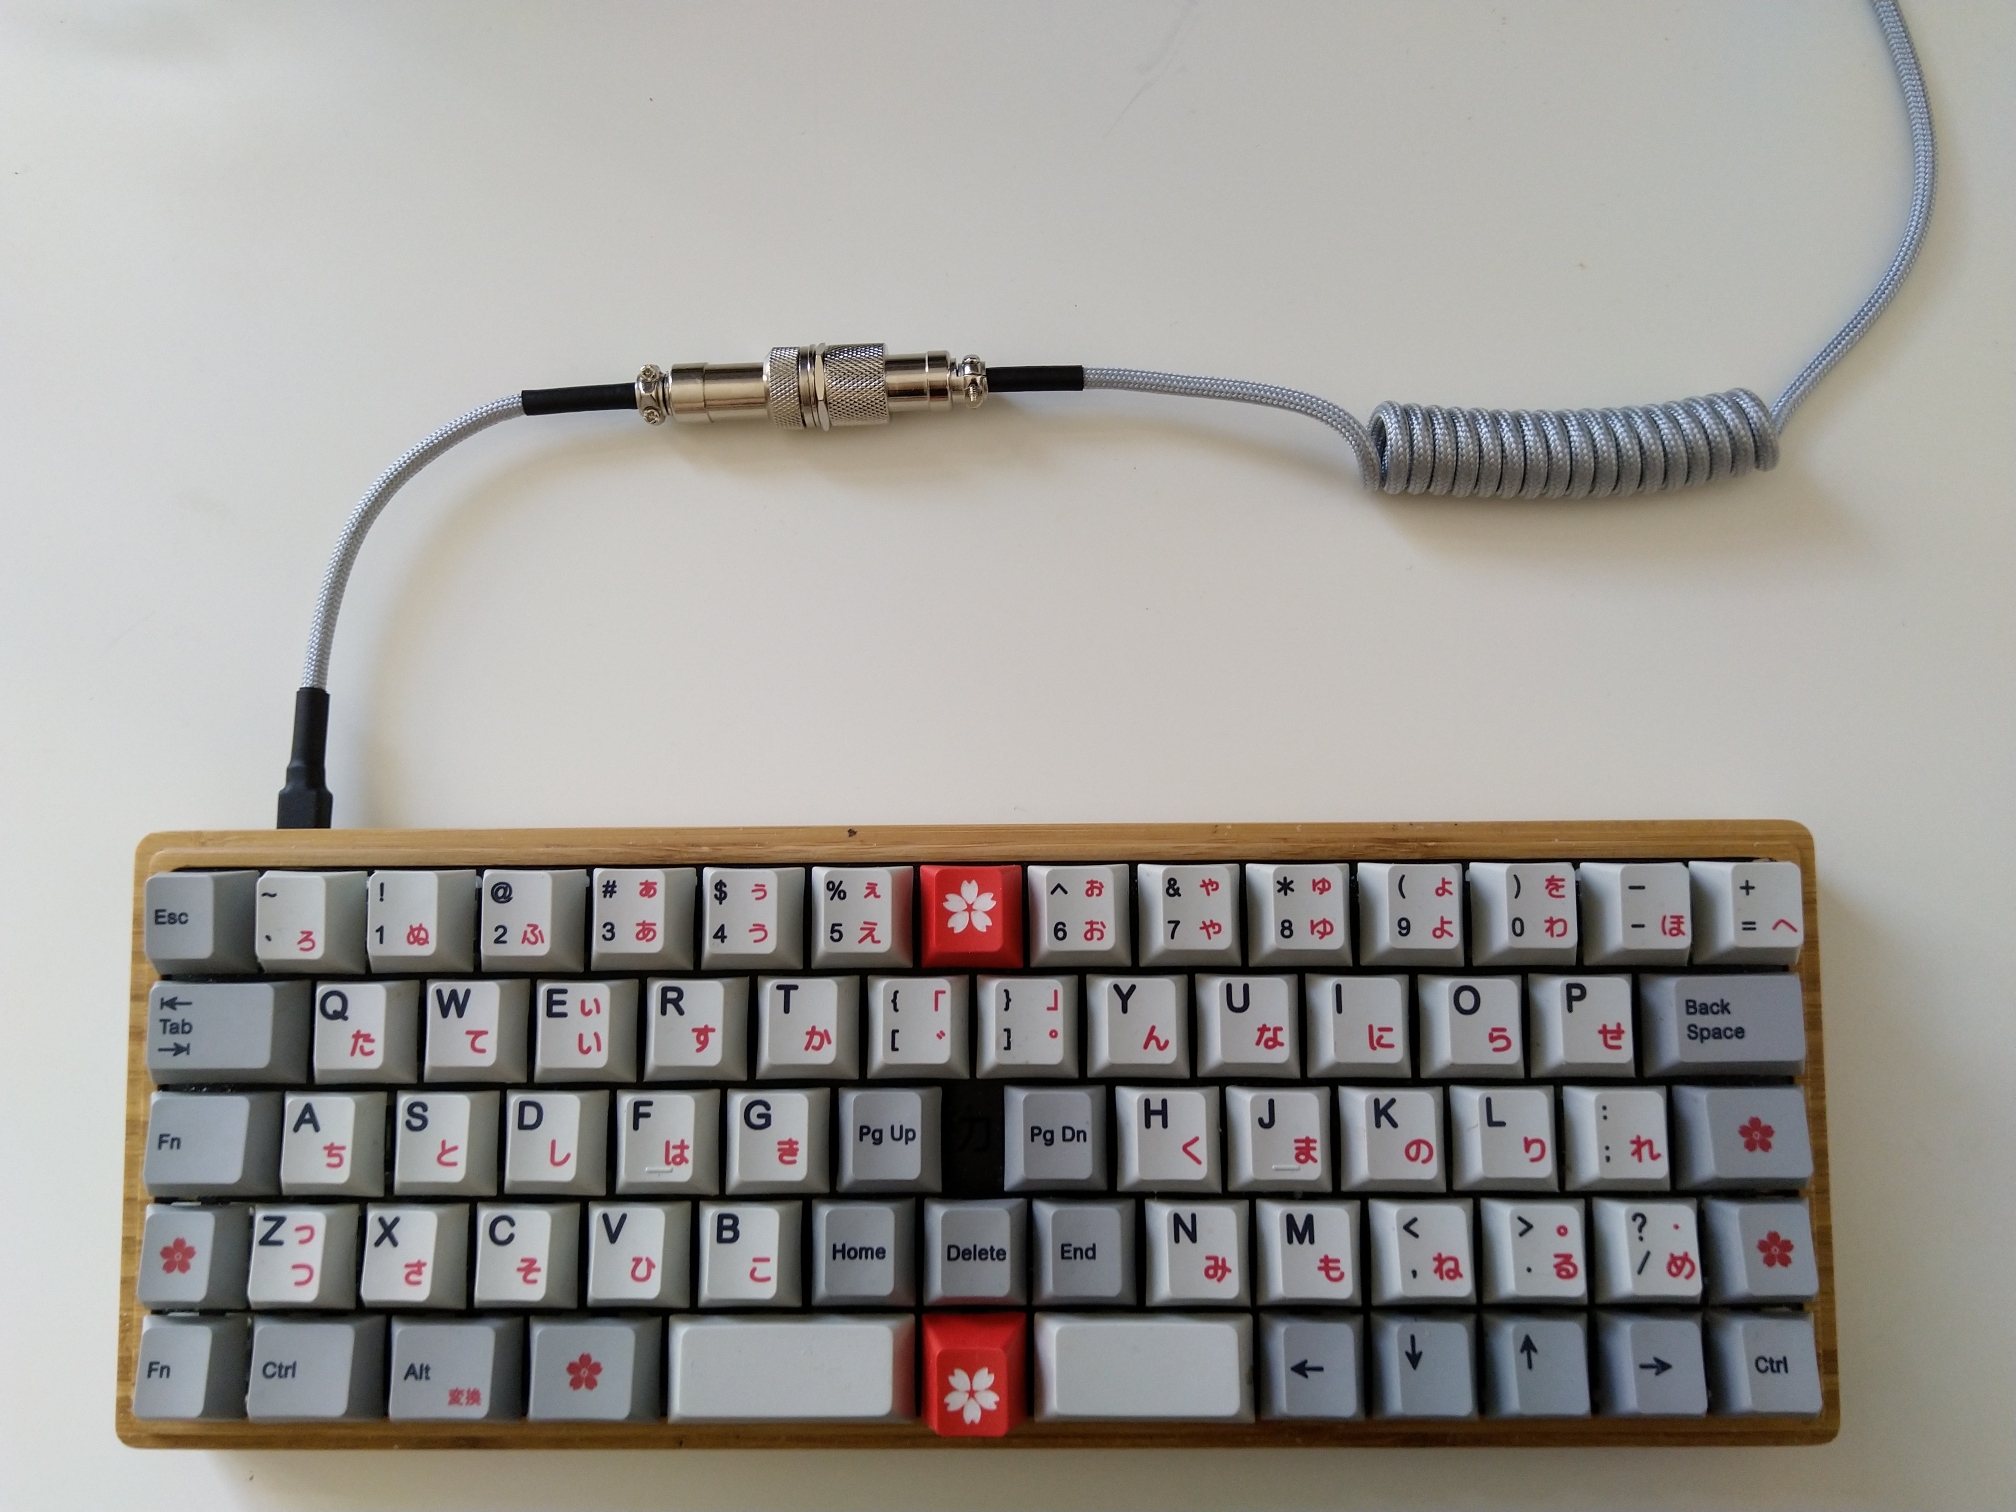
Cable, a paracord. The first thing is to measure and cut pieces of both in desired lengths. I wanted a coil, therefore I coiled a piece of cable on my wooden rod in order to measure how much I need for the coil I like.Once the paracord is cut, take out the white threads from inside and burn ends of the paracord with a lighter.A shorter piece of cable (between the USB-mini and the aviation connector) already sleeved together with pieces of connectors and heat-shrinks. Sleeving is easy, just push the cable through the paracord. I have fixed it at ends with a drop of super glue.The longer piece of cable and its connectors. It's a bit harder to sleeve a longer piece of cable. Just take your time.Tinning the wires.The first part of aviation connector solder and covered with heat-shrink.And covered by its shell.Soldering USB-mini connector. Since this is the second connector on the piece of cable, make sure you have your heat-shrink already on the cable before you start with this step.Soldered. I was a bit afraid that one of the wires might touch another when strained. So I implanted a piece of tape and later ended up adding a dip of hot glue.Small heat-shrink applied and connector completed.The second heat-shrink covering the connector added and therefore the first piece of cable completed.Let's start with another part.Have notes with information which wire connects to which pad of connector always in sight. Pads on aviation connectors are numbered, pads on USB connectors are described in the datasheet or on the internet. Wires in the cable have color-coding. Double check everything. I was very careful and yet I messed things up at least once (but noticed it soon).That's the second half of the aviation connector done.USB-A, again, don't forget to put the inner heat-shrink on the cable.Soldered with the heat-shrink.USB-A is enclosed and covered in another heat-shrink. The cable is complete and should work. For me it didn't the first time, I most likely messed something up when screwing in the aviation connector. When I started to take it apart I messed up again and accidentally started unscrewing a wrong part of the connector and twisted off my wires. I ended up redoing both halves of aviation connectors. This is photo is actually after I fixed everything. I was too annoyed and didn't document my failure.So, cable works, let's coil it. I made a nice tight coil around my rod. I utilized masking tape to hold it in place. Keep in mind that heat is not good for tapes and the adhesive used on them. But you want' your coil to be as tight as possible once you heat it up.I used my heat gun to heat the coil up - let's say 5-10 minutes carefully applying heat to the coil making sure every place is hot. Then I let it cool down and repeated 3 or 4 times. If the tape loosens wait for it to cool down and take it apart and tighten the coil again. The result is quite nice, but not perfect.And final shot of the whole cable.With Katana60They are a good match, aren't they?